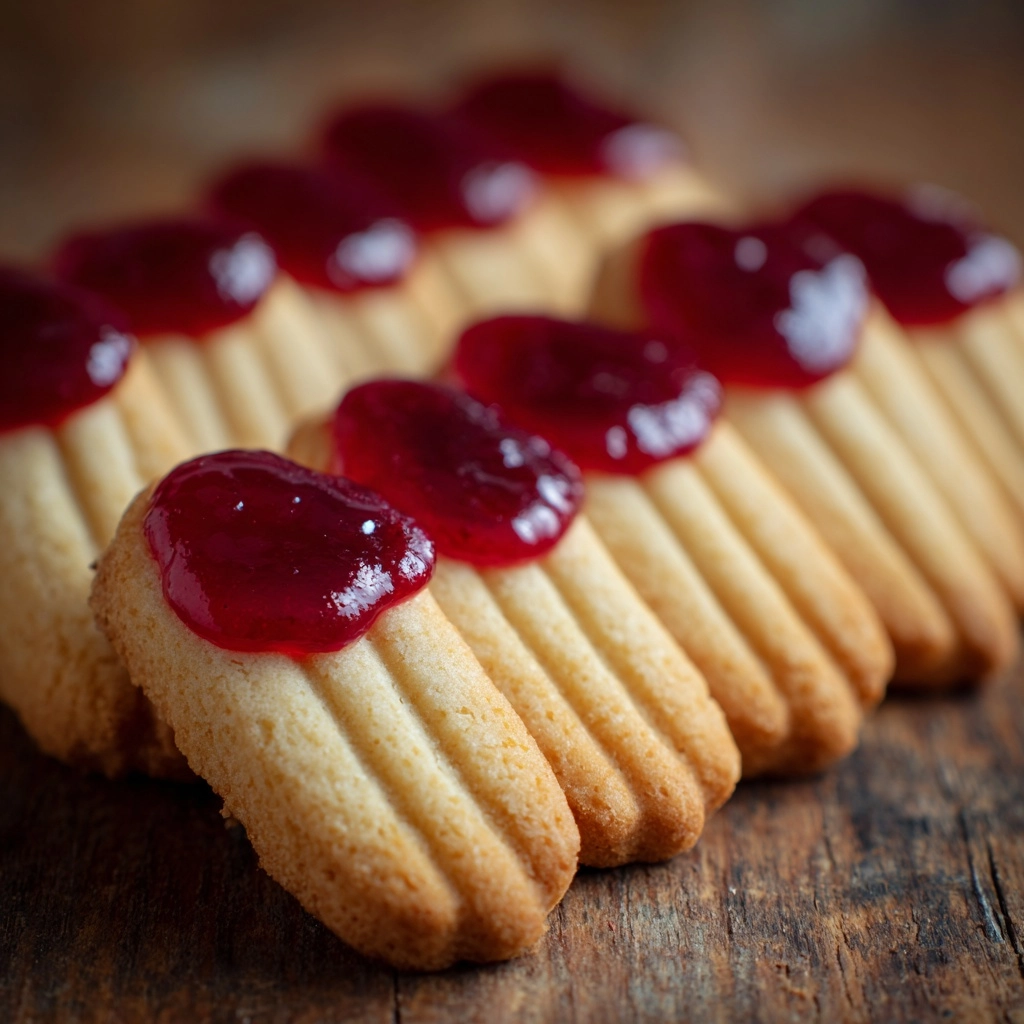
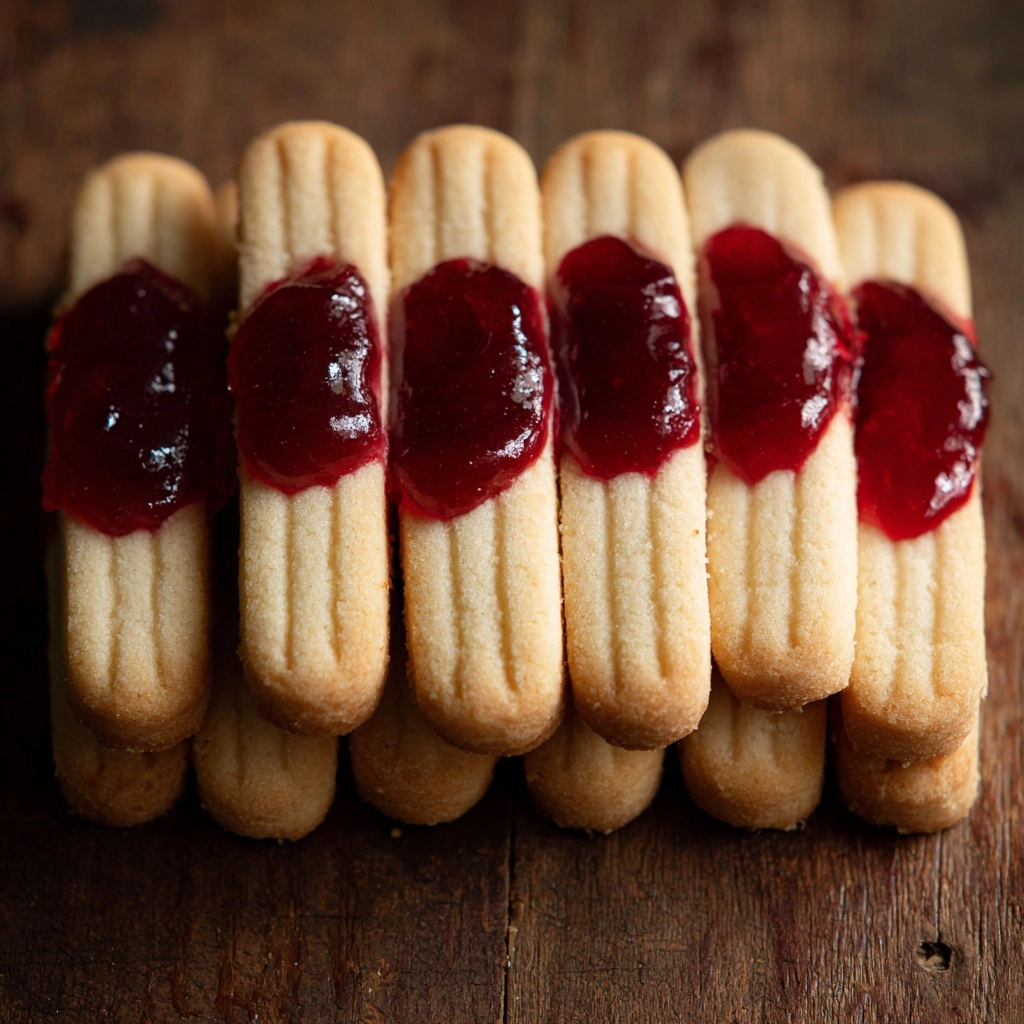
There’s nothing quite like making a batch of Witch Finger Cookies for a delightfully spooky treat! These buttery, crumbly cookies transform everyday ingredients into grizzly, realistic fingers complete with almond nails and gory red jam. Perfect for Halloween parties, scary movie marathons, or just to shock and amuse your friends and family, Witch Finger Cookies always steal the show on a dessert table. Their irresistible combination of fun, flavor, and fright means you’ll return to this recipe season after season.
Ingredients You’ll Need
Gathering the ingredients for Witch Finger Cookies is a breeze, but don’t underestimate the role each plays in building both the flavor and the incredible look of these cookies. Each item works its magic to create that perfect texture and fun appearance.
- Unsalted Butter (1 cup): Make sure it’s softened for easy creaming; it’s the secret to that melt-in-your-mouth texture.
- Powdered Sugar (1 cup): Gives the cookies their ultra-fine crumb and subtle sweetness.
- Large Egg (1): Binds everything together for a dough that’s easy to shape.
- Vanilla Extract (1 teaspoon): Adds warmth and rounds out the flavors beautifully.
- Almond Extract (1 teaspoon): Delivers that hauntingly good nutty aroma that plays so well with the “fingernails.”
- All-Purpose Flour (2¾ cups): Creates the sturdy yet tender base for shaping the “fingers.”
- Baking Powder (1 teaspoon): Just enough lift to keep the cookies light without losing their spooky shape.
- Salt (½ teaspoon): Balances the sweetness and brings out every flavor.
- Whole Blanched Almonds (¾ cup): The perfectly creepy stand-in for realistic fingernails—no need to peel skins!
- Red Gel Food Coloring or Strawberry Jam: For that deliciously bloody effect, use whichever you prefer.
- Green Food Coloring (optional): Tint the dough for an extra ghastly pop of color.
How to Make Witch Finger Cookies
Step 1: Preheat and Prep
Set your oven to 350°F (175°C) and line a baking sheet with parchment paper. This step ensures your Witch Finger Cookies won’t stick, and it helps them bake evenly with golden edges. Proper prep makes all the chilling and shaping steps much easier later on!
Step 2: Cream Butter and Sugar
In a large mixing bowl, beat the softened butter and powdered sugar until the mixture is light, fluffy, and pale. This brings air into the dough, creating a tender cookie texture—don’t rush it! A stand mixer or hand mixer works best, but a strong arm and a sturdy spoon will do in a pinch.
Step 3: Add Egg and Extracts
Beat in the egg, followed by the vanilla and almond extracts. The egg helps the dough come together, while the extracts layer in that signature, hauntingly delicious flavor. Almond extract, especially, is key to that classic Witch Finger Cookies aroma.
Step 4: Combine Dry Ingredients
In a separate bowl, whisk together the flour, baking powder, and salt. Slowly incorporate the dry mixture into the buttery mixture a little at a time. The dough will start to form and pull away from the sides of the bowl. If you’re feeling brave, add a few drops of green food coloring for a supernatural touch!
Step 5: Chill the Dough
Cover the dough and chill it in the refrigerator for 20 to 30 minutes. This quick chill makes shaping the cookies a dream and helps them keep their delightfully gruesome finger shapes during baking. Skipping this step is tempting, but it makes all the difference for Witch Finger Cookies.
Step 6: Shape the Fingers
Scoop out about a tablespoon of dough for each cookie. Roll them into thin, finger-like shapes, making them a bit knobby to mimic real knuckles. Gently press a whole blanched almond into one end to act as the fingernail. Use a small knife to create lines at the knuckles and joints—get as detailed (or as simple!) as you want.
Step 7: Bake
Place the shaped cookies onto your lined baking sheet, giving each one some space. Bake for 12 to 15 minutes, or until the edges begin to turn golden. Keep an eye on them; you want the cookies set, but not too browned. Let them cool on the tray for a few minutes before transferring to a wire rack.
Step 8: Add the Bloody Effect
Once the cookies are cool enough to handle, give them their gruesome finish. Carefully lift each almond, add a smidge of red gel or strawberry jam underneath, then gently press the almond back in place. The jam oozes out just enough for that spine-chilling, bloody look that makes Witch Finger Cookies unforgettable!
How to Serve Witch Finger Cookies

Garnishes
Add even more creepy flair before serving! Dust cookies with a little cocoa for “dirty” nails, or paint the almonds with food coloring for an extra sickly effect. A light sprinkle of powdered sugar gives a ghostly look—just right for your haunted dessert spread.
Side Dishes
Pair these cookies with a cozy mug of hot chocolate, apple cider, or a glass of cold milk for kids. If you’re entertaining adults, set out a platter with spiced nuts or caramel popcorn alongside your Witch Finger Cookies for a sweet-and-savory Halloween spread that satisfies everyone.
Creative Ways to Present
Arrange Witch Finger Cookies poking out of crumbled chocolate cookies or “dirt,” stick them upright in a carved pumpkin, or place them on a tray with gummy worms. For a show-stopping party centerpiece, pile them in a cauldron! However you choose to display them, these cookies always get a reaction.
Make Ahead and Storage
Storing Leftovers
Store any leftover Witch Finger Cookies in an airtight container at room temperature for up to a week. They keep their shape well and even taste better on day two as the flavors meld.
Freezing
You can freeze baked Witch Finger Cookies or unbaked, shaped dough. To freeze, layer cookies with parchment in a sturdy container. For unbaked dough, shape the fingers and flash freeze on a tray, then transfer to a zip-top bag—bake from frozen, adding a minute or two to the bake time.
Reheating
If your cookies get a little too firm, warm them gently in a 300°F (150°C) oven for 3–4 minutes. This revives their lovely texture. Don’t microwave, as it can make the cookies tough or rubbery.
FAQs
Can I make Witch Finger Cookies without almond extract?
Absolutely! While almond extract gives a signature flavor, you can substitute it with more vanilla extract or skip it entirely for a simpler but still tasty cookie.
What can I use if I don’t have whole blanched almonds?
Try using slivered almonds, pumpkin seeds, or even candy pieces as creative fingernail substitutes. You can tint them with food coloring for extra effect!
Can I make the dough ahead of time?
Yes! Witch Finger Cookies dough can be made up to two days in advance. Keep it tightly wrapped in the refrigerator, then shape and bake when ready.
How do I get the fingers to look really realistic?
Don’t be afraid to get creative with the shaping and details. Make knuckle marks deep and vary the widths for a more lifelike, creepy look. Tinting the dough and “dirtying” the nails adds even more realism.
Can I make these cookies gluten-free?
Yes! Use a cup-for-cup gluten-free flour in place of the all-purpose flour. The results are still delightfully spooky and taste just as good!
Final Thoughts
Once you make Witch Finger Cookies, they’re sure to become a Halloween tradition in your home. These treats are spooky, playful, and absolutely delicious—a real showstopper for any party or festive gathering. Give them a try this season, and don’t be surprised if you hear both shrieks and cheers when you present your platter!