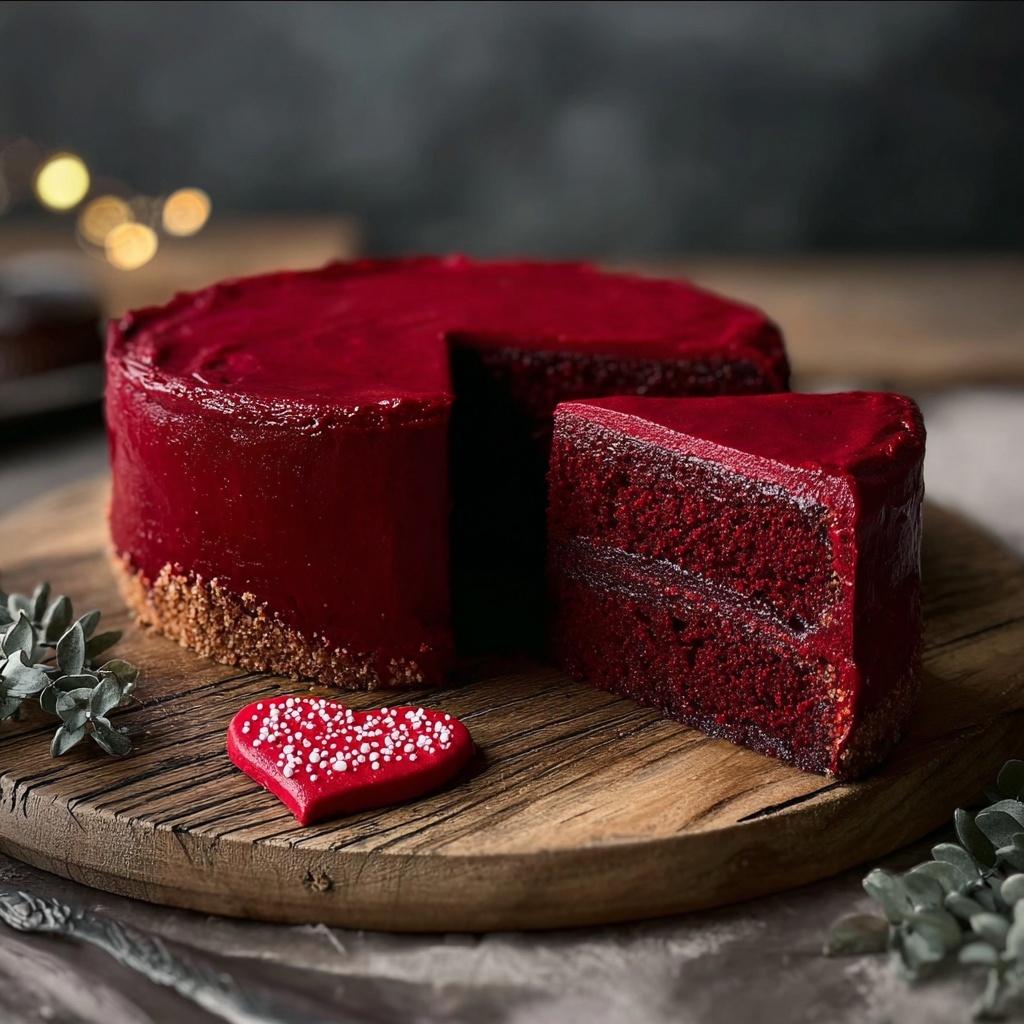
If you are looking to impress your loved one with a show-stopping dessert this season, the Valentine’s Day Red Velvet Cheesecake Recipe combines the best of two indulgent worlds. Imagine biting into a luscious, smooth cheesecake layered perfectly over a moist, vibrant red velvet cake base. This dessert is not only visually stunning but also a delightful balance of rich cream cheese and subtle cocoa flavors with that iconic red hue, making it the perfect romantic treat for a special occasion. Trust me, once you try this recipe, it will become your go-to for Valentine’s Day celebrations and beyond.
Ingredients You’ll Need
Every ingredient in this Valentine’s Day Red Velvet Cheesecake Recipe plays a vital role in building the cake’s unique texture and flavor harmony. From the velvety cream cheese to the bright red food coloring, the components come together easily but thoughtfully to create an unforgettable dessert experience.
- 1 1/2 cups all-purpose flour: Provides the essential structure for the red velvet cake layer, keeping it light yet firm.
- 1 cup granulated sugar: Sweetens both the cake and cheesecake layers with just the right amount of crunch once baked.
- 1 tbsp cocoa powder: Adds the subtle chocolate undertone that makes red velvet so distinctive without overpowering the flavor.
- 1 tsp baking soda: Acts as the leavening agent to help the cake rise and remain tender.
- 1/2 tsp salt: Enhances and balances the sweetness while enriching the overall flavor.
- 1 cup buttermilk, room temperature: Adds moisture and tanginess, contributing to that classic red velvet softness.
- 1/2 cup vegetable oil: Keeps the cake moist and tender without adding overpowering flavor.
- 1 large egg, room temperature: Binds the ingredients together and freshens the texture.
- 2 tbsp red food coloring (or gel coloring): Gives that unmistakable rich red color that is the hallmark of any red velvet dessert.
- 1 tsp vanilla extract: Lends a subtle floral note that rounds out the flavor profile.
- 1 tsp white vinegar: Reacts with the baking soda for tender crumb and intensifies the cake’s vibrant color.
- 2 (8 oz) packages cream cheese, softened: The star of the cheesecake layer, providing its signature creamy and tangy richness.
- 1 cup granulated sugar: Sweetens the cheesecake without being overly sugary.
- 2 large eggs, room temperature: Adds richness and helps set the cheesecake as it bakes.
- 1 tsp vanilla extract: Infuses the cheesecake with a warm, comforting flavor.
- 1/4 cup sour cream, room temperature: Keeps the cheesecake moist and silky smooth.
- 1/2 cup unsalted butter, softened: Used in the frosting to create that classic creamy texture.
- 8 oz cream cheese, softened: For the frosting, echoing the cheesecake’s luscious tang.
- 4 cups powdered sugar: Sweetens the frosting while ensuring smooth spreadability.
- 1 tsp vanilla extract: Adds a final flavor boost to the frosting for extra depth.
How to Make Valentine’s Day Red Velvet Cheesecake Recipe
Step 1: Preheat the Oven and Prepare the Pan
Begin by setting your oven to 325°F (163°C). Grease the sides and bottom of a 9-inch springform pan to ensure the cake releases easily. Line the bottom with parchment paper for extra insurance against sticking. This simple prep sets the stage for a perfect baking environment, allowing both cake and cheesecake layers to bake without a hitch.
Step 2: Prepare the Red Velvet Cake Layer
In a large mixing bowl, whisk together the all-purpose flour, granulated sugar, cocoa powder, baking soda, and salt. In a separate bowl, combine the room-temperature buttermilk, vegetable oil, egg, red food coloring, vanilla extract, and white vinegar. Once the wet ingredients are smoothly blended, gradually add them to the dry ingredients and mix until fully combined. Pour the glossy and vibrant red batter evenly into your springform pan, smoothing the surface with a spatula. This layer is the foundation of your Valentine’s Day Red Velvet Cheesecake Recipe, so take a moment to appreciate the beautiful color before moving on.
Step 3: Prepare the Cheesecake Layer
Using an electric mixer, beat the cream cheese and sugar together until smooth and creamy. Beat in the eggs one at a time, ensuring each is fully incorporated before adding the next. Add the vanilla extract and sour cream, continuing to mix until the batter is silky and lump-free. Gently pour this mixture over the red velvet layer in your pan, spreading evenly to create a distinct layer. The contrast between red and cream will make this dessert just as lovely to look at as it is to taste.
Step 4: Bake the Cheesecake
Place the springform pan in your preheated oven and bake at 325°F for about 55 to 60 minutes. You’ll know it’s done when the edges are set but the center still has a slight wobble. Turn off the oven and crack the door open slightly; let the cheesecake cool inside for an hour. This slow cooling helps prevent cracks. Once removed from the oven, cool to room temperature before transferring to the fridge to chill for at least 4 hours, or better yet, overnight. Patience here rewards you with a flawless texture in this Valentine’s Day Red Velvet Cheesecake Recipe.
Step 5: Make the Cream Cheese Frosting (Optional)
For an extra touch of indulgence, prepare the frosting by beating softened butter and cream cheese until smooth and fluffy. Gradually sift in powdered sugar one cup at a time, mixing thoroughly after each addition. Stir in the vanilla extract for a final burst of flavor. When the cheesecake is chilled and firm, spread or pipe this luscious frosting on top. Feel free to decorate with red velvet crumbs, rich chocolate shavings, or fresh red berries for that festive Valentine’s Day flair.
Step 6: Serve and Enjoy!
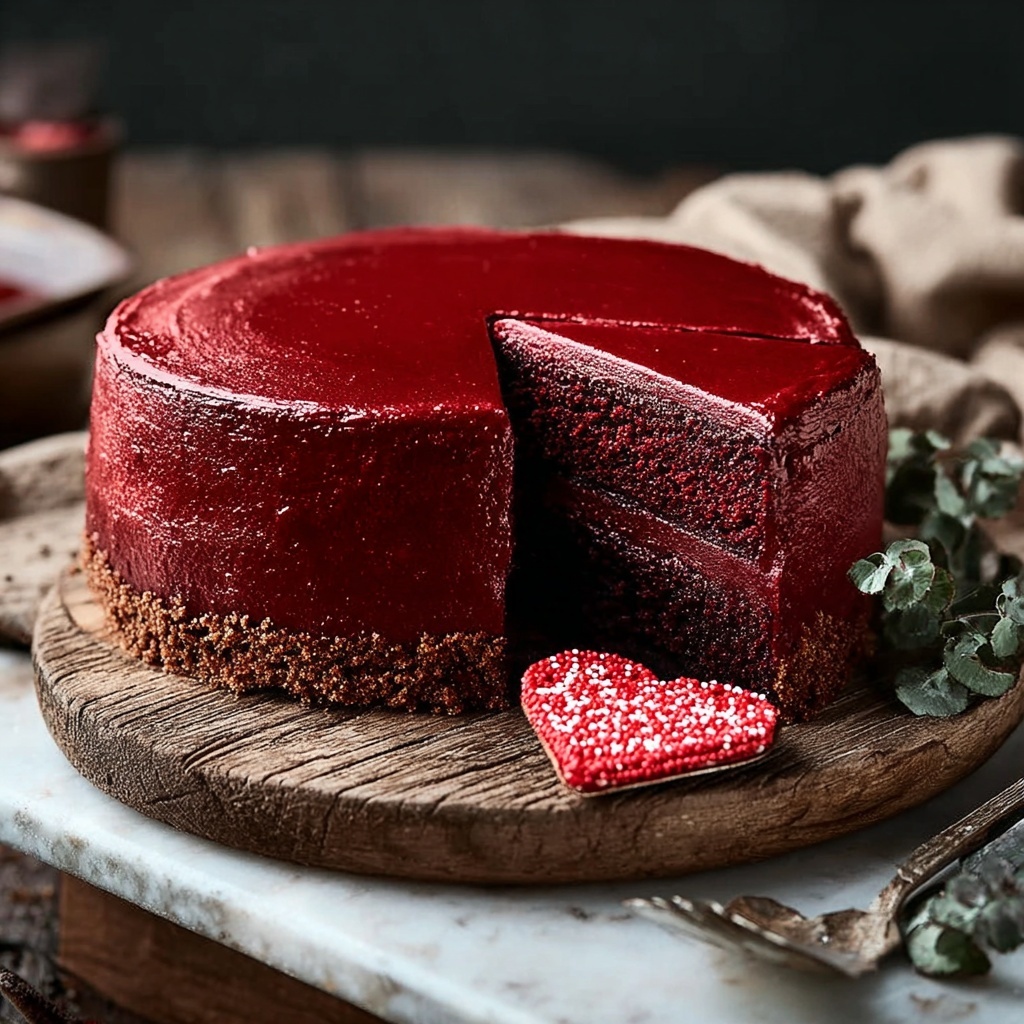
Slice your Valentine’s Day Red Velvet Cheesecake Recipe carefully with a warm, clean knife for perfect, neat servings. Each bite is a celebration of creamy texture, gentle tang, and that unforgettable red velvet charm. Share this marvelous creation with friends and family and savor the joyful smiles that follow.
How to Serve Valentine’s Day Red Velvet Cheesecake Recipe
Garnishes
Adding garnishes is a fantastic way to personalize your Valentine’s Day Red Velvet Cheesecake Recipe. A sprinkle of red velvet crumbs adds a playful texture and intensifies the cake’s color. Fresh berries like raspberries or strawberries bring a juicy burst of freshness, perfectly complementing the richness. For a bit of elegance, chocolate shavings or curls provide a bittersweet contrast and an alluring aroma.
Side Dishes
Serving this cheesecake alongside lightly whipped cream or a scoop of vanilla bean ice cream can create a luscious dessert plate. Fresh fruit salads with citrus notes help cut through the richness, refreshing the palate between bites. If you want something warm, a small cup of espresso or rich hot chocolate pairs beautifully with the Valentine’s Day Red Velvet Cheesecake Recipe, enhancing the cozy, indulgent vibes.
Creative Ways to Present
Presentation can turn an already beautiful dessert into a memorable experience. Try serving individual slices on decorative plates with a drizzle of raspberry coulis or a dusting of powdered sugar for a delicate touch. For celebrations, top the cheesecake with edible rose petals or heart-shaped sprinkles to amp up the Valentine’s Day spirit. You can even transform leftovers into parfaits layered with fresh cream and berries for an effortless encore.
Make Ahead and Storage
Storing Leftovers
This Valentine’s Day Red Velvet Cheesecake Recipe keeps exceptionally well in the fridge for up to 4 days when covered tightly with plastic wrap or stored in an airtight container. Proper storage prevents the cheesecake from drying out and protects its delicate flavors. Always keep it chilled until you are ready to serve the leftovers to maintain that signature creamy texture.
Freezing
You can freeze the cheesecake for up to 2 months. Wrap it securely in plastic wrap and then in aluminum foil or place it in a freezer-safe container. When it’s time to enjoy again, thaw it overnight in the fridge. Freezing is a great option if you want to prepare your Valentine’s Day Red Velvet Cheesecake Recipe in advance for a big celebration without any stress.
Reheating
This cheesecake is best served cold or at room temperature, so reheating is not recommended. However, if you prefer it slightly less chilled, simply leave the slice on the counter for about 20 minutes before serving. This step enhances the cream cheese flavor and makes each bite feel even more melt-in-your-mouth delightful.
FAQs
Can I use regular milk instead of buttermilk?
While you can substitute buttermilk with regular milk mixed with a tablespoon of vinegar or lemon juice to mimic its acidity, the buttermilk’s unique tang is key to the authentic red velvet flavor and tender crumb in this Valentine’s Day Red Velvet Cheesecake Recipe.
Why does the cheesecake need to cool in the oven with the door open?
Cooling the cheesecake slowly in the oven prevents sudden temperature changes that can cause cracking, ensuring a smooth, perfectly set surface that looks as stunning as it tastes.
Can I make this recipe in advance?
Absolutely! This is one of the best make-ahead desserts for Valentine’s Day celebrations. Bake it the day before and refrigerate overnight. The flavors deepen and textures set beautifully with time.
What if I don’t have a springform pan?
A springform pan is ideal for cheesecakes because of its removable sides, but you could use a regular 9-inch cake pan lined with parchment paper. Just be extra careful when extracting your dessert to keep it intact.
How do I prevent the cheesecake topping from cracking?
Aside from slow cooling, ensure you don’t overmix the cheesecake batter, and avoid opening the oven door during baking. Following these tips in the Valentine’s Day Red Velvet Cheesecake Recipe will ensure a perfectly smooth surface every time.
Final Thoughts
Making this Valentine’s Day Red Velvet Cheesecake Recipe is truly a labor of love that rewards you with layers of luscious flavor, vibrant color, and heartwarming delight. Whether you’re celebrating with a special someone or treating yourself, this recipe is a guaranteed showstopper that brings joy to every forkful. Give it a try and watch it become a celebrated favorite in your dessert repertoire.
Print
Valentine’s Day Red Velvet Cheesecake Recipe
- Prep Time: 25 minutes
- Cook Time: 1 hour
- Total Time: 5 hours 25 minutes
- Yield: 12 servings
- Category: Dessert
- Method: Baking
- Cuisine: American
Description
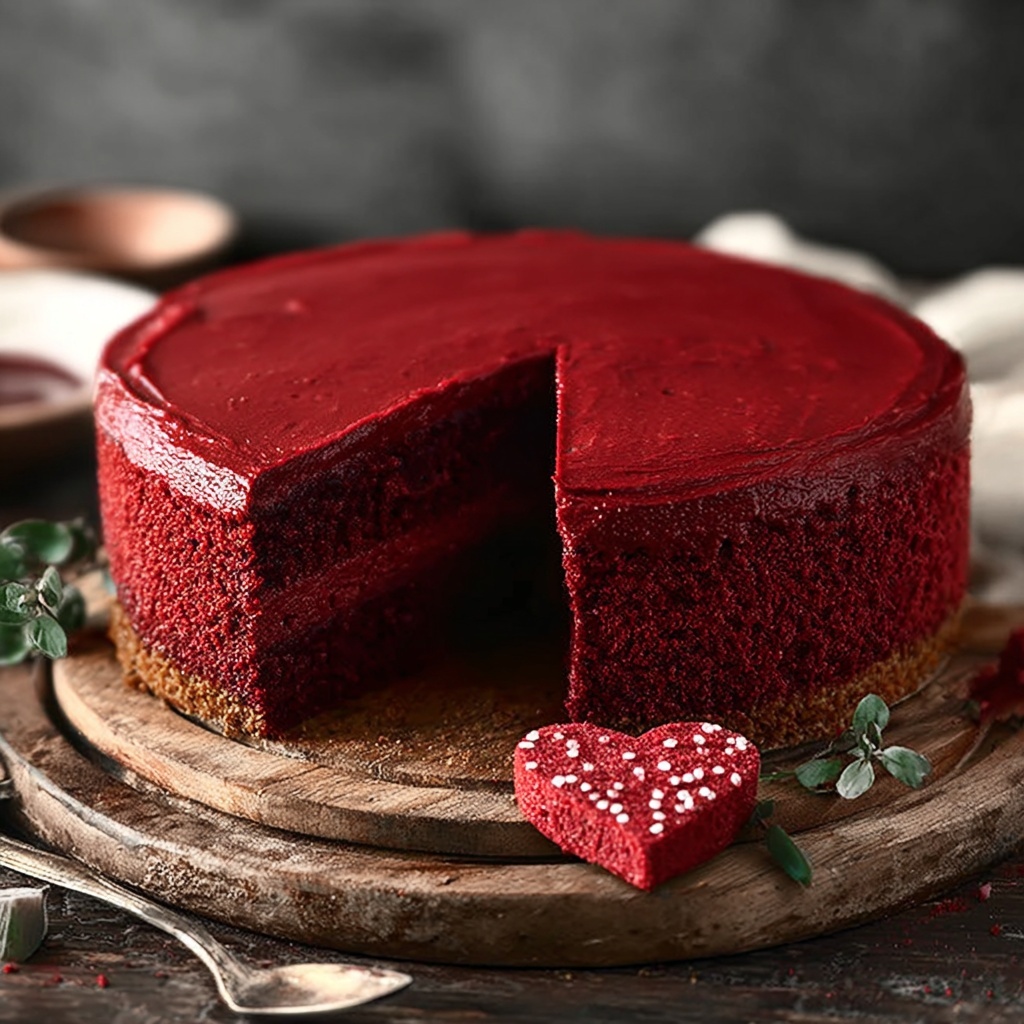
This Valentine’s Day Red Velvet Cheesecake combines a moist and rich red velvet cake base with a creamy, smooth cheesecake layer for a decadent dessert perfect for special occasions. Finished with a luscious cream cheese frosting, this cake offers a beautiful presentation with vibrant red hues and a luxurious texture that melts in your mouth.
Ingredients
Red Velvet Cake Layer
- 1 1/2 cups all-purpose flour
- 1 cup granulated sugar
- 1 tbsp cocoa powder
- 1 tsp baking soda
- 1/2 tsp salt
- 1 cup buttermilk, room temperature
- 1/2 cup vegetable oil
- 1 large egg, room temperature
- 2 tbsp red food coloring (or gel coloring)
- 1 tsp vanilla extract
- 1 tsp white vinegar
Cheesecake Layer
- 2 (8 oz) packages cream cheese, softened
- 1 cup granulated sugar
- 2 large eggs, room temperature
- 1 tsp vanilla extract
- 1/4 cup sour cream, room temperature
Cream Cheese Frosting (Optional)
- 1/2 cup unsalted butter, softened
- 8 oz cream cheese, softened
- 4 cups powdered sugar
- 1 tsp vanilla extract
Instructions
- Preheat the Oven: Preheat your oven to 325°F (163°C). Grease and line the bottom of a 9-inch springform pan with parchment paper to prevent sticking and ensure easy removal.
- Prepare the Red Velvet Cake Batter: In a large bowl, whisk together the all-purpose flour, granulated sugar, cocoa powder, baking soda, and salt until well combined. In a separate bowl, mix the buttermilk, vegetable oil, egg, red food coloring, vanilla extract, and white vinegar until smooth and evenly blended. Pour the wet ingredients into the dry ingredients and mix until just combined, being careful not to overmix.
- Assemble the Red Velvet Cake Layer: Pour the red velvet batter into the prepared springform pan and smooth the top with a spatula to create an even layer. This will form the base of your cheesecake.
- Prepare the Cheesecake Layer: In a separate mixing bowl, beat the softened cream cheese and sugar together until smooth and creamy. Add the eggs one at a time, beating well after each addition to incorporate fully. Mix in vanilla extract and sour cream, continuing to beat until the mixture is smooth and velvety.
- Layer the Cheesecake Batter: Carefully pour the cheesecake mixture on top of the red velvet cake batter in the springform pan. Spread evenly with a spatula to cover the entire surface.
- Bake the Cheesecake: Place the assembled pan in the preheated oven and bake at 325°F (163°C). After baking (time estimated around 50-60 minutes or until the cheesecake center is just set with a slight jiggle), turn off the oven, leaving the cheesecake inside with the door slightly ajar for 1 hour to cool gradually and prevent cracking.
- Cool and Chill: Remove the cheesecake from the oven after the cooling period and allow it to reach room temperature. Then cover and refrigerate for at least 4 hours, preferably overnight, to let the cheesecake fully set and develop flavors.
- Prepare the Cream Cheese Frosting (Optional): In a mixing bowl, beat the softened butter and cream cheese until creamy and smooth. Gradually add powdered sugar, about 1 cup at a time, beating well after each addition until the frosting is fluffy and silky. Stir in vanilla extract for flavor.
- Frost and Decorate: Once the cheesecake is fully chilled, spread or pipe the cream cheese frosting evenly over the top. For an elegant finish, decorate with red velvet cake crumbs, chocolate shavings, or fresh berries as desired.
- Serve and Enjoy: Slice the cheesecake with a clean, sharp knife and serve chilled. This rich and festive dessert is perfect for Valentine’s Day or any celebration.
Notes
- Ensure all dairy ingredients are at room temperature to avoid lumps in batter and frosting.
- Do not overmix the cake batter to keep the texture light and tender.
- Baking times may vary by oven; watch for the cheesecake center to be mostly set but slightly jiggly.
- Gradual cooling in the oven helps prevent cracks on the cheesecake surface.
- Red food coloring gel can provide a more vibrant color than liquid food coloring.
- Refrigerate leftover cheesecake tightly covered to keep it fresh for up to 4 days.
- For a gluten-free version, substitute all-purpose flour with a gluten-free flour blend and verify ingredients accordingly.


