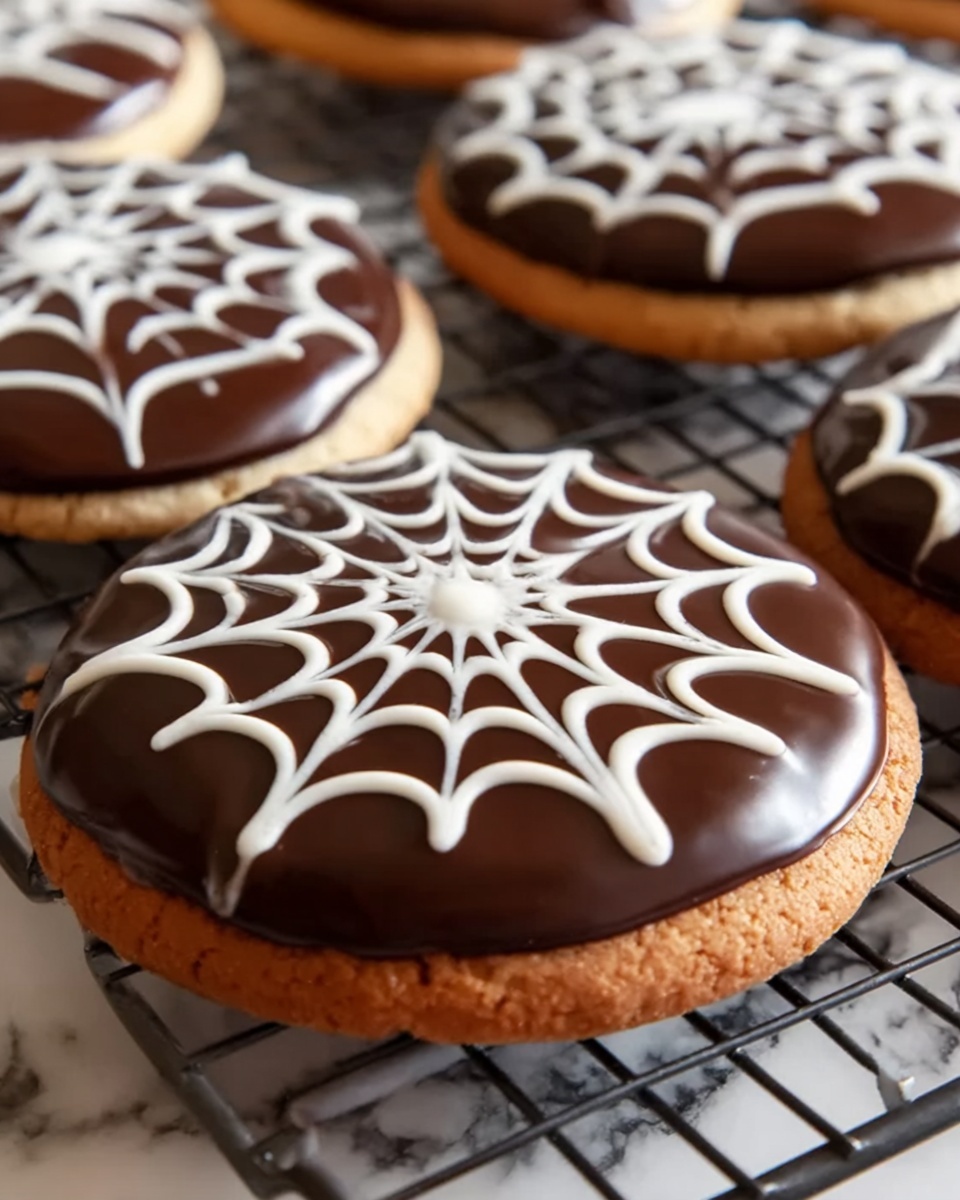
If you’re looking for a show-stopping treat that perfectly captures the spooky spirit of the season, the Spiderweb Halloween Cookies Recipe is an absolute must-try. These delightful sugar cookies combine a tender, buttery base with eye-catching royal icing designs that mimic the intricate beauty of a spider’s web. Whether you’re baking for a Halloween party, a festive family gathering, or simply to delight your little monsters, these cookies bring an irresistible blend of flavor, texture, and festive fun that everyone will love.
Ingredients You’ll Need
This Spiderweb Halloween Cookies Recipe relies on a handful of simple but essential ingredients that work together to create a cookie that’s soft, flavorful, and perfect for decorating. Each element plays a vital role in giving you that classic sugar cookie texture and the perfect canvas for your spooky spiderweb designs.
- 2 3/4 cups all-purpose flour: Provides structure ensuring the cookies hold their shape well while staying soft.
- 1 teaspoon baking soda: Helps the cookies rise gently and achieve a tender crumb.
- 1/2 teaspoon baking powder: Adds a little extra lift for lightness.
- 1/2 teaspoon salt: Balances the sweetness and enhances flavor.
- 1 cup unsalted butter, softened: Adds rich flavor and keeps the cookies tender.
- 1 1/2 cups granulated sugar: Sweetens and helps create that delightful crisp edge.
- 1 large egg: Binds the dough together and adds moisture.
- 1 teaspoon vanilla extract: Provides a warm, familiar flavor that elevates the cookie experience.
- 1/2 teaspoon almond extract (optional): Adds a subtle nutty note perfect for fall baking.
- Black and white royal icing or decorating gel: Essential for crafting the signature spiderweb design.
- Mini chocolate chips or candy spiders (optional): Fun toppings that bring a spooky, playful touch.
How to Make Spiderweb Halloween Cookies Recipe
Step 1: Prepare Your Dough
Begin by preheating your oven to 350°F (175°C) and lining baking sheets with parchment paper to prevent sticking. In a medium bowl, whisk together the flour, baking soda, baking powder, and salt. In a separate large bowl, beat the softened butter and sugar together until the mixture becomes light and fluffy. This step is crucial for the perfect cookie texture. Then, add the egg, vanilla extract, and almond extract if using, mixing everything until combined. Gradually incorporate the dry ingredients into the wet, stirring just until a soft dough forms. This dough will be your canvas for creating beautiful spiderwebs.
Step 2: Shape and Bake
Scoop tablespoon-sized balls of dough onto your prepared baking sheets, spacing them about two inches apart to allow room for spreading. Gently flatten each ball with the palm of your hand—this helps them bake evenly into those classic sugar cookie shapes. Pop them in the oven and bake for 8 to 10 minutes, watching carefully until the edges are just starting to turn golden. When done, allow to cool on the baking sheet for a few minutes before transferring to a wire rack to cool completely. Cooling fully ensures your icing will set perfectly without melting.
Step 3: Create the Spiderweb Design
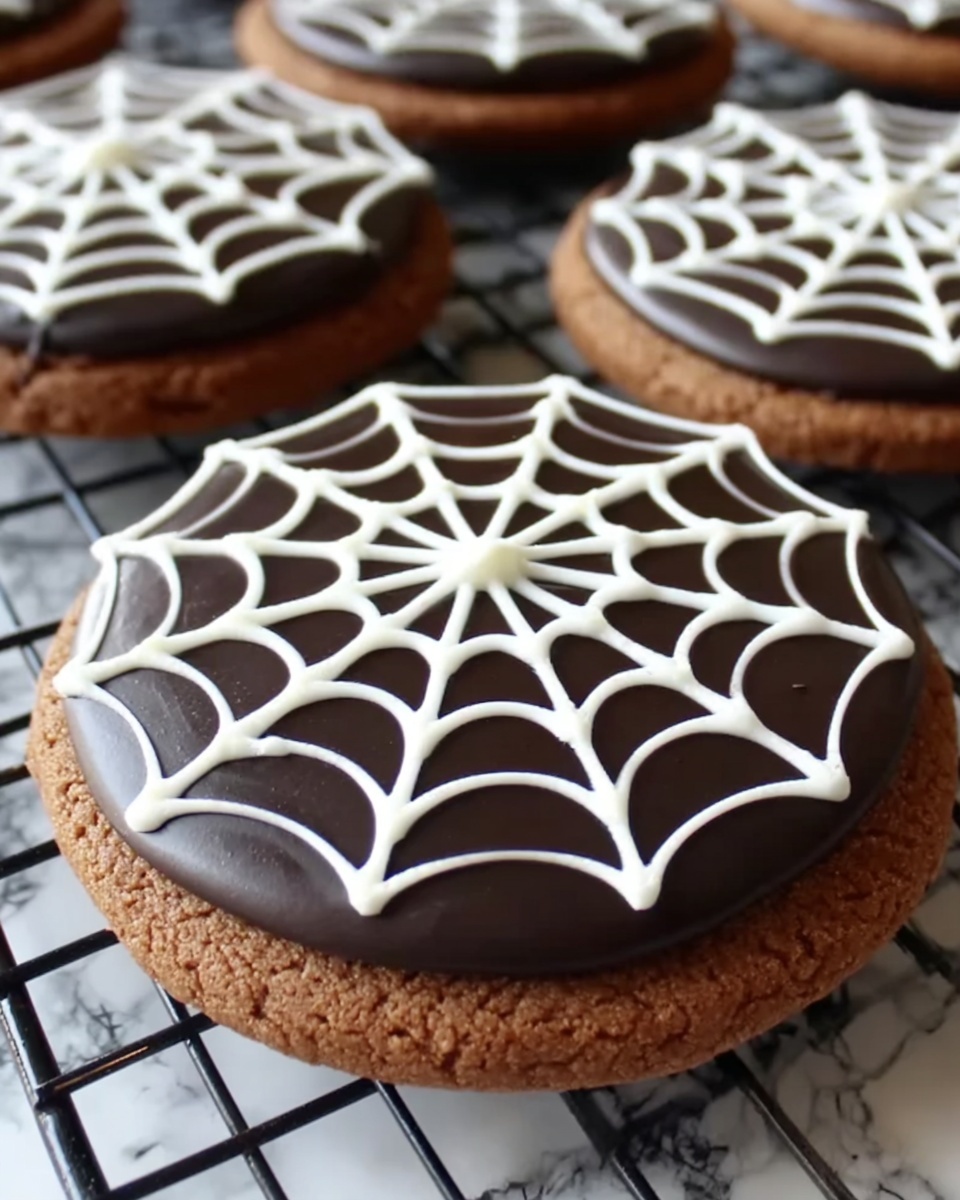
Once the cookies are completely cool, it’s time to bring the spiderwebs to life. Start by spreading or piping white royal icing or decorating gel to cover the top of each cookie. Next, pipe concentric black circles over the white icing. Before the black icing sets, drag a toothpick or skewer from the center outward through the circles to create that iconic spiderweb effect. Don’t forget to add a mini chocolate chip or a candy spider to the center to amp up the Halloween vibes. Let these decorated wonders dry completely before serving or storing.
How to Serve Spiderweb Halloween Cookies Recipe
Garnishes
Adding a little extra to your spiderweb cookies can make all the difference. Consider dusting a pinch of edible glitter or shimmer dust over the icing to add an eerie glow. You might also sprinkle finely crushed candy canes for a minty twist or use tiny edible candy eyes alongside your miniature chocolate spiders for an extra spooky surprise.
Side Dishes
The Spiderweb Halloween Cookies Recipe pairs wonderfully with classic fall flavors. Serve them alongside warm apple cider or a smooth pumpkin spice latte for a festive drink combination. They also complement creamy hot chocolate topped with marshmallows, turning your snack time into a cozy Halloween delight.
Creative Ways to Present
Make your cookie display truly unforgettable by arranging the spiderweb cookies on a black platter lined with faux spider webbing or orange tissue paper to deepen the Halloween atmosphere. You could also place them in clear cellophane bags tied with orange and black ribbons for charming party favors. For a fun twist, stack cookies on a tiered cake stand, alternating with mini pumpkins and decorative plastic spiders for an eye-catching centerpiece.
Make Ahead and Storage
Storing Leftovers
Spiderweb cookies maintain their taste and texture beautifully when stored properly. Place cooled and decorated cookies in an airtight container, separating layers with parchment paper to avoid smudging the icing. Stored at room temperature, they’ll stay fresh for up to five days, making them perfect for prepping ahead of your spooky celebrations.
Freezing
If you want to make these Halloween treats well in advance, freezing is a great option. Freeze unbaked dough balls on a baking sheet, then transfer them to a freezer-safe bag. Thaw in the refrigerator overnight before baking. Alternatively, you can freeze decorated cookies on a baking sheet and once solid, wrap them tightly and keep them frozen for up to three months. Thaw slowly at room temperature to preserve the icing.
Reheating
When you’re ready to enjoy your saved Spiderweb Halloween Cookies Recipe creations, there’s no need to reheat since they’re best served at room temperature. However, if you prefer warm cookies, pop them into a preheated 300°F oven for just a couple of minutes to soften without melting the icing. Be gentle to keep decorations intact.
FAQs
Can I make these cookies gluten-free?
Absolutely! To make the Spiderweb Halloween Cookies Recipe gluten-free, substitute the all-purpose flour with a gluten-free baking blend that includes xanthan gum for structure. This swap typically works well without compromising texture or flavor.
What’s the best way to store decorated cookies to prevent icing smudging?
Use parchment or wax paper between cookie layers and store them in a rigid, airtight container. Keeping the container in a cool, dry place helps maintain the icing’s firmness and avoid smears.
Can I use other colors besides black and white for the spiderweb design?
Definitely! Feel free to use any contrasting colors like orange and purple for a more playful Halloween look. Food-safe gels and royal icings come in many shades to match your party theme.
Is almond extract necessary for the recipe?
No, almond extract is optional—it adds a lovely depth of flavor if you like, but the cookies taste amazing with just vanilla extract alone.
How long can I keep these cookies before decorating?
The baked cookies can be stored undecorated in an airtight container for up to two days. Decorating close to serving time ensures your spiderweb designs look fresh and pristine.
Final Thoughts
There’s something genuinely magical about the Spiderweb Halloween Cookies Recipe—both the playful design and the classic sugar cookie flavor come together to create a treat that’s as fun to make as it is to eat. Whether you’re a seasoned baker or just starting out, these cookies are a perfect way to add warmth and spookiness to your Halloween festivities. Give them a try and watch how they become an instant favorite with friends and family!
Print
Spiderweb Halloween Cookies Recipe
- Prep Time: 25 minutes
- Cook Time: 10 minutes
- Total Time: 35 minutes (plus cooling and decorating time)
- Yield: 24 cookies
- Category: Dessert
- Method: Baking
- Cuisine: American
- Diet: Vegetarian
Description
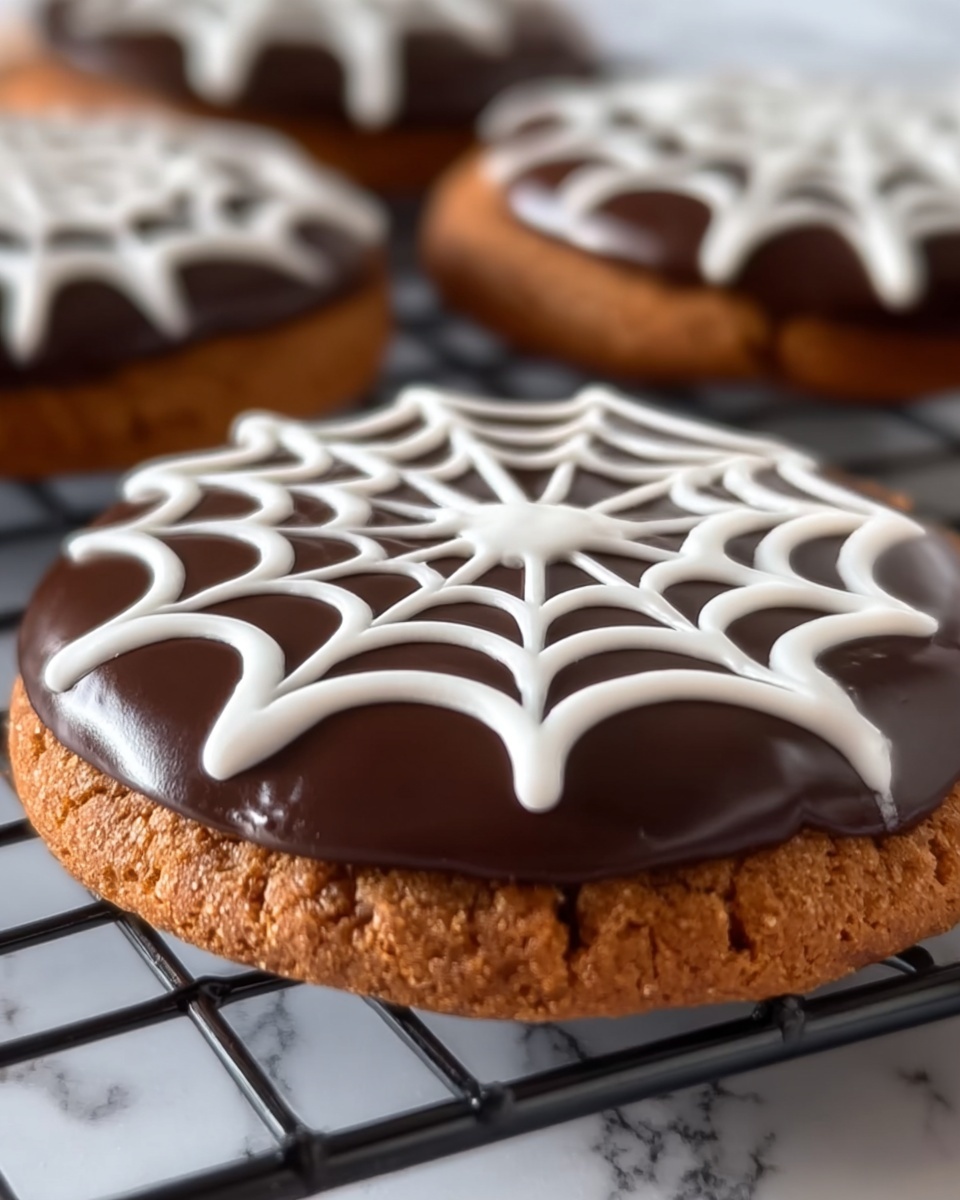
Create festive Spiderweb Halloween Cookies perfect for your spooky celebrations. These classic sugar cookies are soft, buttery, and beautifully decorated with royal icing to resemble spiderwebs, topped optionally with mini chocolate chips or candy spiders for that extra creepy touch.
Ingredients
Dry Ingredients
- 2 3/4 cups all-purpose flour
- 1 teaspoon baking soda
- 1/2 teaspoon baking powder
- 1/2 teaspoon salt
Wet Ingredients
- 1 cup unsalted butter, softened
- 1 1/2 cups granulated sugar
- 1 large egg
- 1 teaspoon vanilla extract
- 1/2 teaspoon almond extract (optional)
Decoration
- Black and white royal icing or decorating gel for piping
- Mini chocolate chips or candy spiders for decoration (optional)
Instructions
- Preheat and prepare baking sheets: Preheat the oven to 350°F (175°C) and line baking sheets with parchment paper to prevent sticking and to ensure even baking.
- Mix dry ingredients: In a medium bowl, whisk together all-purpose flour, baking soda, baking powder, and salt to evenly distribute the leavening agents and salt.
- Cream butter and sugar: In a large bowl, beat the softened unsalted butter and granulated sugar together until light and fluffy, which helps create a tender cookie texture.
- Add eggs and extracts: Mix in the large egg, vanilla extract, and almond extract if using, combining well to ensure smooth batter.
- Combine wet and dry ingredients: Gradually add the dry ingredient mixture to the wet ingredients, mixing until a soft dough forms without overworking to maintain tenderness.
- Form cookies: Scoop tablespoon-sized balls of dough onto prepared baking sheets, spacing them about 2 inches apart, and flatten each slightly with your palm for even baking.
- Bake the cookies: Bake for 8–10 minutes or until edges are lightly golden, indicating doneness while keeping the centers soft.
- Cool the cookies: Let cookies cool on the pan for a few minutes before transferring them to a wire rack to cool completely, ensuring icing adheres properly.
- Decorate with royal icing: Once cooled, use white royal icing or decorating gel to frost the tops entirely. Pipe black circles over the white base, then drag a toothpick from the center outward to create a spiderweb effect on each cookie.
- Add finishing touches: Top with mini chocolate chips or candy spiders in the center of the web for a spooky, festive look.
- Set the icing: Allow the icing to completely set before serving or storing the cookies to avoid smudging the design.
Notes
- You can prepare the cookies a day in advance and decorate them once cooled for convenience.
- Use gel food coloring to tint royal icing if making it from scratch for vibrant, consistent colors.
- These cookies are perfect for Halloween parties or spooky lunchbox treats for kids and adults alike.


