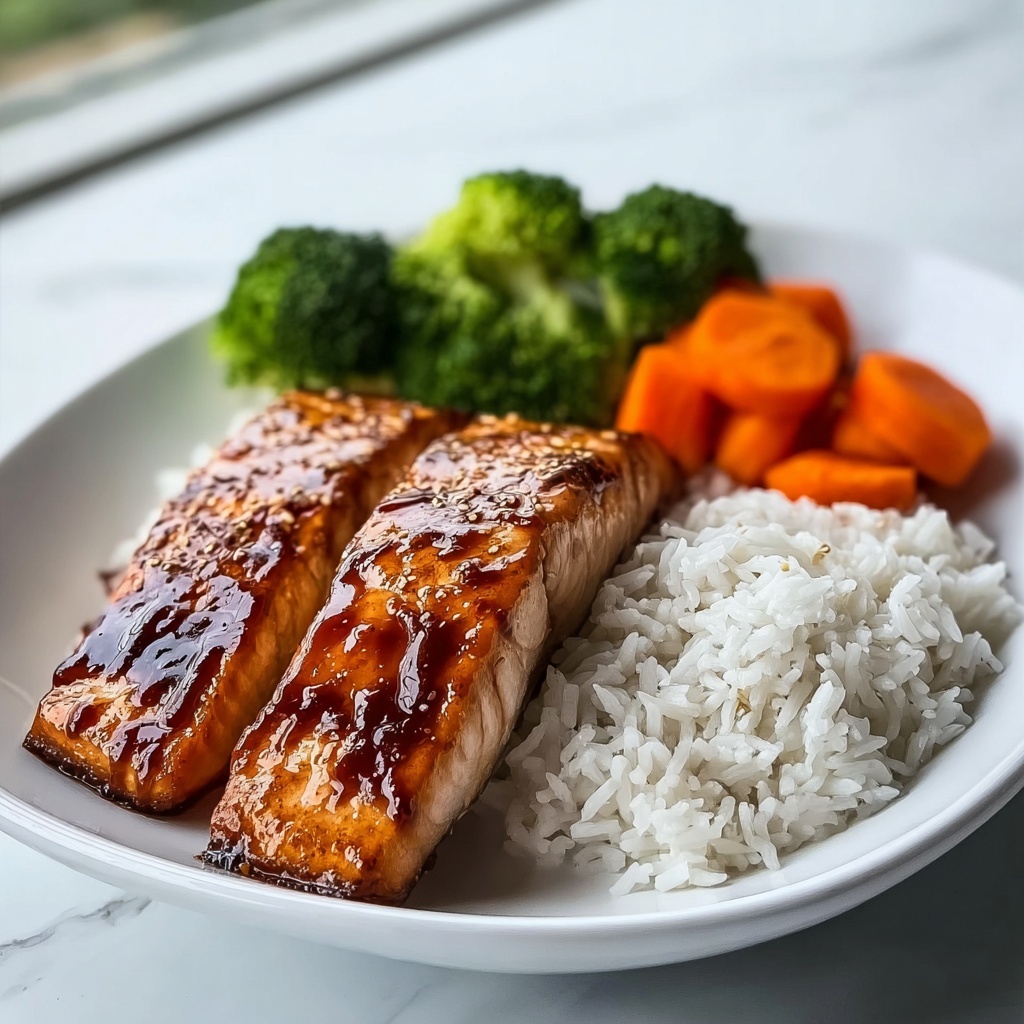
There is something incredibly satisfying about preparing a classic dish that brings together wholesome goodness and incredible flavor effortlessly. The Salmon Teriyaki with Steamed Rice: A Flavorful and Healthy Meal Recipe is exactly that kind of recipe. It seamlessly balances the rich, glazed salmon with the comforting simplicity of perfectly steamed rice, creating a meal that’s both nourishing and downright delicious. Whether you’re cooking for a weeknight dinner or impressing guests, this dish hits all the right notes for taste, health, and ease.

Ingredients You’ll Need
The beauty of this Salmon Teriyaki with Steamed Rice: A Flavorful and Healthy Meal Recipe lies in its simplicity. Each ingredient plays a crucial role in layering flavor, texture, and vibrant color that make the meal truly shine.
- Salmon fillets: Fresh, firm fillets provide the perfect canvas for the teriyaki glaze and pack a powerhouse of healthy omega-3s.
- Soy sauce: The salty backbone of the teriyaki glaze that delivers that signature tangy sweetness.
- Mirin or sweet rice wine: Adds a subtle sweetness and depth to the sauce, elevating the flavor profiles beautifully.
- Honey or brown sugar: Balances the savory with just the right hint of sweetness.
- Fresh ginger and garlic: These aromatics inject warmth and an irresistible zing.
- Sesame oil: A nutty, toasty element that rounds out the marinade perfectly.
- Steamed jasmine or sushi rice: Soft, fluffy rice that absorbs the teriyaki’s rich flavors while keeping the meal light and comforting.
- Sesame seeds: For garnish, adding a bit of crunch and visual appeal.
- Green onions: Freshly chopped, they bring brightness and freshness as a final touch.
How to Make Salmon Teriyaki with Steamed Rice: A Flavorful and Healthy Meal Recipe
Step 1: Prepare the Teriyaki Sauce
Start by whisking together the soy sauce, mirin, honey (or brown sugar), minced garlic, and grated ginger in a small bowl. This simple, yet vibrant mix is what infuses every bite with that classic teriyaki magic. Set it aside while you prepare the salmon.
Step 2: Cook the Salmon
Heat a non-stick skillet over medium heat and add a splash of sesame oil. Place your salmon fillets skin-side down and cook for about 4-5 minutes until the skin is crispy. Flip the fillets gently, then pour in the teriyaki sauce. Let the salmon simmer in the sauce, allowing it to thicken and coat the fillets with a glossy glaze. This process locks in moisture while delivering bold, flavorful bites.
Step 3: Steam the Rice
While the salmon cooks, rinse your jasmine or sushi rice under cold water until the water runs clear. Then cook it according to package instructions, or better yet, in a rice cooker for perfect texture every time. The fluffy rice will soak up any extra sauce on your plate, making every mouthful heavenly.
Step 4: Plate and Garnish
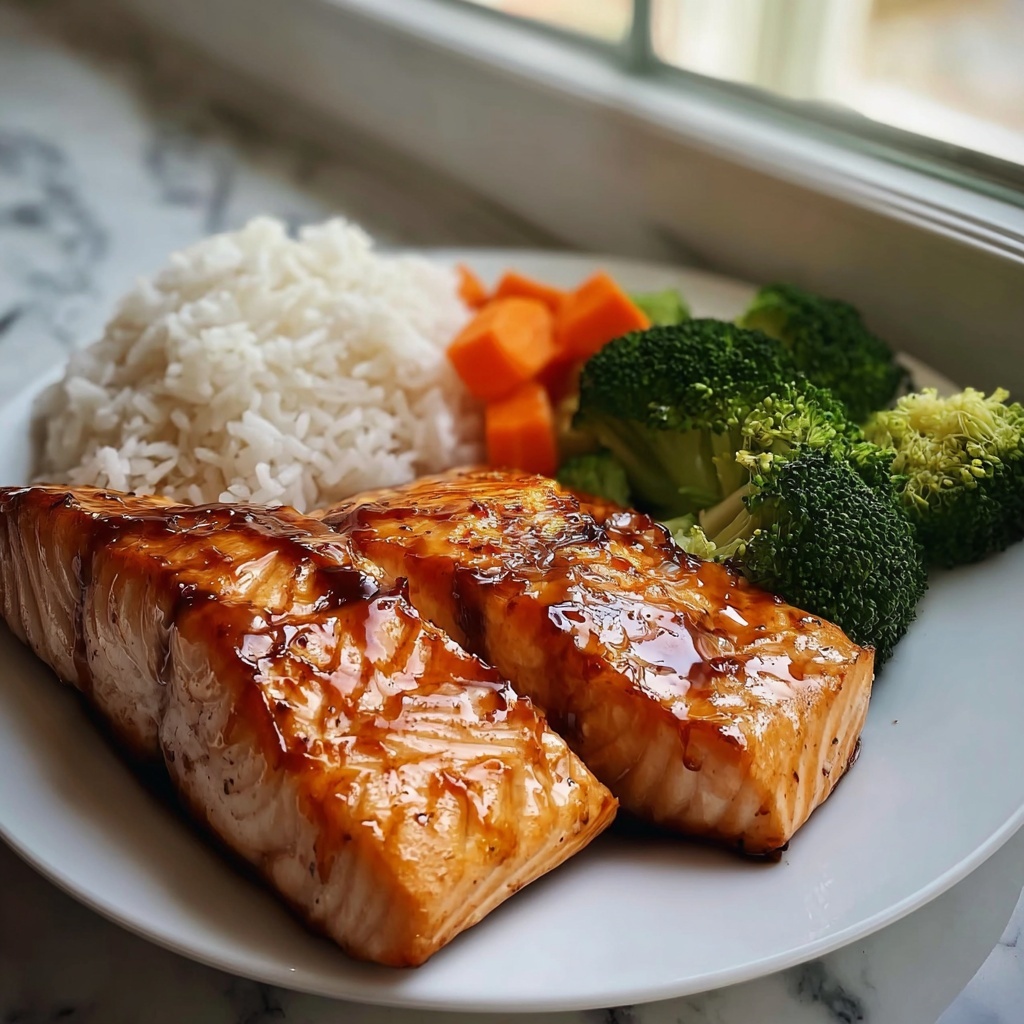
Serve your beautifully glazed salmon fillets over a mound of steaming rice. Sprinkle with toasted sesame seeds and freshly sliced green onions to add texture and a pop of color. This simple plating strategy highlights every element, making the dish inviting and ready to enjoy.
How to Serve Salmon Teriyaki with Steamed Rice: A Flavorful and Healthy Meal Recipe
Garnishes
A sprinkle of toasted sesame seeds and a handful of chopped green onions brighten the dish with crunch and fresh flavor. For a hint of heat and zest, add thinly sliced red chili or a drizzle of sriracha mayo. These little touches create a wonderful balance and visual appeal.
Side Dishes
This recipe pairs beautifully with simple steamed vegetables like broccoli, snap peas, or bok choy. A crisp cucumber salad or edamame pods make refreshing companions without overpowering the teriyaki flavors. The aim is to keep sides light and complementary to maintain the meal’s healthy profile.
Creative Ways to Present
For a fun twist, turn this dish into a bowl by layering rice, flaked salmon, and sautéed veggies, then drizzle the remaining teriyaki sauce on top. Alternatively, use lettuce wraps for a refreshing, handheld experience. When entertaining, serve portioned salmon fillets atop individual rice nests garnished with microgreens for an elegant touch.
Make Ahead and Storage
Storing Leftovers
You can store any leftover salmon teriyaki and steamed rice in airtight containers in the refrigerator for up to 3 days. Keep the sauce separate if possible to maintain texture and flavor freshness.
Freezing
The cooked salmon and rice freeze well if you want to prepare meals ahead of time. Wrap the salmon tightly and pack the rice in freezer-safe containers. Expect the best quality within 1-2 months.
Reheating
Gently reheat leftovers in a skillet over low heat, adding a splash of water to keep the rice moist. Avoid microwaving dry, as it tends to toughen the salmon. Rewarming slowly helps preserve the tender texture and rich glaze.
FAQs
Can I use other types of fish instead of salmon?
Absolutely! This recipe works wonderfully with firm fish like cod, halibut, or tuna. Adjust cooking times slightly based on the thickness and type of fish.
Is it okay to use bottled teriyaki sauce instead of homemade?
While bottled sauces can save time, making your own lets you control the sweetness and salt levels, customizing it exactly to your taste. If you do use bottled, consider adding fresh ginger and garlic to boost flavor.
What’s the best type of rice to serve with this dish?
Jasmine or sushi rice are preferred because of their natural fluffiness and subtle aroma, which complement the teriyaki flavors beautifully. Brown rice works for a nuttier, more fiber-rich alternative.
Can I make this recipe gluten-free?
Yes! Use tamari or a gluten-free soy sauce alternative, and ensure mirin or rice wine does not contain gluten. This dish is very adaptable for special diets.
How do I get crispy salmon skin?
Pat your salmon skin dry before cooking, and cook it skin-side down over medium heat without moving it around. The key is not to skip the sesame oil and to use moderate heat for that perfect crispy finish.
Final Thoughts
There’s something truly heartwarming about a recipe that is straightforward yet delivers a burst of flavors like the Salmon Teriyaki with Steamed Rice: A Flavorful and Healthy Meal Recipe. It’s the kind of dish that you’ll want to return to again and again because it brings comfort and nourishment in every bite. Give it a try soon and watch it become an instant favorite in your home kitchen!
Print
Salmon Teriyaki with Steamed Rice: A Flavorful and Healthy Meal Recipe
- Prep Time: 15 minutes
- Cook Time: 10 minutes
- Total Time: 2 hours 25 minutes
- Yield: 16 bars
- Category: Dessert
- Method: No-Cook
- Cuisine: American
- Diet: Gluten Free
Description
This no-bake chocolate pistachio coconut bar recipe offers a deliciously rich and healthy treat combining the crunch of pistachios, the sweetness of honey, and the indulgence of dark chocolate and shredded coconut. Perfect for a quick snack or dessert, these bars set in the fridge and require minimal preparation, making them an easy and satisfying homemade confection.
Ingredients
Chocolate Pistachio Layer
- 1 cup shelled pistachios
- 1 cup dark chocolate chips
Coconut Topping
- 1/2 cup shredded coconut
- 1/4 cup honey
- 1/4 cup coconut oil
- 1/2 tsp vanilla extract
- Pinch of salt
Instructions
- Chop Pistachios: In a food processor, pulse the shelled pistachios until they are finely chopped but not powdered, creating a textured base for the bars.
- Melt Chocolate: Place the dark chocolate chips in a saucepan and melt them over low heat, stirring frequently to prevent burning until smooth.
- Form Base Layer: Combine the melted chocolate with the chopped pistachios, mixing thoroughly. Press this mixture evenly into a lined baking dish to form the base layer for the bars.
- Prepare Coconut Mixture: In the same saucepan, melt the coconut oil and honey together over low heat. Once melted, stir in the shredded coconut, vanilla extract, and a pinch of salt until all ingredients are evenly combined.
- Assemble Topping: Pour the coconut mixture over the chocolate-pistachio base layer and spread it evenly with a spatula to cover the surface completely.
- Set in Refrigerator: Place the baking dish in the refrigerator and chill for at least 2 hours, allowing the bars to harden and set properly.
- Cut and Serve: Once set, remove from the refrigerator, cut into bars of your desired size, and enjoy your delicious no-bake chocolate pistachio coconut bars.
Notes
- Use a lined baking dish with parchment paper for easy removal of bars.
- Ensure low heat when melting chocolate and coconut oil to prevent separation or burning.
- Store bars in an airtight container in the refrigerator to maintain freshness and texture.
- Optional: Add a sprinkle of sea salt on top for a sweet and salty flavor balance.
- These bars make a great snack or dessert and can be customized by adding dried fruit or other nuts.


