
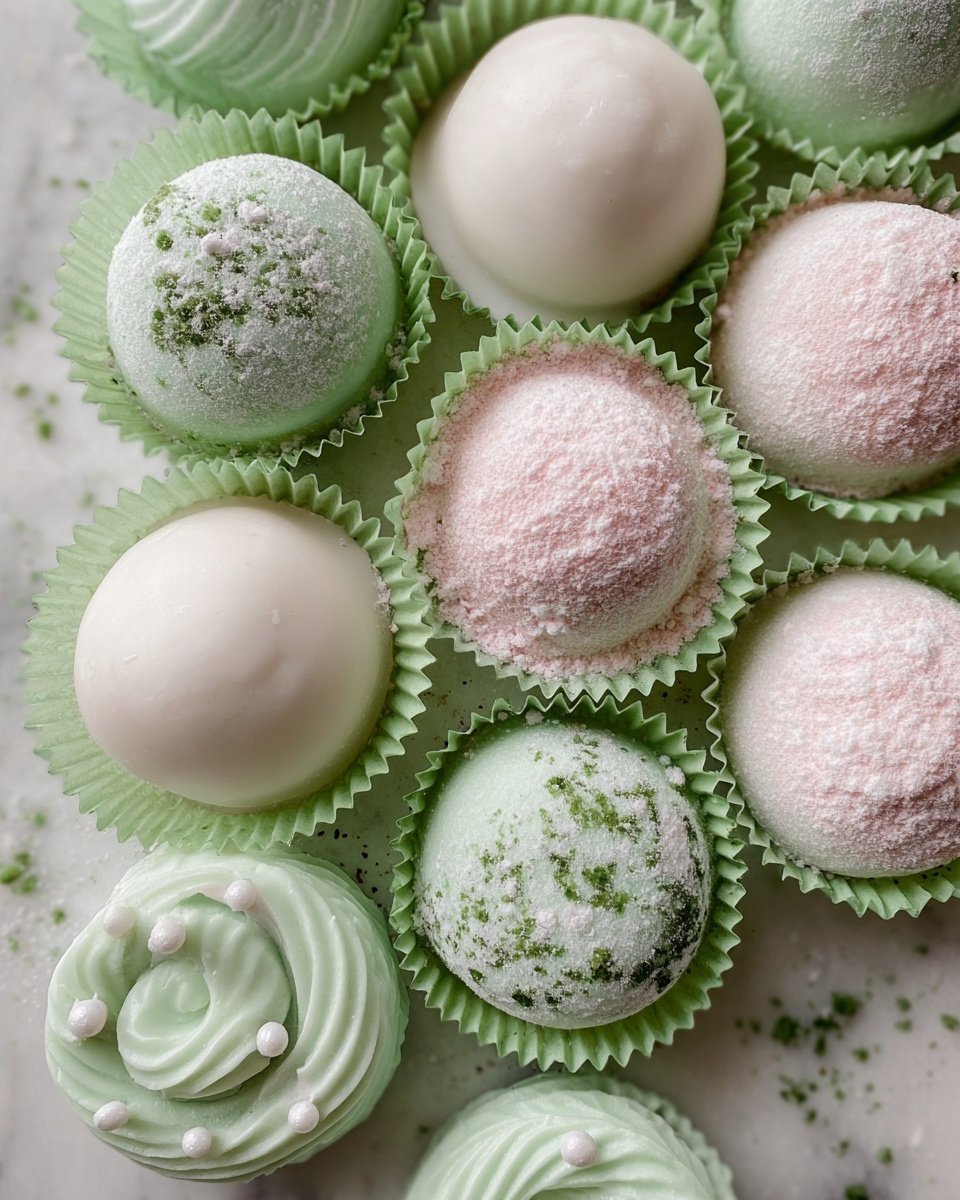
If you love the idea of a cookie that tastes like a fresh blast of winter with every bite, then you’re going to adore this Minty Snowball Cookies Recipe. These little delights combine a tender, buttery crumb with the perfect touch of peppermint and rich mint chocolate chunks, all dusted generously with snowy powdered sugar. They’re crisp around the edges, melt-in-your-mouth soft inside, and just scream cozy holiday cheer or a refreshing after-dinner treat any time of year. Trust me, once you try this Minty Snowball Cookies Recipe, it’ll become one of your favorite go-to recipes for gifting, snacking, or impressing guests with minimal fuss but maximum flavor.

Ingredients You’ll Need
Getting started on the Minty Snowball Cookies Recipe means gathering a handful of simple ingredients that each play a crucial role. From the creamy butter that ensures softness to the peppermint that delivers that irresistible cool bite, every component works in harmony.
- 1 cup unsalted butter, softened: This forms the rich, melt-in-your-mouth base of your cookies; make sure it’s softened for easy creaming.
- 1/2 cup powdered sugar (plus extra for coating): Powdered sugar sweetens gently and creates that signature snowy coat after baking.
- 1 teaspoon vanilla extract: Adds warmth and depth to balance the minty notes beautifully.
- 1/2 teaspoon peppermint extract: The star of the show that gives these cookies their distinctive, refreshing mint flavor.
- 2 cups all-purpose flour: Builds the structure while keeping the cookies soft and tender.
- 1/4 teaspoon salt: Enhances all the flavors and keeps the sweet from becoming one-dimensional.
- 1 cup finely chopped mint chocolate (or mint chocolate chips): Chunks of mint chocolate add bursts of both texture and that perfectly sweet-and-cool contrast.
How to Make Minty Snowball Cookies Recipe
Step 1: Preheat and Prepare
First things first, set your oven to 350°F (175°C) and line a baking sheet with parchment paper. This ensures your cookies will bake evenly and won’t stick, giving you picture-perfect results every time.
Step 2: Cream the Butter and Sugar
In a large mixing bowl, cream the softened butter together with the powdered sugar until the mixture is light and fluffy. This step is key to the cookie’s tender texture. Then mix in the vanilla extract alongside the peppermint extract for that immediately recognizable minty aroma.
Step 3: Combine Dry Ingredients and Mix
Gradually add the all-purpose flour and salt to the creamed mixture, stirring gently until a consistent dough forms. This careful mixing prevents overworking the dough, which keeps the cookies tender. Finally, fold in the finely chopped mint chocolate for delicious pockets of flavor.
Step 4: Shape Your Cookies
Roll the dough into 1-inch balls and arrange them on your prepared baking sheet, making sure each ball has about an inch of space around it to spread slightly while baking.
Step 5: Bake to Perfection
Bake the cookies for 10-12 minutes. You want the edges set but the cookies to remain pale because these snowballs don’t brown much and are best when they maintain their soft, delicate look.
Step 6: Powder and Cool
Once out of the oven, let the cookies cool for about 5 minutes. While still warm, roll each cookie in powdered sugar for that first snowy coat. After they’re completely cool, roll them a second time in powdered sugar to give them an irresistible snowy finish.
Step 7: Store and Enjoy
Place your beautiful Minty Snowball Cookies in an airtight container and enjoy within a week. They stay fresh, soft, and perfectly minty, ready whenever you need a special treat.
How to Serve Minty Snowball Cookies Recipe
Garnishes
For an extra festive touch, sprinkle crushed peppermint candies or edible silver glitter on top of the powdered sugar coating before serving. You can also add a sprig of fresh mint beside the plate to highlight that cool, refreshing vibe these cookies bring.
Side Dishes
Minty Snowball Cookies shine when paired with a warm cup of hot cocoa, a robust coffee, or a soothing herbal tea like chamomile or peppermint. The warm drinks beautifully complement the cool, minty flavor and create an inviting, cozy experience.
Creative Ways to Present
Arrange the cookies in a clear glass jar layered with peppermint candy canes for a stunning holiday gift. Alternatively, stack them on a festive plate with a dusting of powdered sugar and tie the plate with a mint-green ribbon for a simple yet elegant presentation that friends and family will adore.
Make Ahead and Storage
Storing Leftovers
Keep your Minty Snowball Cookies fresh by storing them in an airtight container at room temperature. They will maintain their soft, buttery texture and minty flavor for up to one week, making them perfect for prepping in advance of parties or gift-giving.
Freezing
You can freeze these cookies once baked and fully cooled by placing them in a freezer-safe container or bag, separated by parchment paper to avoid sticking. When properly wrapped, they’ll keep for up to three months without losing that signature mint flavor or texture.
Reheating
To enjoy frozen cookies, simply let them thaw at room temperature for about 30 minutes. If you want them slightly warm, pop them in a 300°F oven for 5 minutes—just enough to soften the chocolate chunks and refresh that melt-in-your-mouth sensation.
FAQs
Can I substitute peppermint extract with another flavor?
While peppermint extract is key to this recipe’s signature fresh mint flavor, you could experiment with spearmint extract for a milder, sweeter twist. Avoid other flavors that might overpower the delicate snowball balance.
What if I don’t have mint chocolate chips?
If mint chocolate chips aren’t available, finely chopped mint chocolate bars work just as well. You could also mix in semi-sweet chocolate for less mint intensity, though that changes the classic flavor profile.
Do I need to chill the dough before baking?
This recipe doesn’t require chilling the dough since the cookies hold their shape well. However, if your kitchen is warm, chilling for 15-20 minutes can help prevent spreading.
How do I prevent the cookies from browning too much?
Minty Snowball Cookies are meant to stay pale, so watch them closely in the oven. Baking for 10-12 minutes and pulling them out when edges are just set ensures the perfect delicate look and texture.
Can these cookies be made gluten-free?
Yes! Substitute the all-purpose flour with a gluten-free flour blend designed for baking, and consider adding a small amount of xanthan gum if it’s not already in your blend to help with texture. The flavor and charm of these cookies will remain delightful.
Final Thoughts
I absolutely encourage you to give this Minty Snowball Cookies Recipe a try soon. They’re remarkably simple to make, incredibly satisfying to eat, and bring a wonderful minty freshness that’s just irresistible. Whether you’re baking for a holiday bash or simply craving a sweet treat with a cool twist, these cookies will quickly become a new staple in your baking repertoire. Enjoy every snowy, mint-filled bite!
Print
Minty Snowball Cookies Recipe
- Prep Time: 20 minutes
- Cook Time: 12 minutes
- Total Time: 32 minutes
- Yield: 24 cookies
- Category: Dessert
- Method: Baking
- Cuisine: American
Description
Minty Snowball Cookies are delightful, buttery treats infused with refreshing peppermint and studded with mint chocolate pieces. These soft, melt-in-your-mouth cookies are generously coated in powdered sugar, giving them a charming snowy appearance perfect for holiday seasons or any time you crave a festive, minty dessert.
Ingredients
Cookie Dough
- 1 cup unsalted butter, softened
- 1/2 cup powdered sugar (plus extra for coating)
- 1 teaspoon vanilla extract
- 1/2 teaspoon peppermint extract
- 2 cups all-purpose flour
- 1/4 teaspoon salt
- 1 cup finely chopped mint chocolate (or mint chocolate chips)
Instructions
- Preheat Oven: Preheat the oven to 350°F (175°C) and line a baking sheet with parchment paper to prevent sticking and ensure even baking.
- Cream Butter and Sugar: In a large bowl, cream the softened unsalted butter with 1/2 cup powdered sugar until the mixture is light and fluffy. Then add the vanilla extract and peppermint extract, mixing well to combine all flavors.
- Prepare Dough: Gradually incorporate the all-purpose flour and salt into the butter mixture, mixing until a soft dough forms. Carefully fold in the finely chopped mint chocolate or mint chocolate chips to evenly distribute throughout the dough.
- Form Cookies: Roll the dough into 1-inch diameter balls and place them on the prepared baking sheet, spacing each about 1 inch apart to allow for slight spreading during baking.
- Bake: Bake the cookies in the preheated oven for 10-12 minutes, or until the edges are set but the cookies remain pale, ensuring a delicate texture.
- Cool and Coat: Let the cookies cool on the baking sheet for 5 minutes, then gently roll each warm cookie in powdered sugar to coat. Once fully cooled, roll them in powdered sugar again for an extra snowy finish that enhances their look and sweetness.
- Store: Store the fully cooled and coated cookies in an airtight container to maintain freshness for up to one week.
Notes
- For best results, ensure the butter is at room temperature for easier creaming.
- Mint chocolate chips can be substituted with chopped peppermint bark or regular chocolate chips for a different flavor twist.
- Rolling cookies twice in powdered sugar creates a beautiful ‘snowball’ effect and adds a touch of extra sweetness.
- Keep cookies in an airtight container at room temperature to maintain their soft texture.
- If preferred, slightly chill the dough before rolling to make handling easier.


