
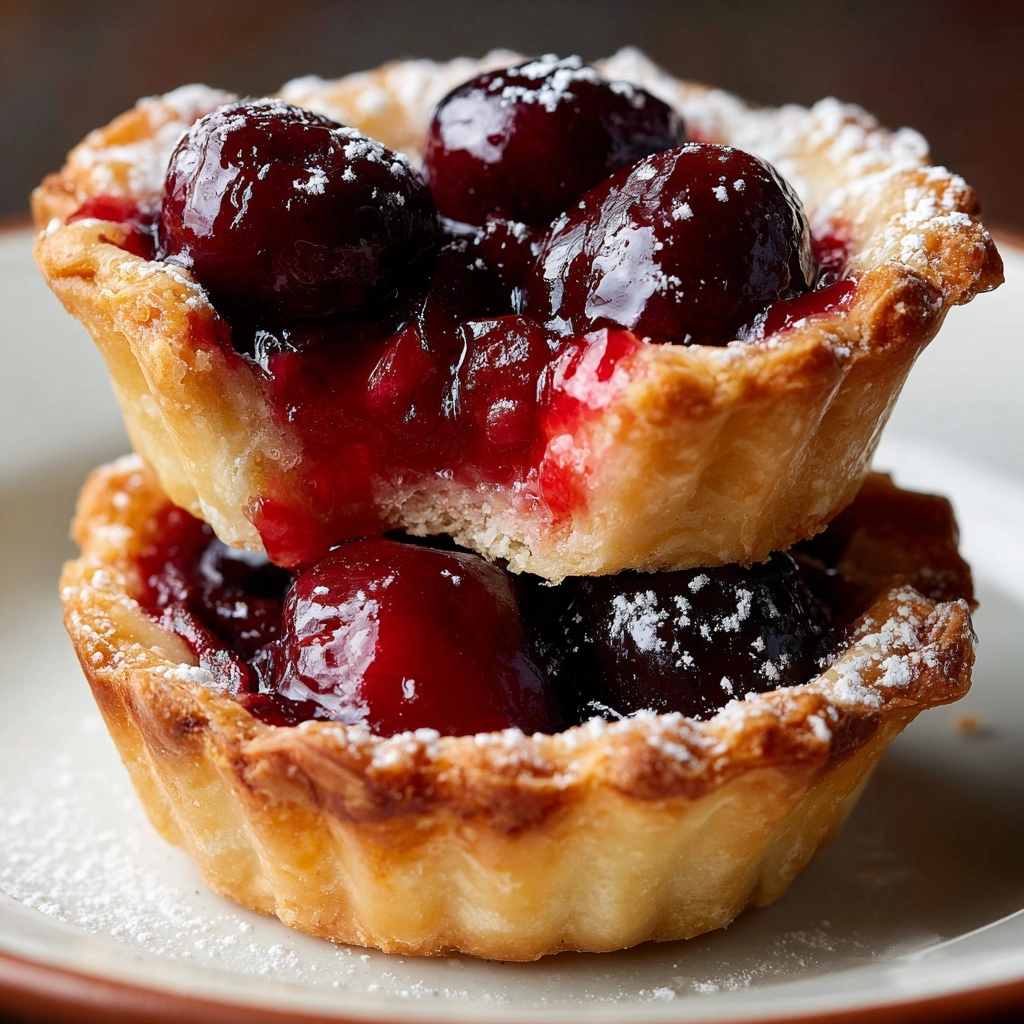
If you’re looking for a show-stopping dessert that’s as easy as it is adorable, these Mini Cherry Pies are about to become your new go-to treat. Imagine all the nostalgia and flavor of a classic cherry pie, but perfectly portioned for handheld enjoyment. Each bite bursts with sweet-tart cherries wrapped in flaky golden crust, making them ideal for parties, picnics, or a cozy night in. You won’t believe how quickly these disappear once they hit the table!
Ingredients You’ll Need
-
Crust
- 1 package refrigerated pie crusts (2 crusts)
- Nonstick cooking spray or butter (for greasing muffin tin)
Filling
- 1 1/2 cups cherry pie filling
- 1 tablespoon cornstarch (optional, for thicker filling)
Topping
- 1 egg (beaten, for egg wash)
- 1 tablespoon coarse sugar (optional, for topping)
How to Make Mini Cherry Pies
Step 1: Prep the Oven and Muffin Tin
Start by preheating your oven to 375°F (190°C). Lightly grease a standard 12-cup muffin tin with nonstick spray or butter. This quick step means your Mini Cherry Pies will pop right out after baking, showing off their beautiful golden crusts.
Step 2: Roll Out and Cut Pie Crusts
Unroll the pie crusts on a lightly floured surface. Use a 3.5- to 4-inch round cookie cutter (or even a glass) to cut out 12 circles. Gently press each circle into a muffin cup, forming the bottom crusts. The dough should come up the sides, creating a cozy little nest for the cherry filling.
Step 3: Prepare the Cherry Filling
If you prefer a thicker filling, stir the cornstarch into your cherry pie filling until fully combined. This step is totally optional but delivers a neat, luscious center that holds up beautifully when you bite in.
Step 4: Fill the Crusts
Spoon about 1 to 2 tablespoons of cherry pie filling into each crust-lined muffin cup. Be generous, but don’t overfill—this helps prevent any bubbling over during baking and keeps your pies looking picture-perfect.
Step 5: Add the Tops
Gather the leftover dough scraps and roll them out again. Cut out small shapes, strips for a lattice, or simple rounds to top each pie. Get creative—this is your chance to add a personal touch! Gently place your chosen tops over the filling.
Step 6: Egg Wash and Sugar Sprinkle
Brush the tops with the beaten egg for a glossy, golden finish. If you like, sprinkle a pinch of coarse sugar on each pie. This adds sparkle and an irresistible crunch once baked.
Step 7: Bake to Perfection
Slide the muffin tin into the oven and bake for 20 to 25 minutes, or until the crusts are deeply golden and the cherry filling is bubbling. Your kitchen will smell amazing!
Step 8: Cool and Remove
Let the Mini Cherry Pies cool in the tin for 10 to 15 minutes. This helps them firm up and makes removal easy. Carefully lift each pie out and transfer to a wire rack. Serve warm for gooey, jammy centers, or let them cool to room temperature for a classic pie texture.
How to Serve Mini Cherry Pies

Garnishes
For that bakery-worthy finish, dust your Mini Cherry Pies with a little powdered sugar, or top each with a tiny dollop of whipped cream. A fresh cherry or a mint sprig adds a playful pop of color and makes them extra special for guests or celebrations.
Side Dishes
Pair these pies with a scoop of vanilla ice cream for a timeless combo, or serve alongside a big bowl of fresh berries for a lighter touch. If you’re putting together a dessert spread, these pies look gorgeous next to chocolate brownies or lemon bars.
Creative Ways to Present
Try stacking your Mini Cherry Pies on a tiered cake stand for a stunning centerpiece, or package them individually in parchment and twine for a picnic or party favor. Little ramekins or cupcake liners also make for easy, mess-free serving—perfect for passing around at gatherings.
Make Ahead and Storage
Storing Leftovers
If you’re lucky enough to have leftovers, store your Mini Cherry Pies in an airtight container at room temperature for up to two days, or in the fridge for up to four days. They stay delightfully crisp and flavorful, making them a treat to look forward to.
Freezing
To freeze, let the pies cool completely, then wrap each one tightly in plastic wrap or foil. Place them in a freezer-safe bag or container. They’ll keep beautifully for up to three months—just thaw overnight in the fridge before serving.
Reheating
For that fresh-baked warmth, reheat the pies in a 300°F (150°C) oven for about 8 to 10 minutes. This crisps the crust and warms the filling without drying them out. A quick zap in the microwave works in a pinch, but the oven is best for restoring that just-baked magic.
FAQs
Can I use homemade pie crust and filling for Mini Cherry Pies?
Absolutely! Homemade crust and filling will make these Mini Cherry Pies even more special. Use your favorite recipes, and just follow the same assembly and baking instructions for delicious results.
What if I don’t have a round cookie cutter?
No problem at all—just use a drinking glass or a small bowl with a similar diameter to cut out your circles. The important thing is to get a round shape that fits snugly into your muffin tin cups.
Can I make Mini Cherry Pies ahead of time?
Yes! These pies are perfect for making a day in advance. Simply store them in an airtight container, and they’ll be ready to serve (and still taste amazing) the next day.
Is it possible to use other fruit fillings?
Definitely—this recipe is super adaptable. Try blueberry, apple, or peach pie filling for a fun twist, or mix and match to create a colorful mini pie medley.
How do I keep the pies from sticking to the muffin tin?
Be sure to generously grease the muffin tin with nonstick spray or butter before adding the crusts. Allowing the pies to cool slightly before removal also helps them come out cleanly every time.
Final Thoughts
Mini Cherry Pies are the ultimate bite-sized treat, combining classic flavors with irresistible charm. Whether you’re baking for a crowd or treating yourself to something sweet, these little pies are guaranteed to win hearts. Give them a try and watch how quickly they disappear—they might just become your new favorite dessert!
Print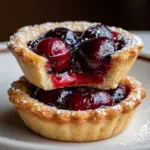
Mini Cherry Pies Recipe
- Prep Time: 20 minutes
- Cook Time: 25 minutes
- Total Time: 45 minutes
- Yield: 12 mini pies
- Category: Dessert
- Method: Baking
- Cuisine: American
- Diet: Vegetarian
Description
Delight in these easy-to-make Mini Cherry Pies, perfect for parties or a charming dessert. With a flaky pie crust filled with sweet cherry pie filling, these handheld pies bake up golden and bubbly in a standard muffin tin.
Ingredients
Crust
- 1 package refrigerated pie crusts (2 crusts)
- Nonstick cooking spray or butter (for greasing muffin tin)
Filling
- 1 1/2 cups cherry pie filling
- 1 tablespoon cornstarch (optional, for thicker filling)
Topping
- 1 egg (beaten, for egg wash)
- 1 tablespoon coarse sugar (optional, for topping)
Instructions
- Prepare the muffin tin and crust: Preheat the oven to 375°F (190°C) and lightly grease a standard 12-cup muffin tin with nonstick cooking spray or butter. Unroll the refrigerated pie crusts on a lightly floured surface to prevent sticking.
- Cut and line crust: Using a 3.5- to 4-inch round cookie cutter, cut out 12 circles from the pie crust. Gently press each circle into the muffin cups to form the bottom crust, ensuring they’re evenly shaped and snug against the sides.
- Prepare the filling: If you prefer a thicker filling, mix 1 tablespoon of cornstarch into the cherry pie filling until well combined. This step is optional based on desired filling consistency.
- Fill the pies: Spoon about 1 to 2 tablespoons of cherry pie filling into each crust-lined muffin cup. Be careful not to overfill to avoid overflow during baking.
- Create crust toppings: Roll out the remaining dough scraps and cut into small shapes, strips, or rounds to place on top of each mini pie, giving them a decorative finish.
- Apply egg wash and sugar topping: Brush the tops of the mini pies with beaten egg to achieve a golden color while baking. Sprinkle with coarse sugar for a delightful crunch and sparkle, if desired.
- Bake: Place the muffin tin in the preheated oven and bake for 20 to 25 minutes, until the crusts turn golden brown and the filling is bubbly.
- Cool and serve: Allow the mini pies to cool in the muffin tin for 10 to 15 minutes to set. Gently remove them from the tin and serve warm or at room temperature for best flavor.
Notes
- You can use homemade pie dough and cherry filling instead of store-bought options for a personalized touch.
- These mini cherry pies are perfect for parties and can be made a day ahead to save time.
- Adding a touch of almond extract to the filling enhances the flavor with a subtle nutty hint.
Nutrition
- Serving Size: 1 mini pie
- Calories: 180
- Sugar: 11g
- Sodium: 140mg
- Fat: 9g
- Saturated Fat: 3g
- Unsaturated Fat: 5g
- Trans Fat: 0g
- Carbohydrates: 23g
- Fiber: 1g
- Protein: 2g
- Cholesterol: 15mg


