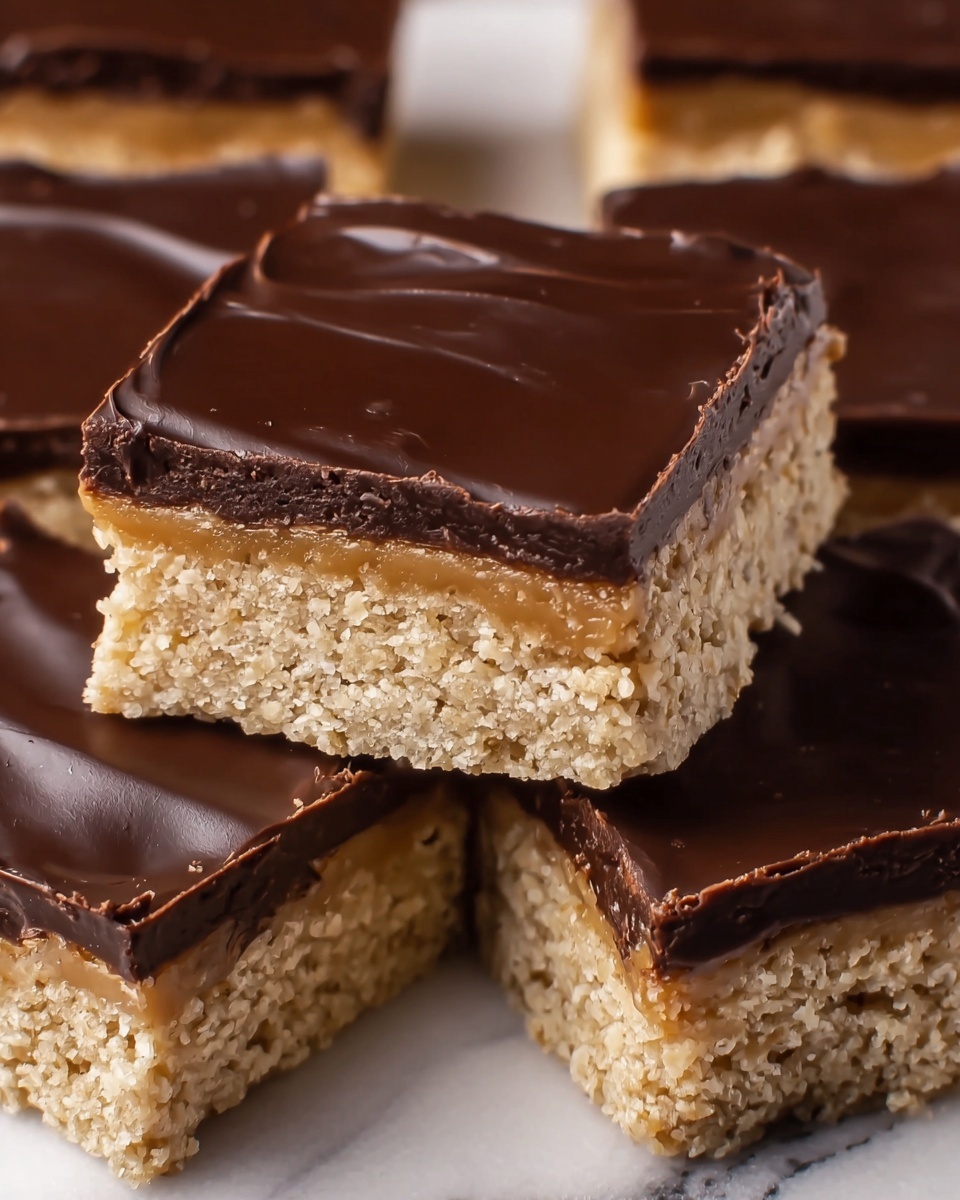
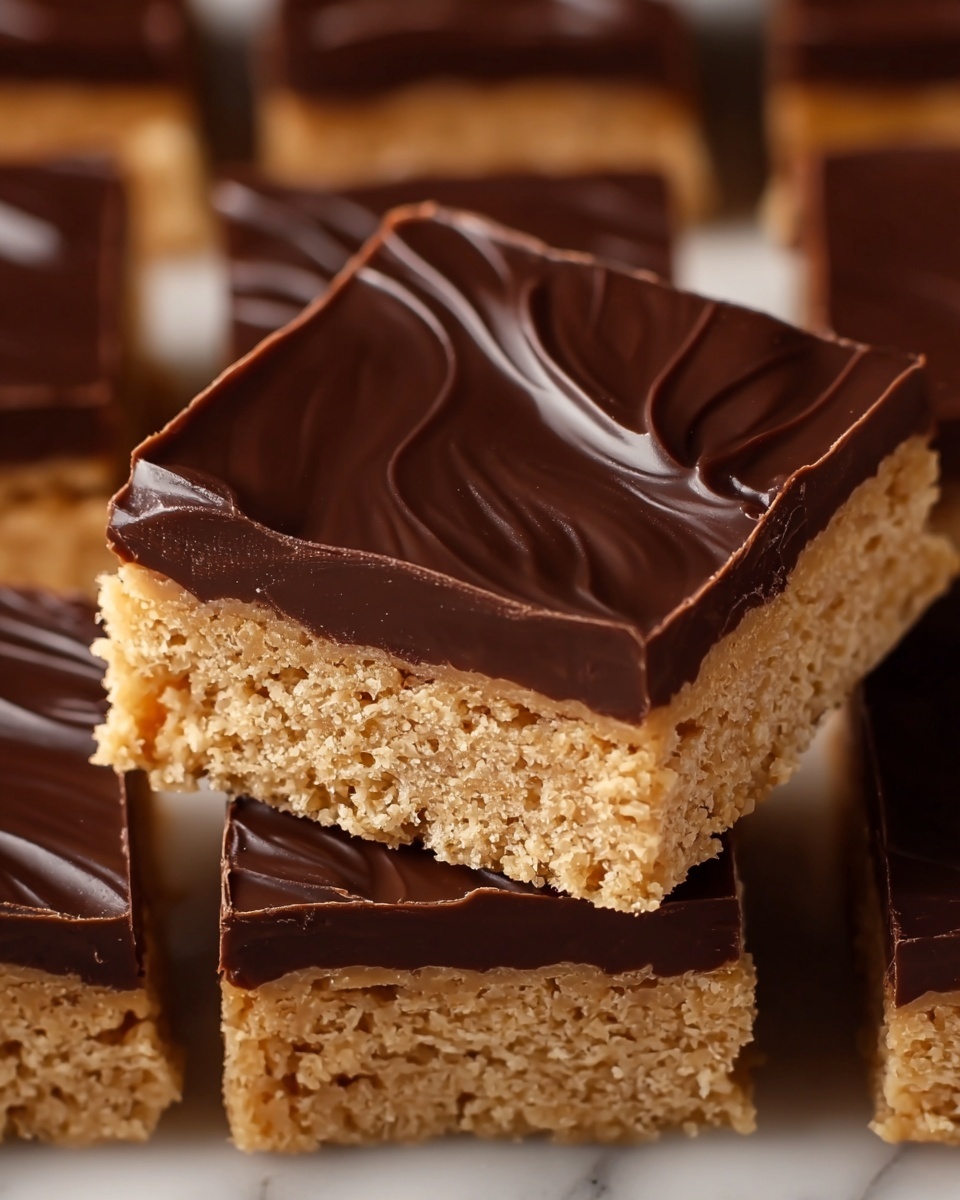
There is something truly magical about the Lunch Lady Peanut Butter Bars Recipe that takes me back to those cozy school days when a sweet treat could brighten the afternoon. These bars combine rich, creamy peanut butter with the delightful chew of oats and a luscious layer of melted chocolate, creating a nostalgic dessert that’s as comforting as it is irresistible. If you want a dessert that perfectly balances buttery sweetness and chocolatey goodness, this recipe is your new go-to indulgence.
Ingredients You’ll Need
Putting together the perfect Lunch Lady Peanut Butter Bars is all about simple, pantry-friendly ingredients that come together to create incredible flavor and texture. Each ingredient plays a vital role, from the softness of butter to the wholesome bite of oats, making these bars satisfyingly rich and delightfully chewy.
- 1 cup unsalted butter (softened): Provides a creamy base and rich flavor for the dough.
- 1 cup creamy peanut butter: Adds that distinctive peanut buttery richness to the batter.
- 1 cup granulated sugar: Sweetens the bars with classic granulated sugar texture.
- 1 cup packed brown sugar: Brings moisture and a deeper caramel flavor for extra chewiness.
- 2 large eggs: Bind all the ingredients together perfectly and give structure.
- 1 teaspoon vanilla extract: Enhances the flavors with a warm, aromatic touch.
- 2 cups all-purpose flour: Provides the necessary foundation for the bars’ crumb.
- 1 teaspoon baking soda: Helps the bars rise just enough to keep a tender crumb.
- 1/2 teaspoon salt: Balances sweetness and intensifies flavors.
- 2 cups quick oats: Adds wholesome texture and a wholesome dimension to every bite.
- 1 ½ cups creamy peanut butter (for topping): Creates a smooth, luscious peanut butter layer under the chocolate.
- 2 cups semi-sweet chocolate chips: Provides the perfect sweet, melty topping for a chocolate-peanut butter dream.
How to Make Lunch Lady Peanut Butter Bars Recipe
Step 1: Preheat and Prepare
Start by preheating your oven to 350°F (175°C) and lightly greasing a 9×13-inch baking pan or lining it with parchment paper. This little step ensures your peanut butter bars will come out perfectly without sticking, making cleanup a breeze.
Step 2: Cream the Butter and Sugars
In a large bowl, cream together the softened butter, 1 cup of peanut butter, granulated sugar, and brown sugar until the mixture is light and fluffy. This is where that melt-in-your-mouth texture begins to form, so take your time with this step for the best results.
Step 3: Add Eggs and Vanilla
Beat the eggs into your creamy mixture one at a time, then stir in the vanilla extract. These ingredients add moisture and richness that make the bars tender and flavorful inside.
Step 4: Combine Dry Ingredients
In a separate bowl, whisk together the all-purpose flour, baking soda, salt, and quick oats. Mixing the dry ingredients first ensures that everything is evenly distributed and your bars bake evenly every time.
Step 5: Mix Wet and Dry Ingredients
Gradually add the dry mixture to the wet ingredients. Stir gently but thoroughly until everything is fully combined, making sure your batter looks uniform with no pockets of flour.
Step 6: Bake the Bars
Spread the dough evenly into your prepared baking pan, smoothing the surface for an even bake. Pop it into the oven and bake for 20 to 25 minutes until the edges turn golden and the center is set. This baking window is crucial for that perfect balance between chewy and cakey.
Step 7: Apply Peanut Butter Layer
Once out of the oven and slightly cooled (about 5 to 10 minutes), gently spread the remaining 1 ½ cups of creamy peanut butter over the warm bars. This step creates that signature luscious middle layer that makes the Lunch Lady Peanut Butter Bars Recipe so special.
Step 8: Top with Melted Chocolate
Finally, melt the chocolate chips in the microwave using 30-second intervals, stirring until smooth and glossy. Spread this melted chocolate evenly over the peanut butter layer. Let everything set at room temperature or pop it in the fridge for a firmer finish before slicing into those glorious bars.
How to Serve Lunch Lady Peanut Butter Bars Recipe
Garnishes
Sprinkle a handful of chopped peanuts or a light dusting of flaky sea salt on top of the chocolate layer for a crunch and an extra flavor punch. You can also drizzle white chocolate for a pretty contrast if you want to impress your guests visually.
Side Dishes
Pair these bars with a cold glass of milk or a hot cup of coffee to balance the sweetness and complement the peanut butter notes beautifully. They also make a playful addition to an afternoon snack platter with fresh fruit and nuts.
Creative Ways to Present
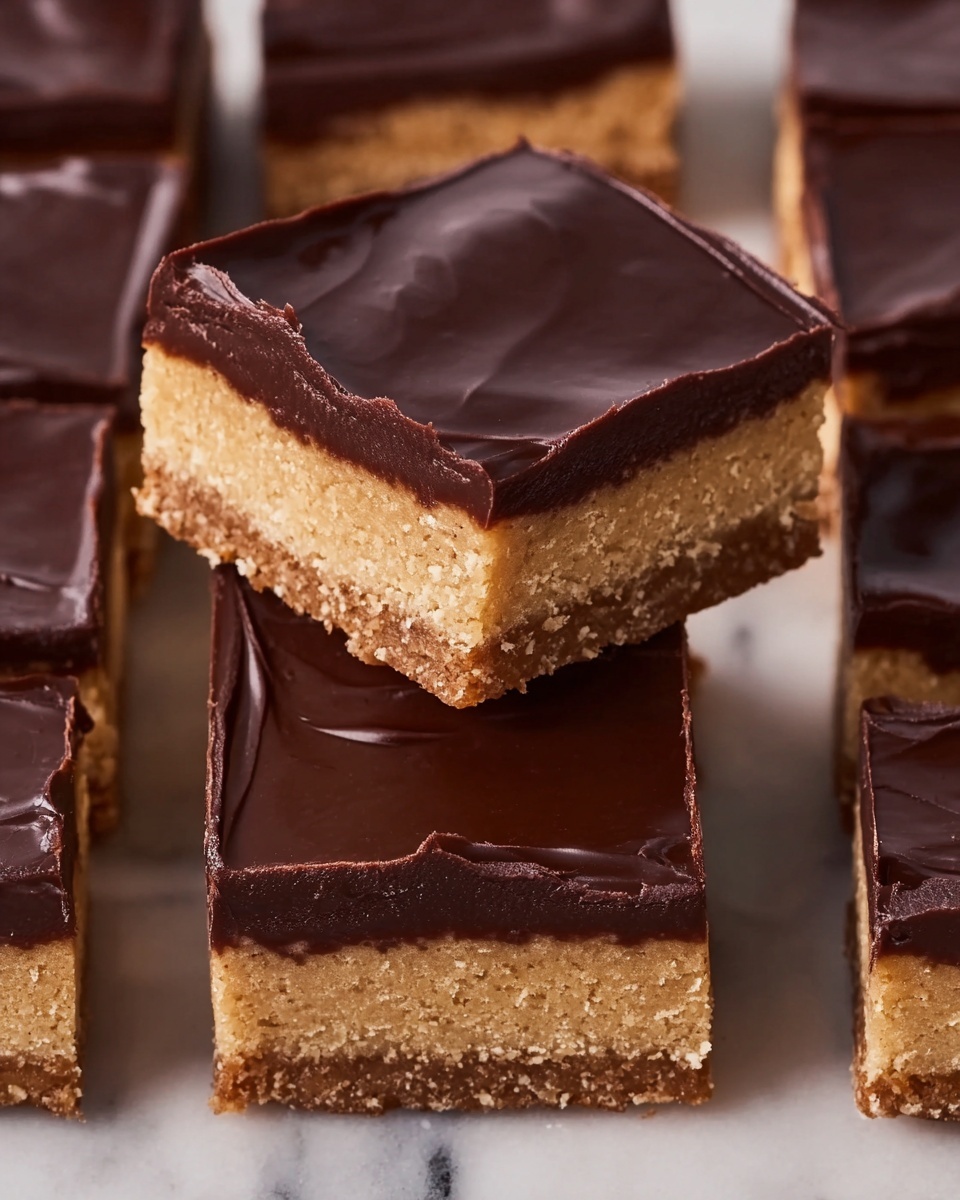
For special occasions, cut the bars into bite-sized squares and arrange them on a decorative platter for a delightful treat that’s easy for everyone to grab. You can even sandwich two bars with a scoop of vanilla ice cream for an unforgettable dessert experience.
Make Ahead and Storage
Storing Leftovers
Keep your leftover Lunch Lady Peanut Butter Bars in an airtight container at room temperature for up to five days. This keeps their texture just right — soft, chewy, and utterly delicious without drying out.
Freezing
If you want to enjoy these bars later, they freeze beautifully. Wrap them tightly in plastic wrap and place in a freezer-safe container for up to three months. Thaw them at room temperature or in the refrigerator overnight for the best texture.
Reheating
For a warm, melty treat, microwave a single bar for about 10 to 15 seconds. This little heat-up brings the chocolate back to gooey perfection and softens the peanut butter layer, making every bite feel freshly baked.
FAQs
Can I use crunchy peanut butter instead of creamy?
Absolutely! Crunchy peanut butter will add a bit more texture and nutty crunch to the bars, enhancing the overall experience if you prefer an extra peanut punch.
Is it necessary to bake the bars before adding the topping?
Yes, baking the bars first helps set the base layer and allows the peanut butter and chocolate topping to stay distinct, creating those beautiful layers that are key to the classic Lunch Lady Peanut Butter Bars Recipe.
Can I substitute oats with something else?
If you’re not a fan of oats, try using crushed rice cereal or chopped nuts to maintain the texture and crunch. Keep in mind this will change the character of the bars slightly but can still be delicious!
How thick should I spread the peanut butter layer?
About 1/4 to 1/2 inch thick is ideal. It should be thick enough to taste distinctly but not so thick that it dominates the entire bar. You want a nice balance between peanut butter, oat bar, and chocolate.
What’s the best way to cut these bars cleanly?
Once fully set, use a sharp knife warmed under hot water and dried before slicing. This helps you achieve clean edges without the chocolate cracking or peanut butter smearing.
Final Thoughts
If you’re in the mood for a dessert that wraps up childhood memories with unbeatable flavor, the Lunch Lady Peanut Butter Bars Recipe is a heartfelt must-try. Rich, chewy, and layered with peanut butter and chocolate, these bars bring that perfect mix of nostalgia and indulgence. Whip them up and share the joy with friends or keep them close as your own little sweet secret.
Print
Lunch Lady Peanut Butter Bars Recipe
- Prep Time: 20 minutes
- Cook Time: 25 minutes
- Total Time: 45 minutes
- Yield: 24 bars
- Category: Dessert
- Method: Baking
- Cuisine: American
- Diet: Vegetarian
Description
Lunch Lady Peanut Butter Bars are a nostalgic American dessert featuring a buttery, peanut buttery base topped with creamy peanut butter and a smooth layer of melted semi-sweet chocolate. These chewy, richly flavored bars blend oats and peanut butter for a perfect balance of texture and taste, making them a beloved school cafeteria treat.
Ingredients
Base Ingredients
- 1 cup unsalted butter (softened)
- 1 cup creamy peanut butter
- 1 cup granulated sugar
- 1 cup packed brown sugar
- 2 large eggs
- 1 teaspoon vanilla extract
- 2 cups all-purpose flour
- 1 teaspoon baking soda
- 1/2 teaspoon salt
- 2 cups quick oats
Topping Ingredients
- 1 ½ cups creamy peanut butter (for topping)
- 2 cups semi-sweet chocolate chips
Instructions
- Preheat and Prepare Pan: Preheat the oven to 350°F (175°C) and lightly grease a 9×13-inch baking pan or line it with parchment paper to prevent sticking.
- Cream Butter and Sugars: In a large bowl, cream together the softened butter, 1 cup peanut butter, granulated sugar, and brown sugar until the mixture is light and fluffy, which usually takes a few minutes using an electric mixer.
- Add Eggs and Vanilla: Beat in the eggs one at a time followed by the vanilla extract, mixing well after each addition to ensure even incorporation.
- Combine Dry Ingredients: In a separate bowl, whisk together the all-purpose flour, baking soda, salt, and quick oats to evenly distribute the leavening agents and salt throughout the mixture.
- Mix Dry into Wet: Gradually add the dry ingredients to the wet ingredients, mixing just until fully combined to avoid overworking the dough, which can make the bars tough.
- Spread Dough and Bake: Spread the dough evenly into the prepared 9×13-inch pan, smoothing the top. Bake in the preheated oven for 20–25 minutes, or until the edges are golden and a toothpick inserted into the center comes out clean.
- Cool Slightly and Add Peanut Butter Layer: Remove from the oven and let cool for 5–10 minutes. While still warm, gently spread the remaining 1 ½ cups of creamy peanut butter evenly over the bars to form a smooth layer. Allow the bars to cool completely.
- Melt Chocolate: Melt the semi-sweet chocolate chips in the microwave in 30-second intervals, stirring thoroughly between intervals until smooth and fully melted to prevent burning.
- Top with Chocolate and Set: Spread the melted chocolate evenly over the peanut butter layer. Let the bars set at room temperature or refrigerate until the chocolate is firm before slicing into 24 bars for serving.
Notes
- For clean, distinct layers, allow the bars to cool completely before adding the melted chocolate.
- For a creative twist, swirl the peanut butter and chocolate layers together for a marbled effect.
- Store the bars in an airtight container at room temperature for up to 5 days to maintain freshness.


