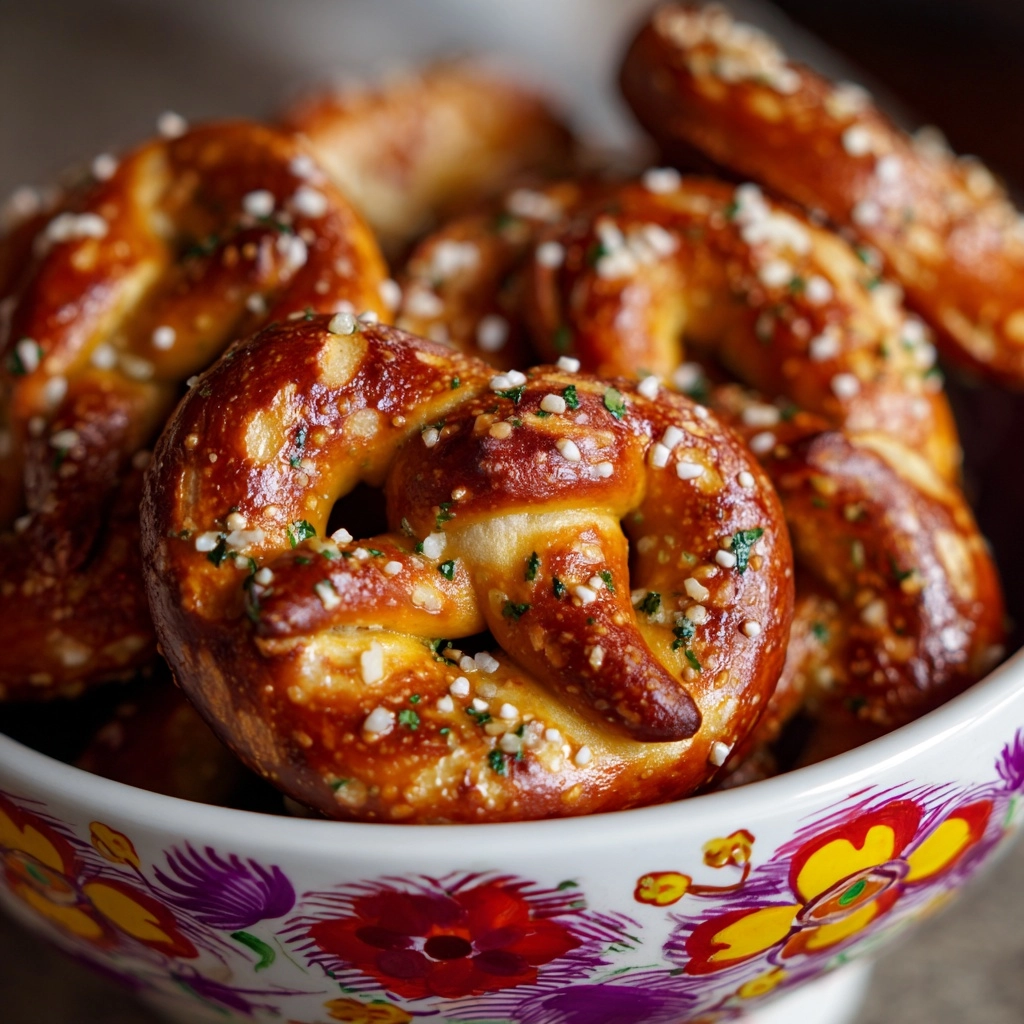
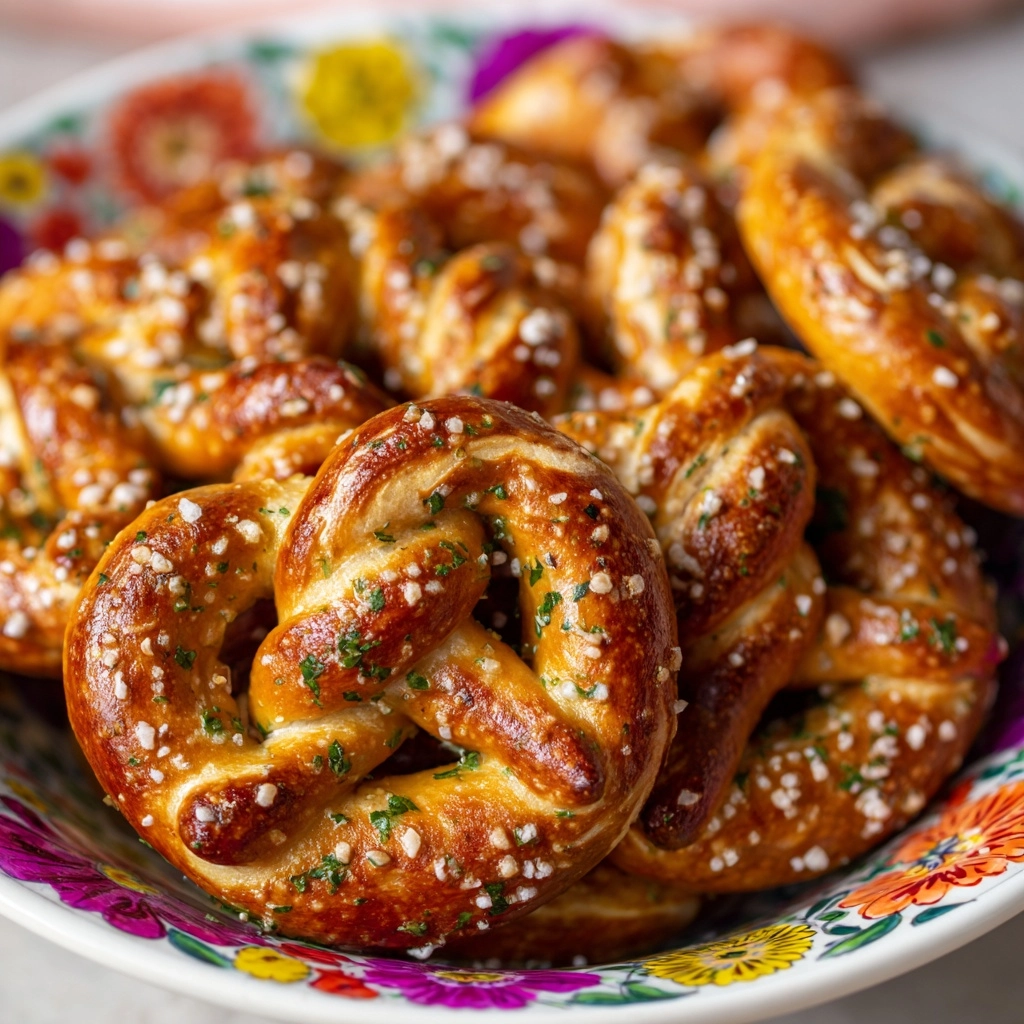
If you crave a crunchy, irresistibly savory snack that’s a breeze to whip up and wildly addictive to munch, Garlic Ranch Pretzels might just become your new favorite. Infused with garlicky goodness, ranch tang, and herby dill, these pretzels are perfect for game nights, road trips, or any moment when you need a little flavor-packed happiness in your life. Whether you share them at a party or keep them all for yourself (no judgment here!), this recipe is quick, easy, and sure to win over anyone who takes a bite.
Ingredients You’ll Need
Ingredients You’ll Need
This recipe shines because of its simple, top-notch ingredients—each one has a role in creating the signature punchy taste and satisfying crunch. Grab these pantry staples, and let’s break down what makes each so essential.
- Pretzels: Mini pretzels deliver the ideal salty crunch and are the classic base for soaking up all those bold flavors.
- Vegetable oil: Helps all the seasonings adhere to the pretzels, ensuring every bite is packed with flavor and has a delicious, glistening finish.
- Ranch seasoning mix: The not-so-secret superstar that gives these Garlic Ranch Pretzels their zesty, cool, ranchy tang.
- Garlic powder: The namesake ingredient brings its aromatic punch to every mouthful without overpowering the other flavors.
- Onion powder: A subtle background note that rounds out the savory profile and amplifies the ranch vibe.
- Dried dill (optional): Adds a pop of freshness and herby brightness to the finished snack. Use it if you love that little extra something!
How to Make Garlic Ranch Pretzels
Step 1: Preheat the Oven
Set your oven to 275°F to get it warming while you prep. A low baking temperature is important here—not only does it crisp up the pretzels without burning them, but it also helps the seasoning stick and bake gently onto every nook and cranny.
Step 2: Mix the Seasoning
Grab a large mixing bowl and whisk together the vegetable oil, ranch seasoning, garlic powder, onion powder, and dried dill if you’re using it. This blend smells incredible and will make your kitchen feel like a flavor factory!
Step 3: Coat the Pretzels
Add the pretzels straight into the bowl and toss them really well, ensuring every pretzel is evenly coated in the garlicky ranch mixture. You want no pretzel left behind—full coverage guarantees maximum flavor in every bite.
Step 4: Bake to Perfection
Transfer your seasoned pretzels to a large baking sheet, spreading them out in a single layer. Bake for 20 minutes, pausing at the halfway mark to give them a quick stir so they toast and crisp up evenly. They’ll come out golden, crunchy, and gloriously fragrant.
Step 5: Cool and Enjoy
Let the Garlic Ranch Pretzels cool completely on the baking sheet before digging in. This little bit of patience gives them their perfect snap and lets the flavors settle. Once cool, snack away or store for later!
How to Serve Garlic Ranch Pretzels
Garnishes
A sprinkle of fresh chopped parsley or a touch more dried dill added right before serving can make these pretzels look as vibrant as they taste. If you really want to up the ante, try a light dusting of Parmesan just out of the oven for a flavorful, cheesy twist.
Side Dishes
Garlic Ranch Pretzels shine on snack boards alongside sharp cheeses, olives, or crunchy veggie sticks. They also pair deliciously with dips—think creamy hummus, ranch dip, or a spicy mustard. For a savory snack spread, set them out with party classics like seasoned nuts and popcorn.
Creative Ways to Present
Turn these pretzels into a thoughtful edible gift by bagging them in cellophane with a festive ribbon, or pile them into a mason jar for a rustic, homemade touch. For parties, serve Garlic Ranch Pretzels in mini bowls or paper cones, so everyone can grab a handful and mingle.
Make Ahead and Storage
Storing Leftovers
Once completely cool, transfer the pretzels to an airtight container. They’ll stay fresh and crunchy for up to a week, making them perfect for spontaneous snacking. Keep them away from humidity and strong odors to preserve their flavor.
Freezing
You can absolutely freeze Garlic Ranch Pretzels if you want to prep them in advance. Once cooled, seal them in a freezer-safe bag or container and freeze for up to 2 months. Thaw at room temperature for about 30 minutes and they’ll be ready to please.
Reheating
If your pretzels lose any crunch, pop them in a 275°F oven for 5-7 minutes to revive their crispness. Just let them cool briefly afterward. This quick refresh works like magic, especially after freezing or long-term storage.
FAQs
Can I use different shapes or sizes of pretzels?
Absolutely! Mini pretzels are classic for Garlic Ranch Pretzels, but twists, sticks, or even pretzel nuggets work beautifully. Just keep in mind that baking time may vary slightly, so keep an eye out to avoid over-browning.
Is there a healthier oil I can use instead of vegetable oil?
Yes, you can swap in a neutral oil like avocado or canola oil if you prefer. Even light olive oil can work, as long as you stick with something fairly neutral so the ranch and garlic flavors remain front and center.
How do I make these pretzels spicy?
If you’re a fan of heat, simply add a pinch of cayenne pepper or crushed red pepper flakes to your seasoning mix. Start with a small amount and build to your taste—these snacks can handle as much kick as you like!
Can I double or halve the recipe?
Definitely. Garlic Ranch Pretzels scale up or down perfectly. Just adjust the mixing bowl and baking sheet sizes as needed, and make sure the pretzels are spread in a single layer for even baking.
What’s the best way to keep the pretzels crisp?
Store them in a truly airtight container and let them cool fully before sealing them up. If you’re serving at a party, only keep out what you’ll eat within the hour, and replenish as needed to keep every handful as crunchy as the first.
Final Thoughts
Honestly, once you try Garlic Ranch Pretzels, you’ll want a bowl within reach at all times! They’re a quick snack with big flavor, and impossibly easy to make. Share them with friends, take them on the go, or treat yourself anytime—you’re in for a seriously tasty snack adventure.