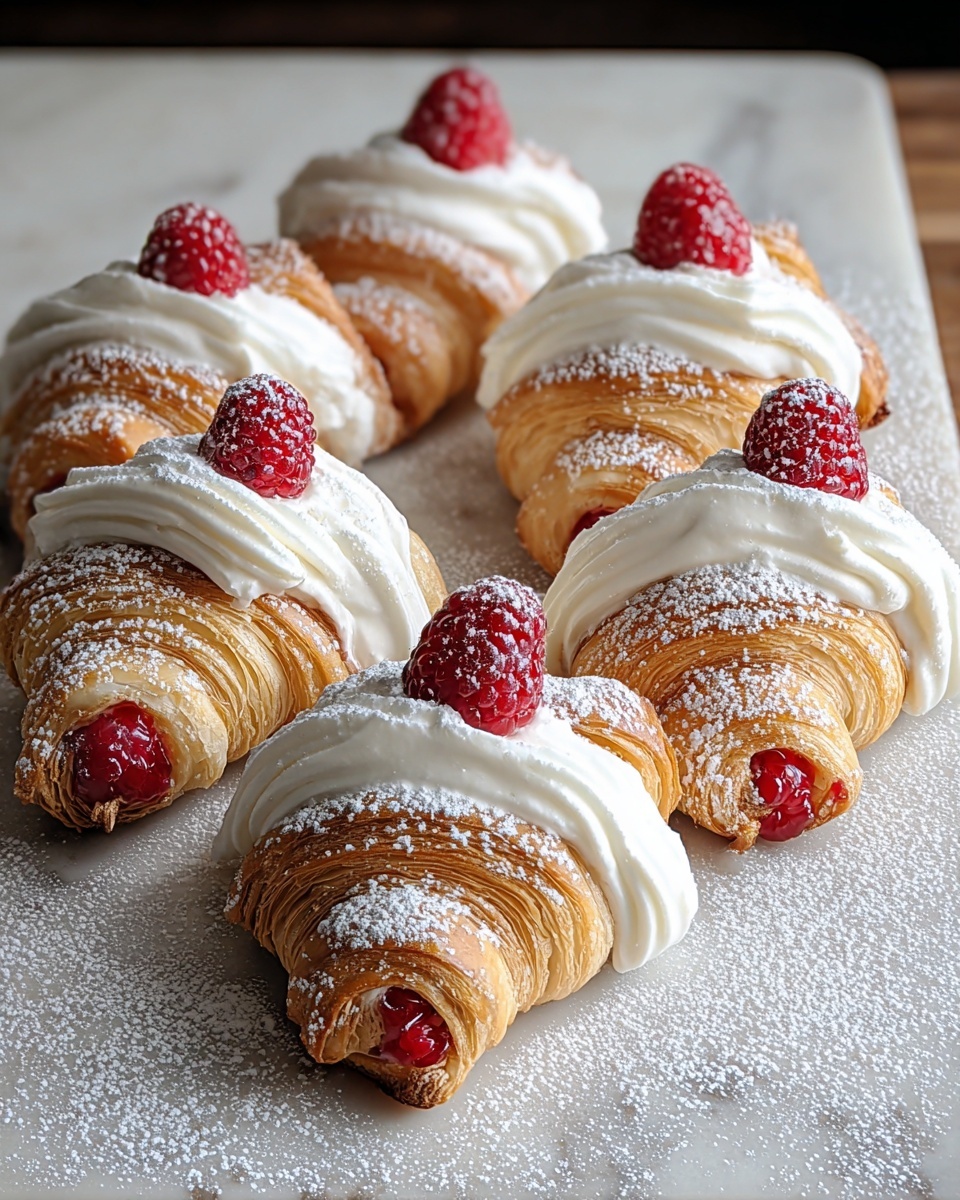
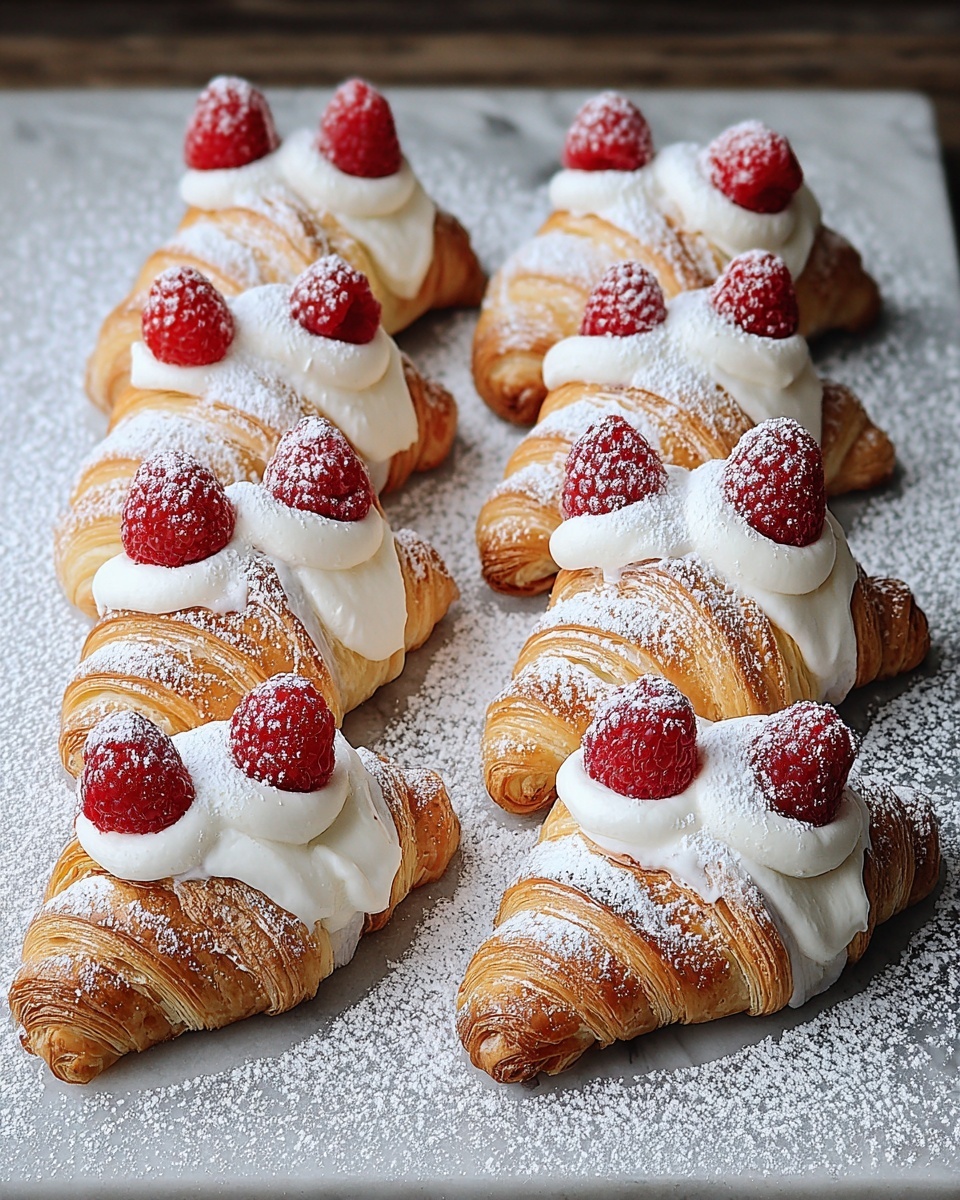
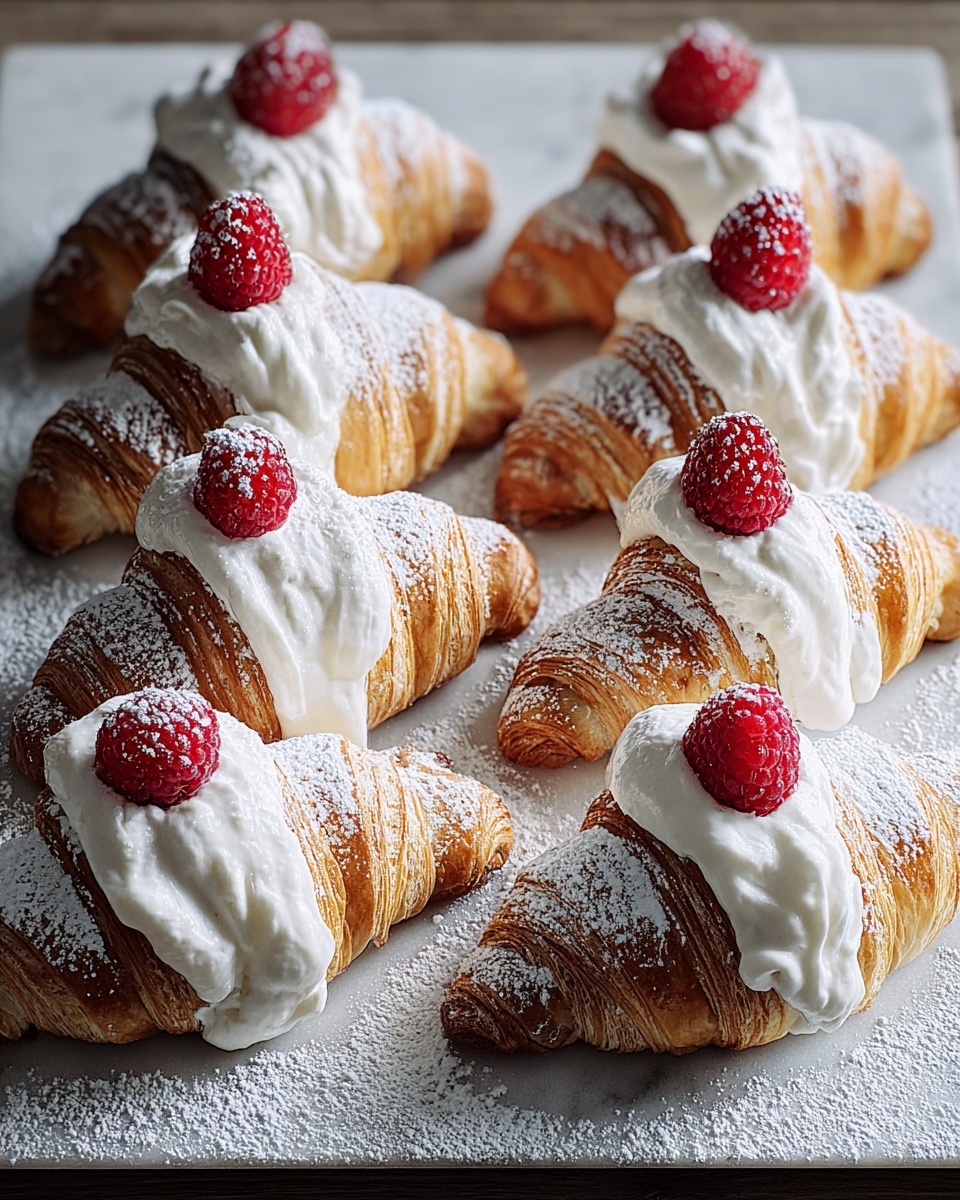
If you have a sweet tooth and a love for classic pastries, this Cream Horns Recipe will soon become your go-to treat. These delicate, golden puff pastry spirals filled with silky whipped cream are a perfect harmony of crispness and softness, offering a light yet indulgent dessert that feels fancy but is surprisingly easy to make at home. Whether it’s for a special occasion or an everyday delight, this Cream Horns Recipe brings an irresistible charm to your dessert table.
Ingredients You’ll Need
Don’t let the simplicity of these ingredients fool you; each one plays a crucial role in creating the perfect Cream Horns Recipe. From the flaky puff pastry to the sweet, fluffy cream filling, every component adds a unique texture and flavor that makes these pastries so special.
- 1 package (17.3 oz) puff pastry sheets (2 sheets): The flaky, buttery pastry forms the crisp outer shell that’s essential for cream horns.
- 1 cup heavy cream: Whips into the light, smooth filling that contrasts beautifully with the pastry.
- ½ cup powdered sugar: Sweetens the cream without graininess, keeping the filling silky.
- 1 tsp vanilla extract: Adds warm, comforting flavor to the whipped cream.
- 1 tsp almond extract (optional): Offers a subtle nutty note for those who love a twist on the classic flavor.
- 2 tbsp cocoa powder (optional): Perfect for chocolate lovers wanting a rich variation.
How to Make Cream Horns Recipe
Step 1: Preparing the Puff Pastry
Start by preheating your oven to 400°F (200°C) and rolling out those puff pastry sheets until they’re about 1/8 inch thick. This ensures your pastry will bake evenly with perfect flakiness, the signature texture of a great cream horn.
Step 2: Cutting and Wrapping
Cut the dough into 1-inch-wide strips. Wrap each strip carefully around cream horn molds, overlapping slightly to seal the edges together. This creates the charming spiral shape that holds the luscious filling.
Step 3: Baking to Golden Perfection
Place your wrapped molds on a parchment-lined baking sheet and pop them into the oven. Bake for 12 to 15 minutes until the pastry is golden brown and puffed up. That golden color means crunchy, buttery success.
Step 4: Cooling Before Filling
Once baked, cool the pastries slightly before gently sliding them off the molds. Let them cool completely on a wire rack so they stay crisp and don’t get soggy when filled.
Step 5: Whipping the Cream Filling
In a chilled bowl, whip the heavy cream until soft peaks form. Add the powdered sugar and vanilla extract (and almond extract or cocoa powder if you fancy) and continue whipping until stiff peaks form. This luscious filling is what makes the Cream Horns Recipe so irresistible.
Step 6: Filling and Finishing Touches
Use a piping bag to fill each cooled horn with the whipped cream. A generous filling ensures every bite has that perfect cream-to-pastry ratio. Finish by dusting lightly with powdered sugar for an elegant, sweet sparkle.
How to Serve Cream Horns Recipe
Garnishes
You can keep it classic with a dusting of powdered sugar or experiment with fresh berries for a pop of color and tartness that balances the sweetness. A sprinkle of cocoa powder or finely chopped nuts can add texture and flair without overpowering the delicate flavors.
Side Dishes
Cream horns pair beautifully with a simple cup of coffee or tea, creating a delightful afternoon pick-me-up. For brunch or dessert spreads, serve alongside fresh fruit or a light fruit compote to add brightness and variety to your offering.
Creative Ways to Present
Try arranging your cream horns standing upright in a decorative glass or vase to create an eye-catching centerpiece. For a party, fill some horns with chocolate cream or lemon curd as surprises among the traditional ones—this playful twist will wow your guests and showcase the versatility of the Cream Horns Recipe.
Make Ahead and Storage
Storing Leftovers
If you have leftovers (which is rare, because they’re so good!), store the cream horns in an airtight container in the refrigerator. They’re best enjoyed within 1 to 2 days to keep the pastry crisp and the cream fresh.
Freezing
While the pastry horns themselves freeze well if wrapped tightly, the filled cream does not fare as well. For best results, freeze the baked pastry shells before filling. Thaw them gently, then fill just before serving to maintain the best texture and taste.
Reheating
Reheating filled cream horns is not recommended as the cream filling can melt and make the pastry soggy. If you want warm pastry, briefly heat the unfilled shells in a low oven, then fill once they have cooled slightly.
FAQs
Can I make cream horns without cream horn molds?
Absolutely! You can improvise with metal cones or craft sturdy cones from heavy-duty aluminum foil. The key is maintaining the shape while baking so the pastry puffs up nicely.
How long does the whipped cream filling last?
The whipped cream filling is freshest when enjoyed within 24 hours. After this, it can begin to separate or lose volume, so it’s best to pipe the filling shortly before serving.
Can I flavor the cream filling differently?
Yes! Vanilla is classic, but you can add almond extract, cocoa powder, or even a hint of citrus zest to customize the cream filling to your taste.
Is there a way to make this recipe dairy-free?
You can use dairy-free puff pastry and substitute coconut cream or a dairy-free whipping cream alternative. Keep in mind the texture and flavor will vary slightly from the traditional recipe.
Why is my puff pastry not puffing up nicely?
Make sure your puff pastry is fully thawed but still cold before rolling. Also, avoid over-handling the dough, and ensure your oven is fully preheated to get that perfect puff.
Final Thoughts
I can’t recommend this Cream Horns Recipe enough if you want to impress with a dessert that’s as delightful to make as it is to eat. With just a handful of simple ingredients and easy steps, you’ll create flaky, creamy treats that bring smiles around the table. Go ahead and try this recipe—you might just find your new favorite pastry!
Print
Cream Horns Recipe
- Prep Time: 30 minutes
- Cook Time: 15 minutes
- Total Time: 45 minutes
- Yield: 8 servings
- Category: Dessert
- Method: Baking
- Cuisine: European
Description
Delightful and crispy cream horns made from flaky puff pastry, filled with sweetly whipped cream flavored with vanilla and optional almond and cocoa accents. Perfect as a classic dessert or an elegant teatime treat.
Ingredients
Pastry
- 1 package (17.3 oz) puff pastry sheets (2 sheets)
Filling
- 1 cup heavy cream
- ½ cup powdered sugar
- 1 tsp vanilla extract
- 1 tsp almond extract (optional)
Optional
- 2 tbsp cocoa powder (optional)
- Powdered sugar for dusting
Instructions
- Preheat and Prepare Pastry: Preheat your oven to 400°F (200°C). Roll out the puff pastry sheets to about 1/8 inch thickness to ensure even baking and a delicate flaky texture.
- Shape the Horns: Cut the pastry into 1-inch wide strips. Wrap each strip tightly around cream horn molds, overlapping the edges slightly to prevent them from unraveling during baking.
- Bake Pastry Shells: Place the wrapped molds on a parchment-lined baking sheet and bake for 12-15 minutes, or until the pastry turns a beautiful golden brown and is crisp to the touch.
- Cool Pastry: Allow the pastry to cool slightly, then gently remove the molds. Transfer the horns onto a wire rack and let them cool completely to retain crispness.
- Prepare Whipped Cream Filling: In a mixing bowl, whip the heavy cream until soft peaks form. Gradually add the powdered sugar and vanilla extract (and almond extract if using), whipping further until stiff peaks develop.
- Fill and Serve: Using a piping bag, fill the cooled pastry horns with the whipped cream filling. Dust with powdered sugar for an elegant finish and serve immediately for the best texture.
Notes
- You can gently dust the horns with cocoa powder along with the powdered sugar for a chocolatey variation.
- For ease, chill the cream horn molds before winding the pastry to prevent sticking.
- If you don’t have molds, you can make improvised ones using aluminum foil shaped into cones.
- Serve cream horns shortly after filling to prevent the pastry from becoming soggy.


