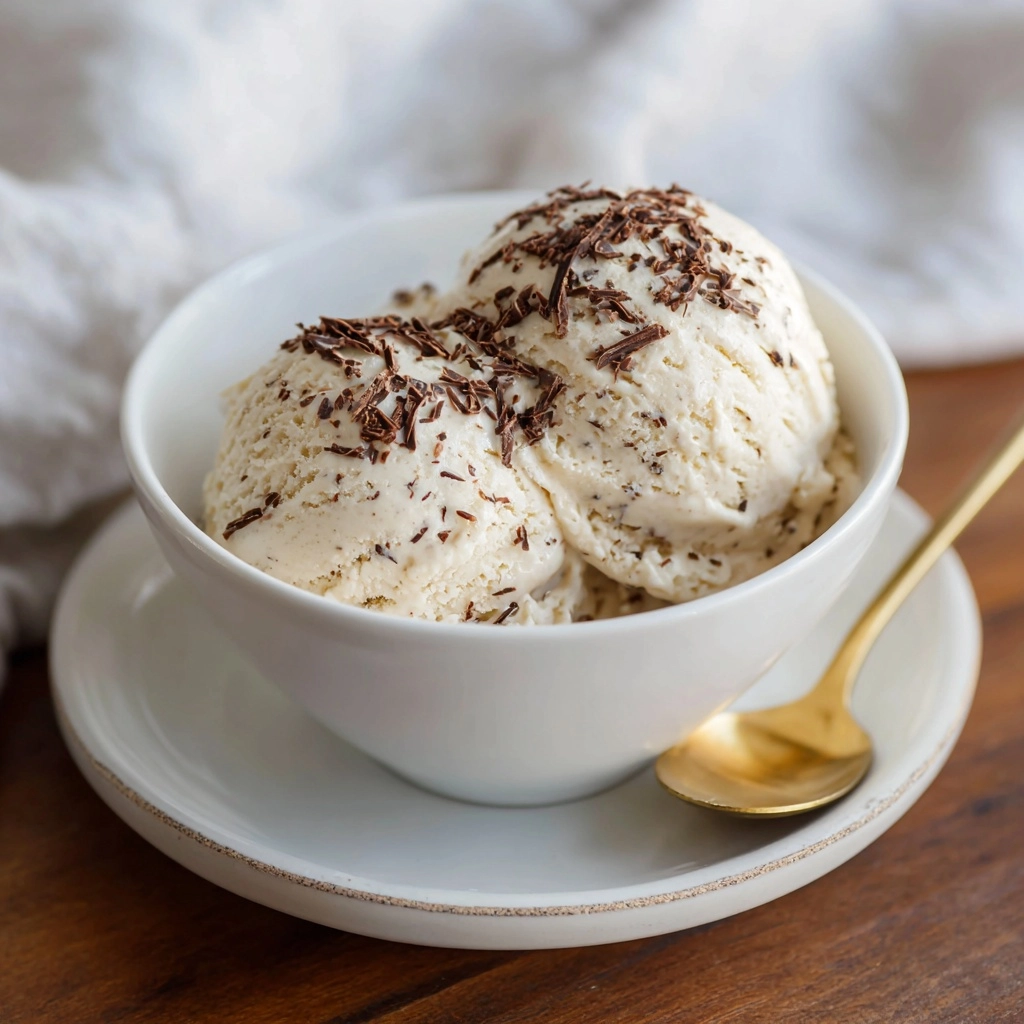
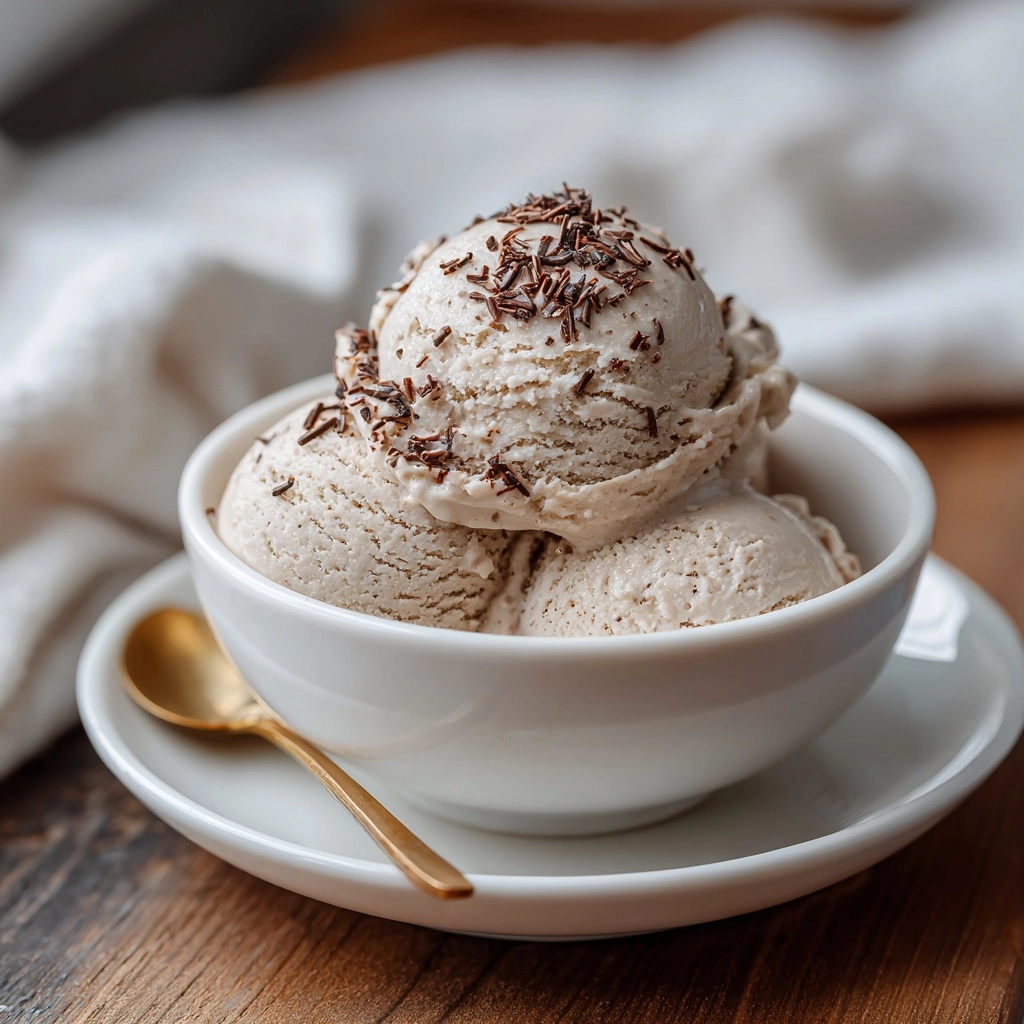
Indulgent, creamy, and bold, Coffee Ice Cream is the perfect marriage of rich coffee flavors and ultra-smooth, homemade custard. Every spoonful is a sweet, grown-up treat that’s both comforting and a little bit exciting—imagine the best café latte you’ve ever had, now perfectly frozen and endlessly scoopable. The allure of this Coffee Ice Cream is that it’s downright easy to make from scratch, yet it delivers a flavor so deep and satisfying, you’ll wonder why you ever settled for store-bought versions. This recipe will take you through every step, from making a luscious custard base to creating that signature dreamy texture that coffee lovers crave.
Ingredients You’ll Need
You’ll find these ingredients are simple kitchen staples, but each plays a crucial role in building layers of flavor and silky-smooth texture. Using the right components ensures that every bite of your Coffee Ice Cream is as robust and creamy as it should be—no shortcuts here, just pure, delicious intent.
- Heavy cream: Brings that irresistibly rich and creamy base to the ice cream, giving it body and a luxurious mouthfeel.
- Whole milk: Lends balance so the texture isn’t too dense, making each scoop perfectly scoopable straight from the freezer.
- Granulated sugar: Sweetens up the mix just right and also helps prevent the ice cream from getting icy.
- Instant espresso powder or instant coffee granules: Delivers that deep coffee punch—use more for a bolder flavor or stick to one tablespoon for a classic touch.
- Egg yolks: The key to a custardy, ultra-smooth texture; they help thicken the base to lavish perfection.
- Vanilla extract: Subtly rounds out the coffee’s robustness, adding warmth and balance to each bite.
- Salt: Just a pinch enhances every other flavor, bringing the whole dessert together.
How to Make Coffee Ice Cream
Step 1: Warm the Milk, Sugar, Coffee, and Salt
Pour your whole milk, sugar, espresso powder or coffee granules, and a pinch of salt into a medium saucepan. Set it over medium heat and stir gently until the sugar and coffee are completely dissolved. You want this mixture to get hot but not steaming or bubbling. The aroma at this stage will have your kitchen smelling like your favorite coffee shop!
Step 2: Temper the Egg Yolks
Separate your egg yolks into a medium bowl. Now slowly trickle about 1/2 cup of the hot milk mixture into the yolks while constantly whisking. This step helps bring the temperature of the eggs up gradually, preventing them from scrambling. Once combined and smooth, you’re ready to add the eggs back into the mix.
Step 3: Cook the Custard Base
Gently pour the tempered yolk mixture back into the saucepan with the rest of the milk. Cook over medium-low heat, stirring constantly with a heatproof spatula or wooden spoon. The mixture will thicken after about 5 to 7 minutes—when it coats the back of a spoon, it’s perfect. Be careful not to let it boil, which could curdle the eggs.
Step 4: Add Cream and Vanilla
Take the pan off the heat right away and stir in the heavy cream and vanilla extract. This not only cools the base a bit but infuses it with that lush, aromatic vanilla warmth, balancing the intense coffee edge.
Step 5: Strain and Chill the Mixture
For the silkiest texture, strain your custard through a fine-mesh sieve into a clean bowl—to catch any tiny curdled bits and guarantee smoothness. Let it cool to room temperature, then cover and refrigerate for at least 4 hours, or even overnight. The wait is worth it for the deepest flavor.
Step 6: Churn the Coffee Ice Cream
When your custard is good and cold, pour it into your ice cream maker and churn according to your machine’s instructions, usually around 20–25 minutes. You’ll see it transform into a creamy, dreamy Coffee Ice Cream right before your eyes. If you love texture, toss in a handful of chocolate chunks or crushed espresso beans in the final minute.
Step 7: Freeze Until Firm
Scoop the churned ice cream into a freezer-safe container, smooth the top, and press a piece of parchment or wax paper directly onto the surface. Pop it in the freezer for an additional 2 to 4 hours so it firms up beautifully. When it’s ready, get out your favorite bowls or cones and enjoy!
How to Serve Coffee Ice Cream

Garnishes
Dress up your Coffee Ice Cream with a flourish of dark chocolate shavings, a sprinkle of cocoa powder, or even a few crushed biscotti for crunch. A light drizzle of caramel sauce and a pinch of flaky sea salt turn each scoop into a true showstopper.
Side Dishes
For a delightful pairing, serve Coffee Ice Cream alongside a fudgy brownie or a crisp almond cookie. It can also take a starring role atop a warm slice of pound cake, where the cold and creamy coffee flavor perfectly complements a buttery, crumbly base.
Creative Ways to Present
Don’t just stick to bowls! Try sandwiching Coffee Ice Cream between homemade chocolate chip cookies for dreamy ice cream sandwiches, or drop a scoop into a steaming shot of espresso to make an affogato. For a party, serve mini scoops in demitasse cups with tiny spoons for a charming twist.
Make Ahead and Storage
Storing Leftovers
Transfer any leftover Coffee Ice Cream to an airtight container and press a sheet of parchment or wax paper directly onto the surface before sealing. This helps keep the texture velvety and guards against pesky ice crystals, so every scoop stays as delicious as the first.
Freezing
Stored properly in the coldest part of your freezer, homemade Coffee Ice Cream will keep for up to two weeks. For best results, let the ice cream freeze undisturbed after churning, and always use a clean scoop to avoid introducing ice or moisture.
Reheating
While there’s no real “reheating” here, if your Coffee Ice Cream is too hard straight from the freezer, just let it rest on the counter for 5 to 10 minutes. This softens it to perfect scooping consistency and brings out its full, rich flavor.
FAQs
Can I make Coffee Ice Cream without an ice cream maker?
Absolutely! While the texture will be a bit different, you can pour the chilled custard base into a loaf pan, freeze it, and stir vigorously every 30 minutes for several hours until set. This helps break up ice crystals for a smoother finish.
Can I use decaf coffee instead of regular?
Yes, you can easily substitute decaf espresso powder or coffee granules. You’ll get all that delectable coffee flavor in your Coffee Ice Cream with none of the buzz—perfect for enjoying a scoop after dinner.
How can I intensify the coffee flavor?
If you really want your Coffee Ice Cream to stand out, try increasing the espresso powder by half a tablespoon, or choose a bold, high-quality instant espresso. Adding a shot of brewed espresso (cooled) can also boost the flavor.
What other mix-ins go well with Coffee Ice Cream?
Chocolate chunks, crushed chocolate-covered espresso beans, or even a swirl of caramel or fudge are all fantastic. Just add them during the last minute or so of the churning process for even distribution.
Is this recipe gluten-free?
Yes! Coffee Ice Cream made this way is naturally gluten-free as long as your instant coffee and vanilla are, too. Just double-check your brands if you’re serving anyone with sensitivities.
Final Thoughts
Making Coffee Ice Cream at home is a true treat for anyone who loves coffee or just craves something a little more grown-up in their dessert bowl. Trust me, it’s impossible not to fall in love with those creamy, bold scoops. Give this recipe a try, experiment with your own twists, and share it with someone special—you’ll never look at coffee or ice cream the same way again!
Print
Coffee Ice Cream Recipe
- Prep Time: 20 minutes (plus chilling and freezing time)
- Cook Time: 10 minutes
- Total Time: 30 minutes (active)
- Yield: 1 quart (8 servings)
- Category: Dessert
- Method: Churned
- Cuisine: American
- Diet: Vegetarian
Description
Indulge in the rich and creamy goodness of homemade Coffee Ice Cream. This decadent dessert features a velvety smooth texture with a bold coffee flavor that will satisfy any sweet tooth.
Ingredients
For the Coffee Ice Cream:
- 2 cups heavy cream
- 1 cup whole milk
- 3/4 cup granulated sugar
- 1 tablespoon instant espresso powder or instant coffee granules
- 5 large egg yolks
- 1 teaspoon vanilla extract
- pinch of salt
Instructions
- In a medium saucepan, combine the milk, sugar, espresso powder, and salt. Heat over medium heat, stirring until the sugar and coffee granules dissolve, and the mixture is hot but not boiling.
- In a separate bowl, whisk the egg yolks. Slowly pour about 1/2 cup of the hot milk mixture into the yolks while whisking constantly to temper the eggs.
- Gradually whisk the tempered yolks back into the saucepan. Cook over medium-low heat, stirring constantly, until the mixture thickens and coats the back of a spoon, about 5–7 minutes. Do not let it boil.
- Remove from heat and stir in the heavy cream and vanilla extract. Strain the custard through a fine-mesh sieve into a clean bowl to remove any cooked egg bits.
- Let cool to room temperature, then cover and refrigerate for at least 4 hours or overnight.
- Churn the chilled custard in an ice cream maker according to the manufacturer’s instructions until thick and creamy.
- Transfer to a container and freeze for 2–4 hours until firm.
Notes
- For stronger coffee flavor, increase the espresso powder to 1 1/2 tablespoons.
- Add mix-ins like chocolate chunks or crushed espresso beans during the last minute of churning for texture.
Nutrition
- Serving Size: 1/2 cup
- Calories: 260
- Sugar: 22g
- Sodium: 40mg
- Fat: 18g
- Saturated Fat: 11g
- Unsaturated Fat: 6g
- Trans Fat: 0g
- Carbohydrates: 23g
- Fiber: 0g
- Protein: 4g
- Cholesterol: 150mg


