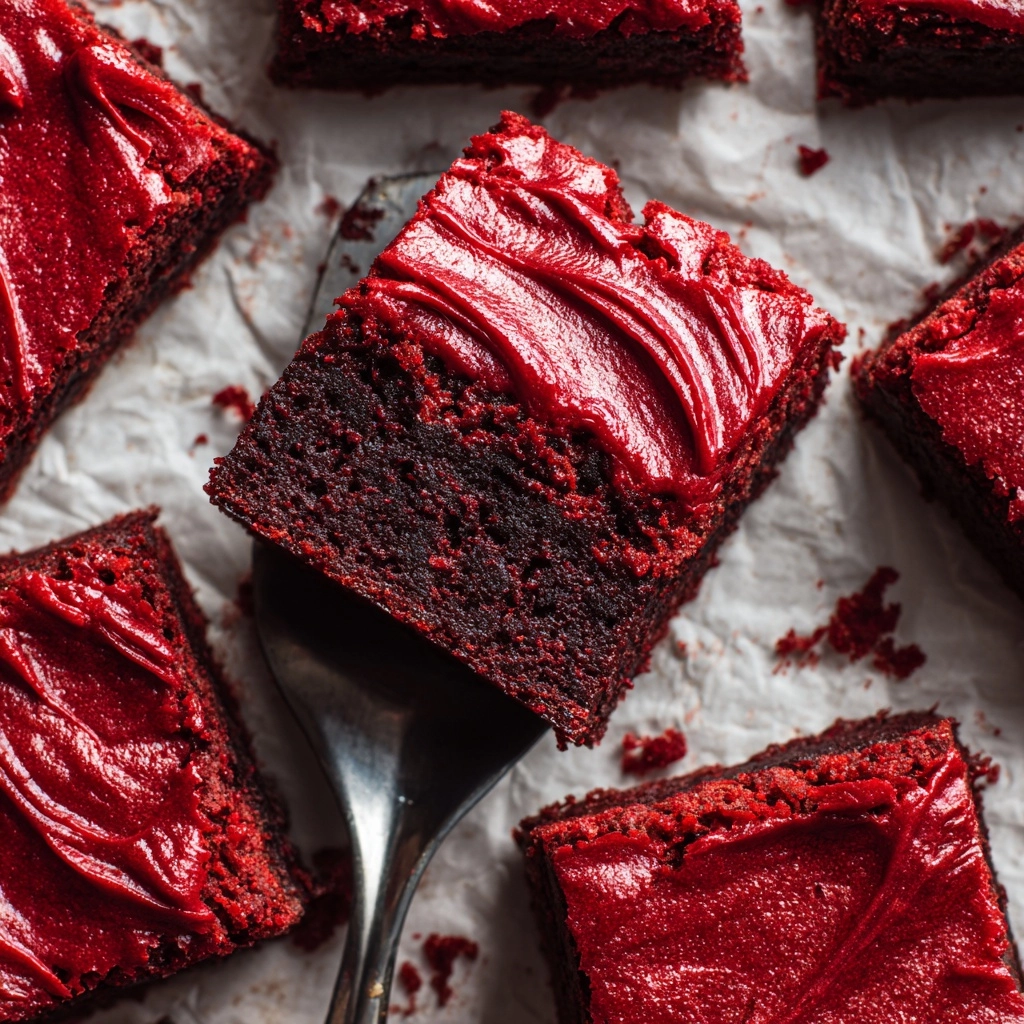
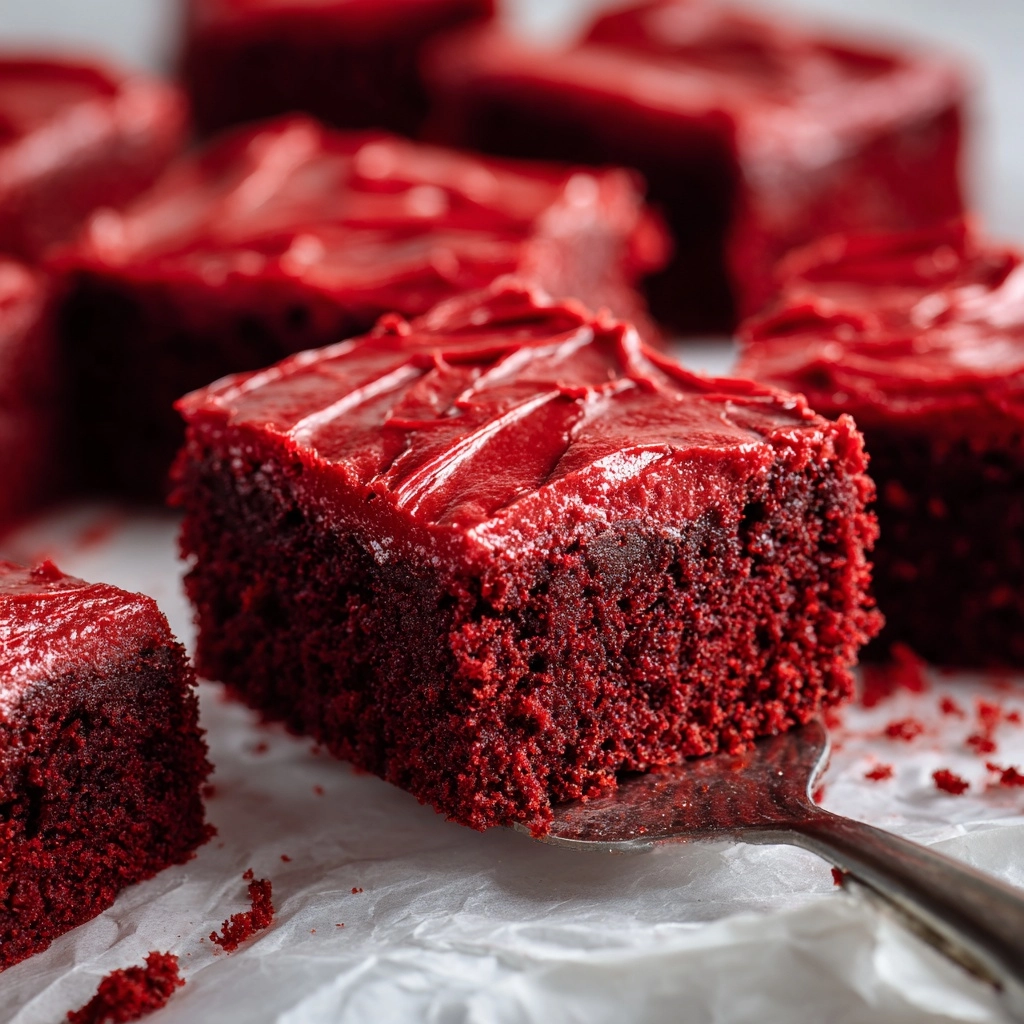
If you’re searching for an irresistible dessert that brings a stunning pop of color and unbeatable fudgy texture, look no further than these Red Velvet Brownies. They’re everything we adore about red velvet—rich with a hint of cocoa, vibrantly red, and impossibly tender—only with the deep, decadent chew of your favorite brownies. These beauties come together in under an hour, making them perfect for last-minute gatherings, special holidays, or simply anytime you’re craving a swoon-worthy treat.
Ingredients You’ll Need
All it takes is a handful of classic baking staples and a touch of red food coloring to whip up these gorgeous Red Velvet Brownies. Each ingredient has its own delightful role to play, from achieving that iconic color to perfecting their moist, fudgy crumb. Here’s what you’ll need, along with a few insider tips:
- Unsalted Butter (½ cup, melted): The secret to rich, melt-in-your-mouth brownies—using melted butter adds extra moisture and makes everything taste a touch more luxurious.
- Granulated Sugar (1 cup): This sweetens the batter and helps achieve that signature crackly brownie top.
- Large Eggs (2): Eggs add important structure and lend fudginess to each bite.
- Vanilla Extract (1 teaspoon): A dash of vanilla brings balance and depth, perfectly complementing the cocoa and red velvet flavor.
- Red Food Coloring (1 tablespoon): For that show-stopping crimson color—gel food coloring works best for intensity, but liquid absolutely does the trick.
- Unsweetened Cocoa Powder (⅓ cup): Just the right amount for a velvety chocolate undertone without overwhelming the classic red velvet vibe.
- All-Purpose Flour (¾ cup): The backbone of the brownies, giving them their soft, chewy texture.
- Salt (¼ teaspoon): A pinch to brighten and balance the flavors so each note of sweetness and chocolate shines.
- White Vinegar (½ teaspoon): The unsung hero! Vinegar enhances the red color and lends a slight tang that sets red velvet apart.
- Optional Topping (½ cup white chocolate chips or cream cheese frosting drizzle): For sweet pops of flavor and lovely visual flair—choose one or both to take these brownies totally over the top.
How to Make Red Velvet Brownies
Step 1: Prepare Your Pan and Ingredients
Begin by preheating your oven to 350°F (175°C). Line an 8×8-inch baking pan with a square of parchment paper or lightly grease it, making sure the corners are covered. This little effort makes lifting out the brownies a breeze (and keeps the edges soft and chewy).
Step 2: Whisk Together Butter and Sugar
In a large mixing bowl, whisk the melted butter and granulated sugar until the mixture is smooth and glossy. This step lays the foundation for that perfect, crinkly brownie top we all love. Don’t stop until it looks like pale caramel and feels thick—this signals the sugar has started dissolving, giving you super moist Red Velvet Brownies later on.
Step 3: Add Eggs, Vanilla, Red Food Coloring, and Vinegar
Crack in your eggs one at a time, followed by a splash of vanilla extract, your tablespoon of red food coloring, and the white vinegar. Whisk until the batter is deeply red, luxuriously silky, and everything is well combined. The vinegar may seem surprising, but it’s a key player for that signature red velvet zing!
Step 4: Sift and Add Cocoa, Flour, and Salt
Sift in the cocoa powder, flour, and salt right over your wet ingredients. This extra step guarantees your batter is lump-free and perfectly blended. Gently fold everything together using a spatula, being careful not to overmix—a few streaks of flour are just fine. Overmixing leads to cakey brownies, and we’re after supremely fudgy Red Velvet Brownies here.
Step 5: Pour, Top, and Bake
Pour your vivid red batter into the prepared pan and smooth it into the corners with a spatula. If desired, sprinkle white chocolate chips over the top for pockets of melty, sweet contrast. Pop the pan in the oven and bake for 25 to 30 minutes, until the edges look set but the center still has a slight wobble. A toothpick inserted should come out with a few moist crumbs attached—don’t overbake or you’ll miss out on maximum fudginess!
Step 6: Cool, Slice, and Optional Drizzle
Allow your brownies to cool completely in the pan—patience pays off, as this keeps them dense and easy to slice. For an extra decadent finish, drizzle with cream cheese frosting and let it set before cutting into squares. Each piece will be as beautiful as it is delicious, promising a jaw-dropping dessert spread!
How to Serve Red Velvet Brownies

Garnishes
When it comes to Red Velvet Brownies, the right finishing touch can make all the difference. Try a swirl of cream cheese frosting for that classic tang, or sprinkle on mini chocolate chips and a dusting of powdered sugar for extra pizzazz. Even a handful of fresh raspberries adds sweetness and a gorgeous color pop.
Side Dishes
To complete your dessert plate, pair these brownies with a scoop of creamy vanilla ice cream or a dollop of whipped cream. For something warm, a mug of rich hot chocolate or a robust espresso makes the ideal companion, setting off the brownies’ flavors beautifully.
Creative Ways to Present
Think beyond simple squares! Cut your Red Velvet Brownies into heart shapes for Valentine’s Day, layer them in parfait glasses with whipped cream for eye-catching brownie trifles, or break them into bite-sized cubes and skewer with strawberries for festive party treats. No one will ever call these brownies boring.
Make Ahead and Storage
Storing Leftovers
Red Velvet Brownies actually get even more irresistible the next day as the flavors deepen. Store leftover brownies in an airtight container at room temperature for up to three days, or refrigerate them to keep them fresh and fudgy for a bit longer.
Freezing
Want to make a batch in advance? Allow brownies to cool completely, then wrap each square tightly in plastic wrap and store in a freezer-safe zip bag or container. They’ll keep well for up to three months. Thaw overnight in the fridge for best texture, or pop straight from the freezer into a lunchbox for a sweet midday surprise.
Reheating
If you love a warm brownie, just zap an individual piece in the microwave for about 10-15 seconds. The chocolate chips get gooey again, and the brownie turns deliciously soft and fragrant—like it’s fresh from the oven all over again.
FAQs
Can I use natural or Dutch-process cocoa powder?
Absolutely! Either cocoa powder will add rich flavor. Dutch-process will give your Red Velvet Brownies a darker hue and slightly mellower chocolate taste, while natural cocoa keeps the classic ruby red vibrancy more pronounced.
Why is vinegar included in Red Velvet Brownies?
The vinegar’s mild acidity helps activate the cocoa powder and intensifies the red color, as well as adding that subtle tangy note that’s absolutely essential to true red velvet desserts.
Can I make these brownies gluten-free?
Yes! Simply substitute the all-purpose flour with a 1:1 gluten-free baking blend. Be sure to check that your cocoa powder and toppings are also certified gluten-free as needed.
How do I know when the brownies are done baking?
Your brownies are ready when the edges look firm, and a toothpick inserted into the center comes out with just a few moist crumbs—don’t wait for it to be completely clean, or you’ll miss out on the perfect fudgy center.
Is it okay to double this recipe?
Definitely! To double, use a 9×13-inch baking pan and add a few extra minutes to the bake time. Keep an eye on the center for doneness, and get ready for a party-worthy batch of Red Velvet Brownies.
Final Thoughts
If you’ve been looking for an easy showstopper dessert that always wins rave reviews, these Red Velvet Brownies are it. With their gorgeous hue, ultra-fudgy texture, and a pinch of red velvet magic, they’re sure to become an instant favorite. Give them a try, and don’t be surprised if you find yourself making them on repeat for every special occasion (or honestly, any day at all)!