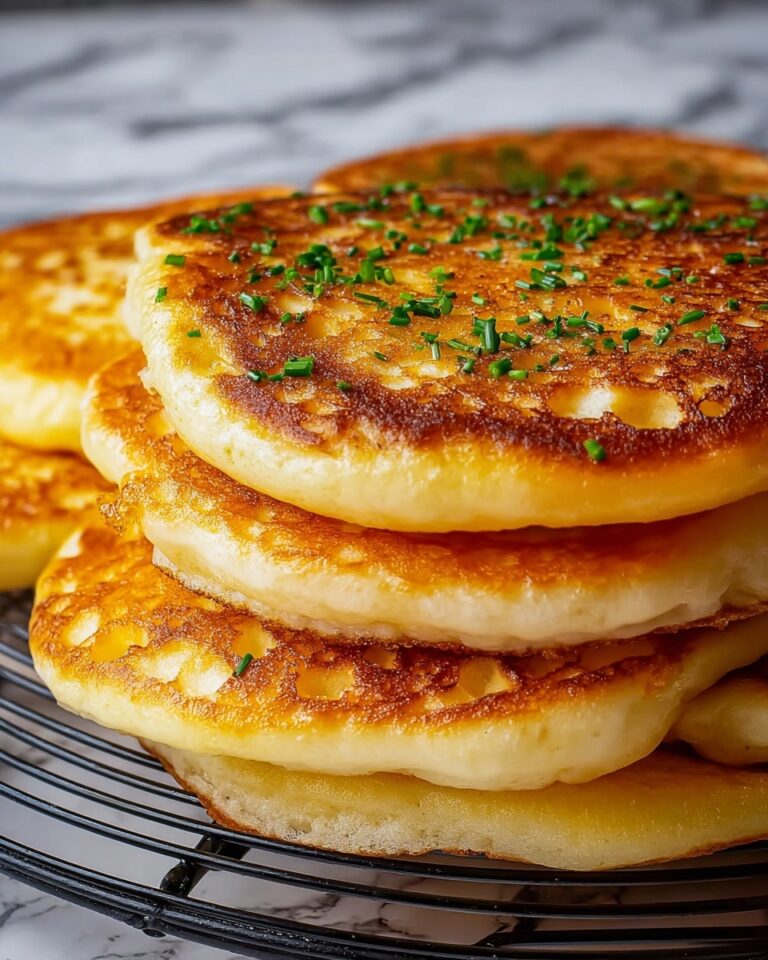
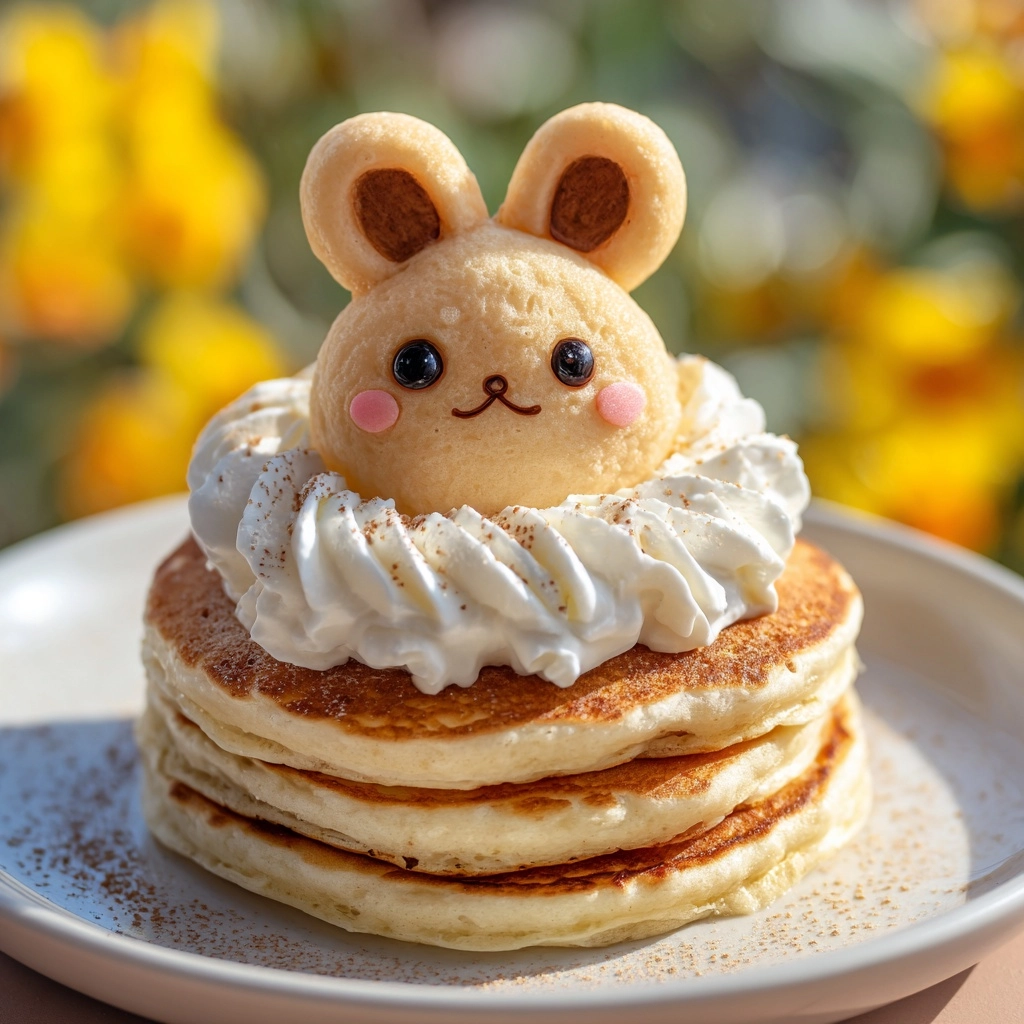
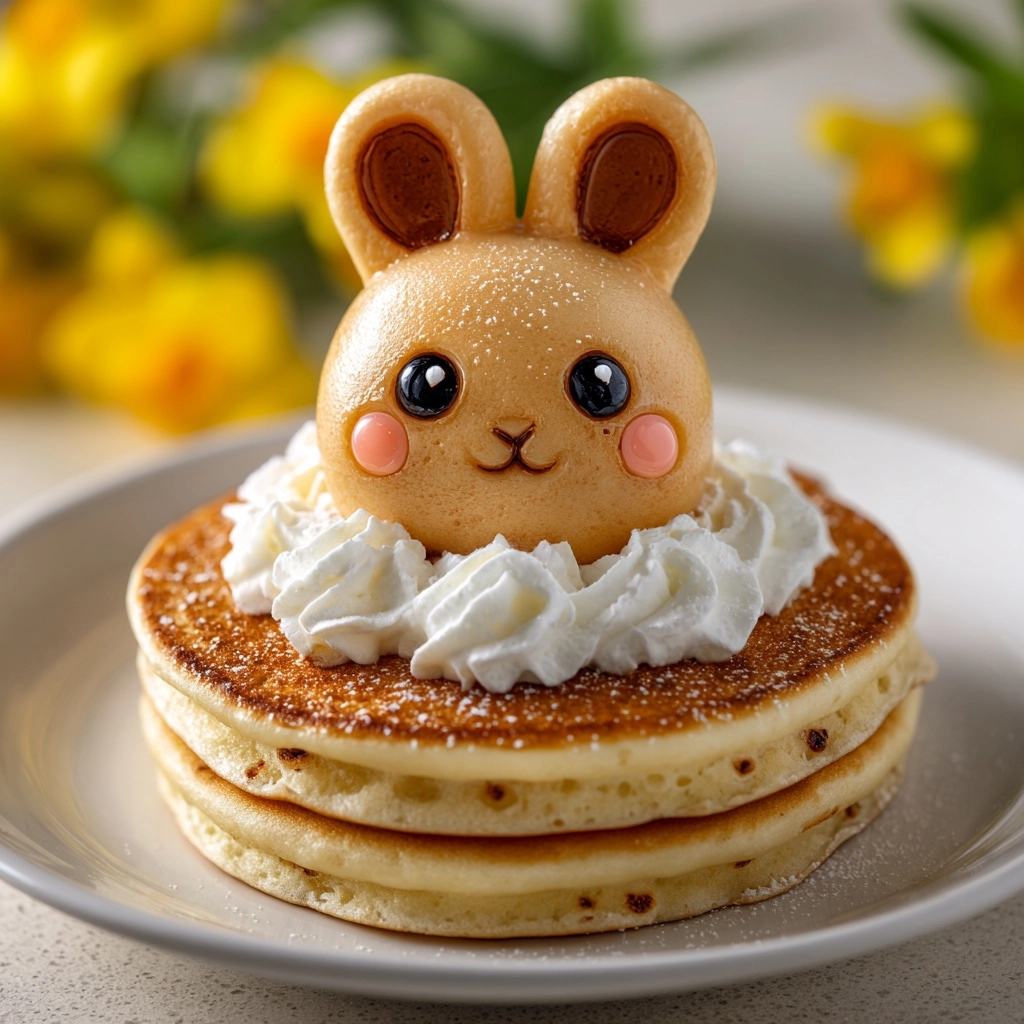
There’s something absolutely magical about starting Easter morning with a plate of Easter Bunny Pancakes. This playful and delicious breakfast is as much fun to make as it is to eat! Fluffy golden pancakes transform into an adorable bunny with just a few clever cuts and some fresh fruit decorations. Whether you’re cooking with kids or trying to create a festive table for your family, Easter Bunny Pancakes are guaranteed to bring big smiles and happy tummies to everyone at the table.
Ingredients You’ll Need
Don’t let the impressive look fool you: the ingredient list for these Easter Bunny Pancakes keeps things simple but essential. Each component adds a unique touch, from tender pancake texture to the burst of color and sweetness from fresh fruit and whipped cream. Here’s what you’ll want to have ready:
- All-purpose flour: The base of the pancakes, giving them that classic fluffiness every good stack needs.
- Granulated sugar: Adds a subtle sweetness to balance the savory notes in the batter.
- Baking powder: The secret to those perfectly puffy, cloud-like pancakes—don’t skip it!
- Salt: Just a pinch brings out all the other flavors, making each bite pop.
- Milk: Creates a silky batter for tender, moist pancakes every time.
- Large egg: Binds your ingredients and gives structure (and a bit of richness) to the pancakes.
- Melted butter: Keeps the pancakes moist and adds that irresistible buttery flavor.
- Vanilla extract: A little splash for warmth and a touch of sweetness in every bite.
- Butter or oil for cooking: Ensures your bunny doesn’t stick, plus a bit of golden color and crispness.
- Sliced bananas: Perfect for bunny paws—plus, kids love the creamy, mild flavor.
- Strawberries: Adds a pop of red—lovely for decorating and delicious fresh taste.
- Blueberries: Great for tiny details like bunny toes or eyes, and a sweet-tart bite.
- Whipped cream: The fluffiest bunny tail you’ve ever seen, and a deliciously creamy finish!
How to Make Easter Bunny Pancakes
Step 1: Mix the Dry Ingredients
In a medium bowl, whisk together the all-purpose flour, granulated sugar, baking powder, and salt. This step is important to ensure that your baking powder gets evenly distributed—meaning every pancake turns out perfectly fluffy and rises the way it should.
Step 2: Blend Wet Ingredients
In a separate bowl, combine your milk, large egg, melted butter, and vanilla extract. Whisk these together until smooth. This combination not only adds moisture and richness but also infuses every bite with a buttery, fragrant sweetness that makes these pancakes truly crave-worthy.
Step 3: Stir to Combine
Gently pour your wet ingredients into the bowl with the dry mix. Stir them together until just combined—even a few lumps are totally fine! Overmixing can make your bunny a little tough, so keep it tender by mixing only as much as needed.
Step 4: Cook the Pancakes
Heat a nonstick skillet or griddle over medium heat and lightly grease with butter or oil. Pour the batter to create one large round pancake for the bunny’s head, two oval-shaped pancakes for ears, and three smaller rounds for feet and tail. Cook each pancake for 2–3 minutes per side, flipping when you see bubbles forming and the edges starting to look set.
Step 5: Build Your Bunny
Now for the fun part! Arrange your cooked pancakes on a plate: the largest round at the bottom for the head, two ovals at the top for ears, two small circles at the bottom for feet, and one in the center as the tail. It’s already looking adorable, but wait until the decorating starts!
Step 6: Decorate (Easter Bunny Pancakes Magic!)
This is where Easter Bunny Pancakes really come to life. Use banana slices for paw pads, blueberries for toes or even eyes (if you’re creating a face), and a big dollop of whipped cream for the fluffiest bunny tail. Tuck sliced strawberries and more fruit around the bunny for color and extra freshness. Get creative—this is your bunny’s big moment!
How to Serve Easter Bunny Pancakes
Garnishes
Give your bunny the royal treatment with playful garnishes. Sprinkle extra blueberries across the plate for a pop of color, dust a little powdered sugar for a touch of springtime “snow,” or add a swirl of syrup for sweet dripping “grass.” Sprigs of fresh mint or extra whipped cream make the platter feel like a celebration worthy of any Easter brunch.
Side Dishes
Pair these whimsical Easter Bunny Pancakes with chilled orange juice, a fruit salad bursting with melon and grapes, or even a handful of crispy breakfast potatoes. If you want to go all out, set out bowls of yogurt or extra berries so everyone can customize their plate, building their own perfect Easter morning feast.
Creative Ways to Present
For a true wow factor, try serving individual bunny pancakes on small decorative plates, or arrange a whole “family” of bunnies on a serving platter for everyone to share. You can even let little ones “design” their own bunny using small cups filled with toppings. Easter Bunny Pancakes are just begging for a big reveal at the breakfast table, so don’t be afraid to get playful with napkins, pastel sprinkles, or even bunny-ear-shaped fruit slices.
Make Ahead and Storage
Storing Leftovers
If you find yourself with extra pancakes (lucky you!), simply let them cool completely and store them in an airtight container in the refrigerator. They’ll keep their texture and flavor beautifully for up to three days, making for a quick breakfast treat even after the holiday is over.
Freezing
Want to get ahead for a future brunch or surprise a sleepyhead on a random spring morning? Easter Bunny Pancakes freeze wonderfully. Lay cooled pancakes in a single layer on a baking sheet; once frozen, transfer to a zip-top bag or container, separating with parchment if you like. They’ll stay fresh and ready to reheat for up to two months.
Reheating
To bring your pancakes back to fluffy perfection, simply pop them in a toaster or warm in the microwave for about 20-30 seconds. For larger batches, you can reheat them in a low oven (300°F) for 5-10 minutes. Add your fruit and whipped cream after reheating to keep everything bright and fresh!
FAQs
Can I make the Easter Bunny Pancakes gluten-free?
Absolutely! Swap the all-purpose flour for your favorite gluten-free blend (just make sure it includes xanthan gum for the best texture). You may need to adjust the milk slightly if the batter is too thick, but the results will still be fluffy and fun.
What if I don’t have fresh berries for decorating?
Get creative with what you have—chocolate chips, raisins, or even colored sprinkles work wonderfully for eyes and toes. You can also use small pieces of other fruit like kiwi or apple for a colorful twist on your bunny’s features.
How can I involve kids in making Easter Bunny Pancakes?
This is the perfect recipe for a family project! Let kids help stir the batter, arrange the pancakes on their plate, and use fruit and toppings to create their own bunny masterpiece. Giving them creative freedom makes Easter breakfast even more memorable.
Can I double the recipe for a bigger crowd?
Yes, you can easily double (or triple!) the recipe. Just be sure to cook the pancakes in batches and keep them warm on a tray in a low oven (200°F) until you’re ready to build your bunny arrangements.
Is it possible to make the batter the night before?
While it’s best to mix the batter fresh for the fluffiest pancakes, you can prepare the dry and wet ingredients separately the night before. In the morning, just combine, stir, and pour for a quick start to your Easter fun.
Final Thoughts
I hope you feel inspired to give these Easter Bunny Pancakes a try this spring! Not only are they delicious, but they’re also a guaranteed way to create some laughter and joy around your table. Gather your favorite toppings, let your creativity shine, and turn breakfast into a cherished Easter tradition your family will look forward to year after year!