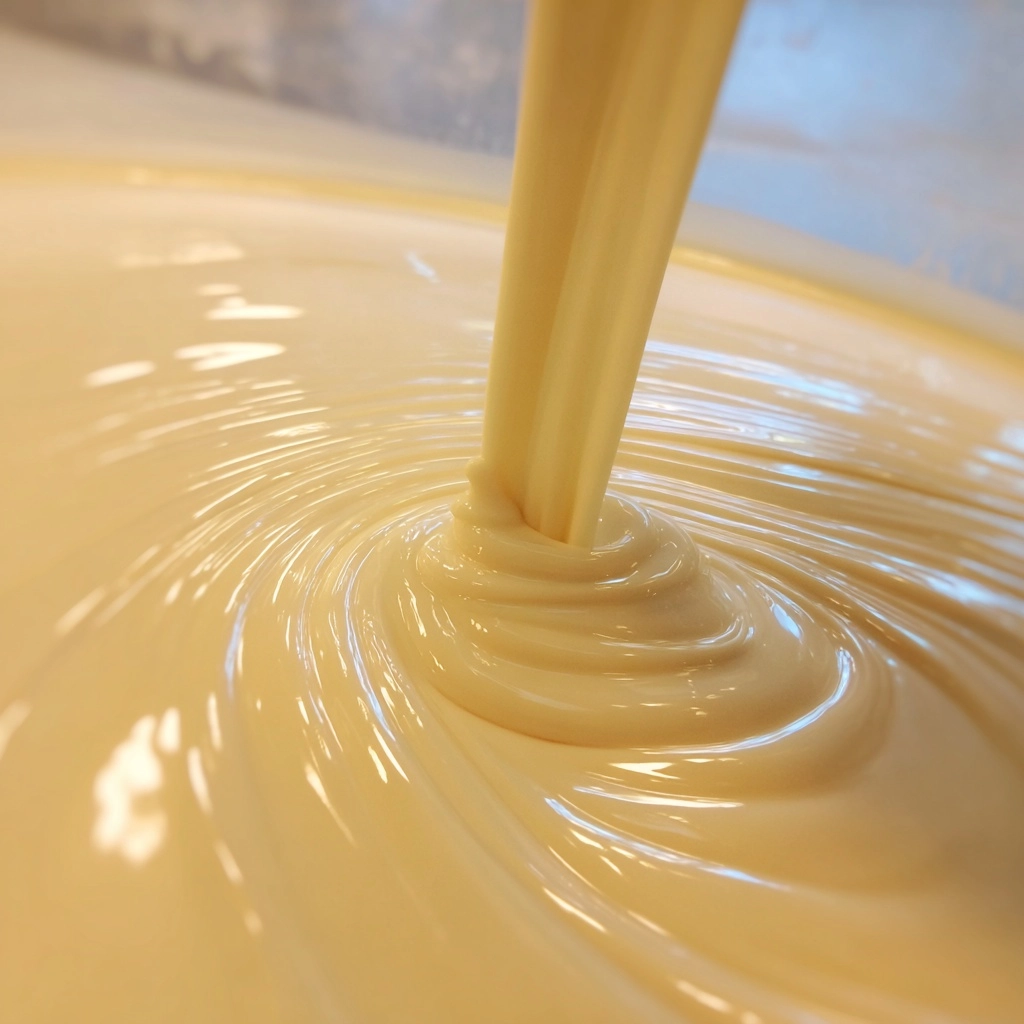
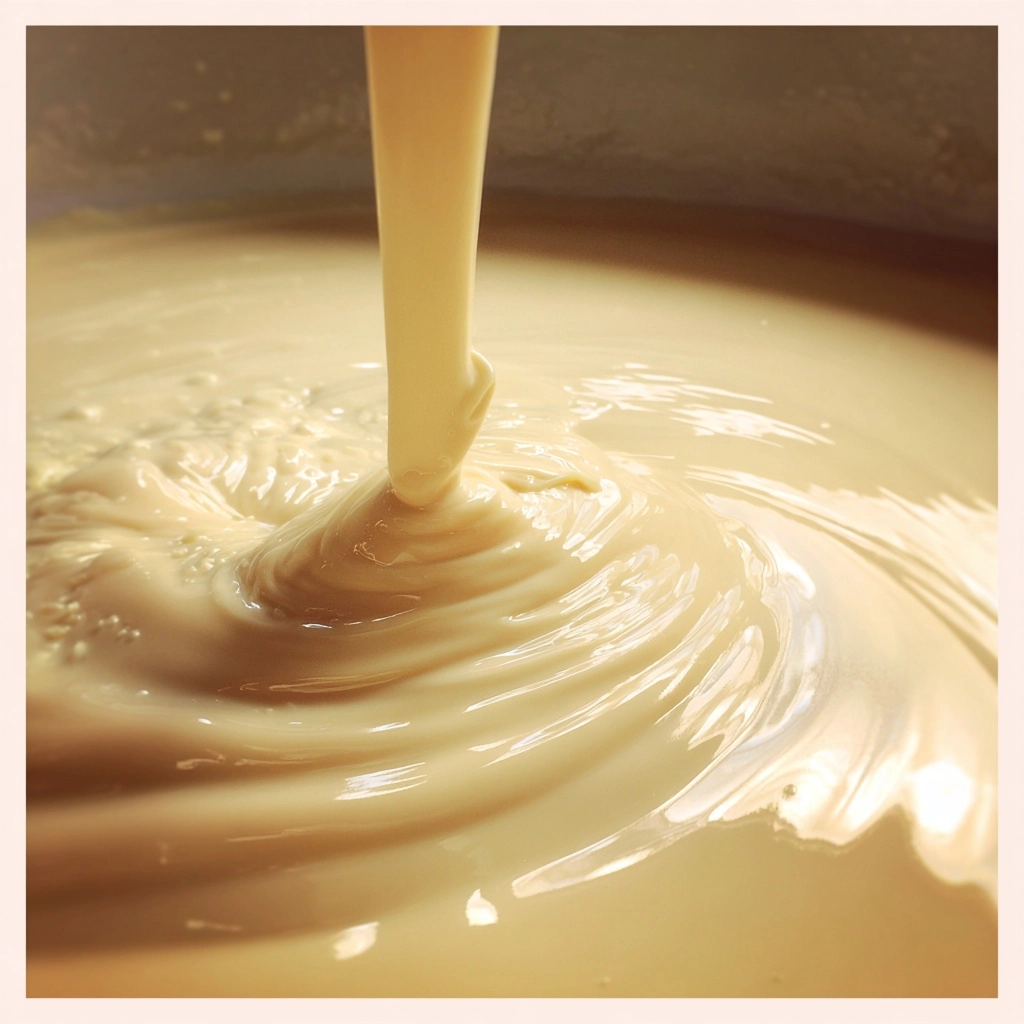
Rich, sweet, and blissfully creamy, Homemade Condensed Milk is a back-pocket kitchen staple that transforms ordinary recipes into something spectacular. With this fuss-free recipe, you’ll shun the canned stuff forever, opting instead for a luscious treat you can whip up from scratch in under an hour. Whether you’ll drizzle it over fresh fruit, swirl it into coffee, or bake it into dreamy desserts, one spoonful and you’ll be hooked—plus, making it yourself means you’re in control of the flavor and quality every single time.
Ingredients You’ll Need
Incredibly, this luscious concoction starts with just a handful of everyday ingredients—each one playing a vital role in building that signature silky texture and rich, caramelized sweetness. Take a peek at what you’ll need for this irresistible treat and let each element shine in the finished Homemade Condensed Milk.
- Whole Milk: The backbone for creaminess and decadent mouthfeel—choose the highest quality milk you can find for the best result.
- Granulated Sugar: Provides classic, familiar sweetness and helps thicken the mixture beautifully as it simmers.
- Unsalted Butter: Adds a silky finish and a subtle richness that sets Homemade Condensed Milk apart from store-bought.
- Vanilla Extract (optional): Invites a splash of warm, aromatic flavor that elevates everything from cakes to morning coffee.
How to Make Homemade Condensed Milk
Step 1: Combine Milk and Sugar
Start by grabbing a medium saucepan—one with a heavy bottom is best to avoid scorching. Pour in your whole milk and sprinkle the sugar over the top. Give it a quick stir to dissolve any clumps, then settle the pan on your stove.
Step 2: Gently Heat and Stir
Turn the heat to medium-low and start stirring. The key to glossy, perfectly smooth Homemade Condensed Milk is gentle, patient heat and constant attention in the beginning. Continue until the sugar has completely dissolved and your mixture is uniform—no gritty bits allowed!
Step 3: Simmer and Reduce
Now, it’s time to let the magic happen. Allow the mixture to simmer gently—not boil—for about 30 to 35 minutes. Stir occasionally to ensure nothing sticks to the bottom. You’ll notice it becomes thick, creamy, and reduces by nearly half. This is where Homemade Condensed Milk gets its signature richness and deep, creamy hue.
Step 4: Add Butter and Optional Vanilla
Remove the saucepan from the heat and drop in the butter, stirring until it’s fully melted and smoothly incorporated. If you’re a fan of vanilla’s cozy warmth, now’s your moment to add the extract. Stir well to blend everything together into a smooth, silky dream.
Step 5: Cool Completely
Let the Homemade Condensed Milk cool in the pan for a bit before pouring it into a glass jar or airtight container. As it cools, it will thicken even further—just perfect for swirling into recipes or enjoying straight by the spoonful. Don’t rush this step; cooling is where the texture truly settles into creamy perfection.
How to Serve Homemade Condensed Milk
Garnishes
The possibilities for garnishing your Homemade Condensed Milk are nearly endless! Try a sprinkle of ground cinnamon for warmth, a bit of grated citrus zest for brightness, or even a dusting of cocoa powder for a chocolatey twist. Little touches like these make each serving pop, both in flavor and in looks.
Side Dishes
This sweet staple is like a secret weapon for the dessert table. Spoon it over fresh berry bowls, drizzle onto pancakes or waffles, or serve as a dipping sauce for churros or biscotti. Classic pairings like sliced fruit, buttery shortbreads, or even warm, pillowy bread can make any snack feel like an occasion.
Creative Ways to Present
Homemade Condensed Milk shines when you get playful with how you serve it. Fill small mason jars for adorable edible gifts, or serve in a vintage creamer at brunch. Or let everyone customize their dessert by pouring this over everything from baked apples to ice cream sundaes—guaranteed smiles all around!
Make Ahead and Storage
Storing Leftovers
Pop any remaining Homemade Condensed Milk into an airtight container in your fridge, and you’ll have a gorgeous, ready-to-use treat for up to a week. A tight seal is key to keeping it luscious and free from fridge odors. Always give it a quick stir before use if any separation occurs—no harm done!
Freezing
Yes, you can absolutely freeze Homemade Condensed Milk. Pour it into a freezer-safe container, leaving a little space for expansion, and freeze for up to three months. Let it thaw overnight in the refrigerator and give it a good stir before using. The texture might change slightly, but the flavor remains wonderful.
Reheating
If your condensed milk becomes a bit too thick from storage, simply reheat it gently. Place the container in a bowl of warm water or microwave in short bursts, stirring in between. Be careful not to overheat—gentle warmth ensures the consistency stays blissfully smooth.
FAQs
Can I make Homemade Condensed Milk dairy-free?
Absolutely! Swap the whole milk for canned coconut milk and follow the exact same method. The result is rich and creamy with a subtle coconut hint—amazing in vegan treats or dairy-free coffee drinks.
Why did my Homemade Condensed Milk turn grainy?
This typically happens if the sugar wasn’t fully dissolved or if the mixture was boiled too rapidly. The fix: use low heat and stir patiently to keep everything silky and smooth. Next time, watch closely, especially in the first stages!
How can I use Homemade Condensed Milk in recipes?
The uses are endless: sweeten your coffee or tea, soak cakes, fold into fudge, layer in parfaits, or even make homemade ice cream. Adding this to baked goods lends unbeatable moisture and richness every time.
Is it possible to double or triple this recipe?
Definitely! Scale up the ingredients for a bigger batch, but be ready for a slightly longer simmering time. Use a wide, heavy-bottomed pan to help with even heat distribution and consistent reduction.
What should the finished consistency be like?
Properly made Homemade Condensed Milk is thick but pourable—think of a melted caramel sauce or a velvety custard. It should coat the back of a spoon. Remember, it will thicken more as it cools and chills.
Final Thoughts
With just a few pantry staples and a bit of time, you’ll never need to reach for a store-bought can again. Give Homemade Condensed Milk a try—the flavor, freshness, and sense of accomplishment are unbeatable. There’s something deeply satisfying about making this sweet kitchen classic yourself, and I know it’ll become a homemade favorite in your kitchen too!