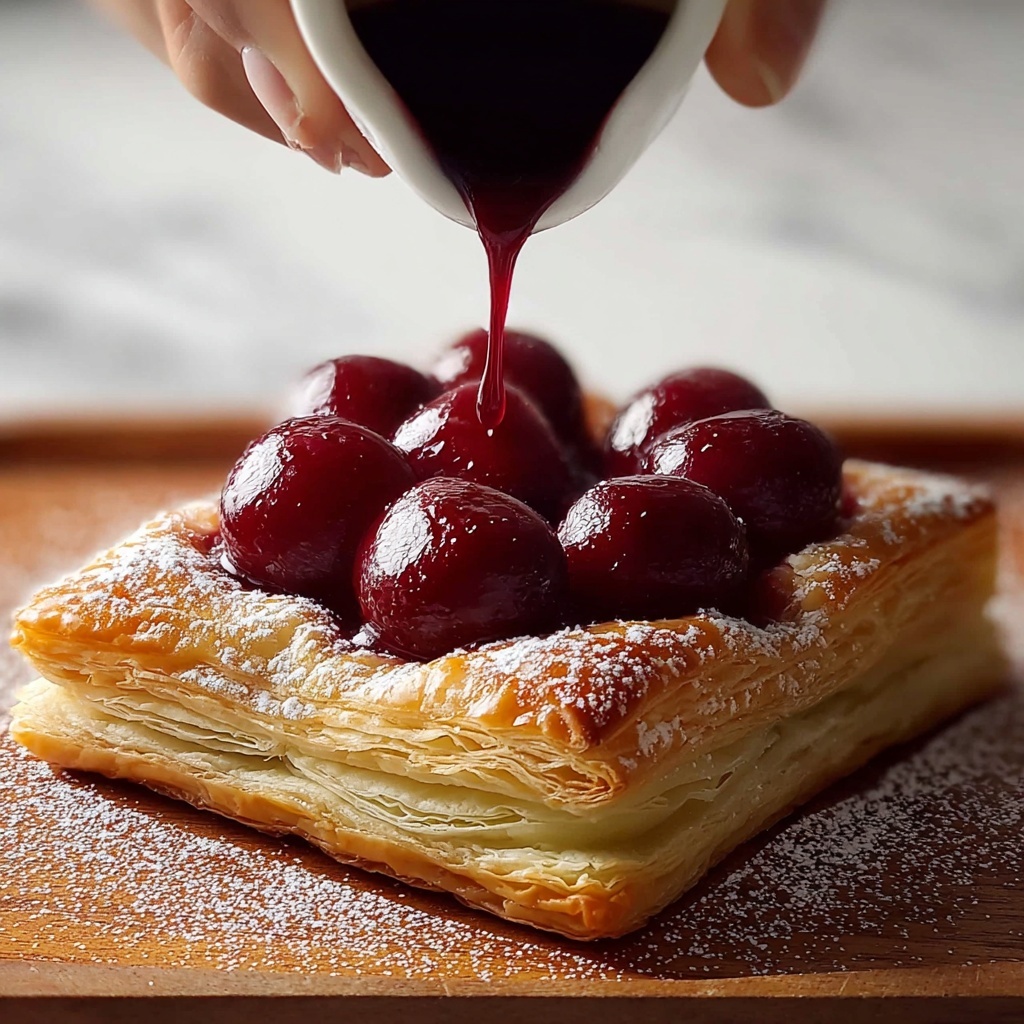
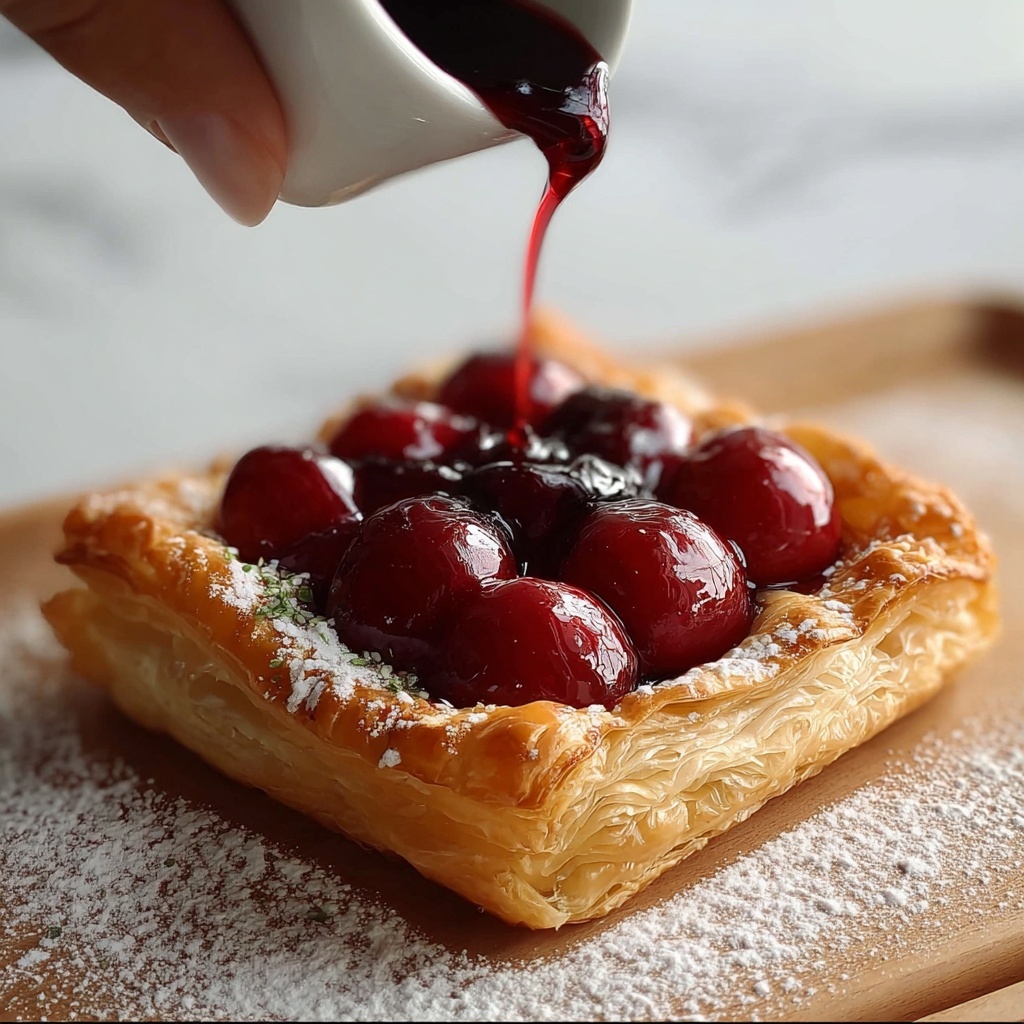
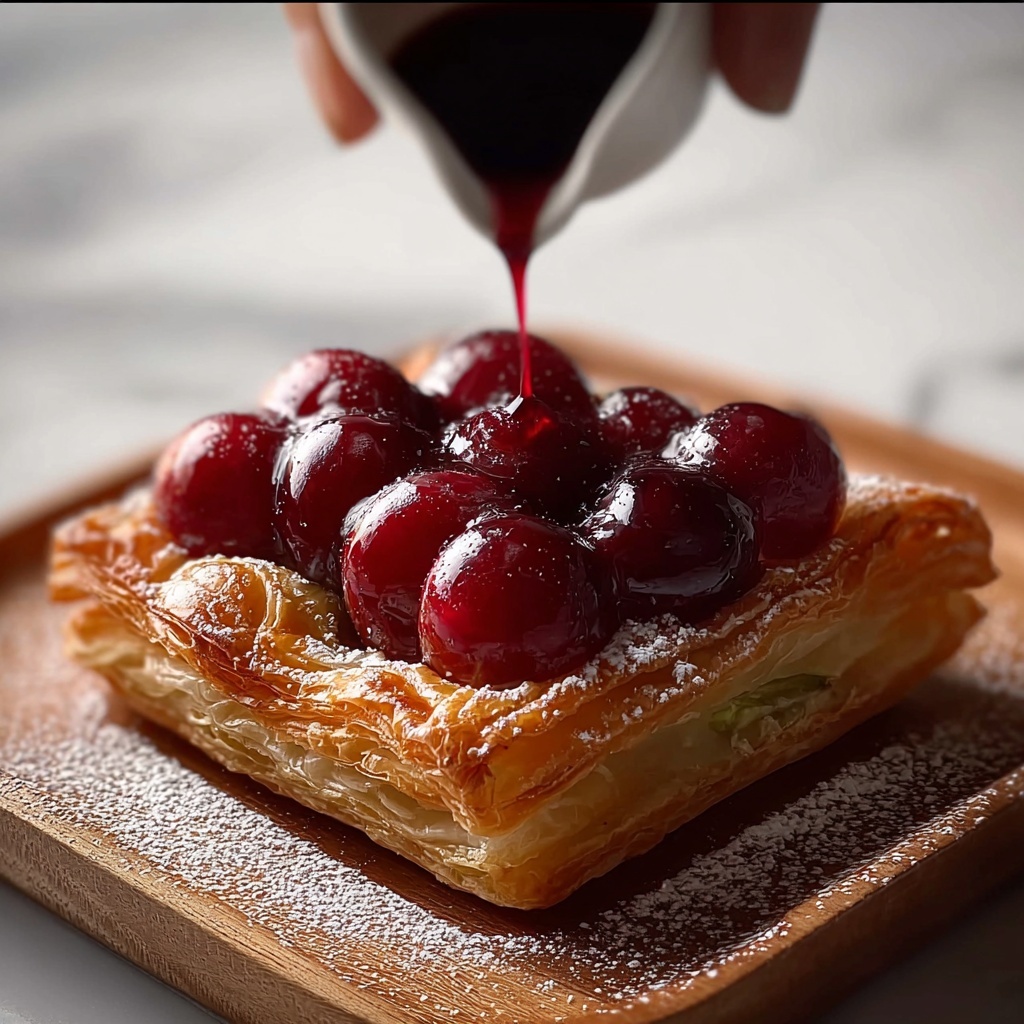
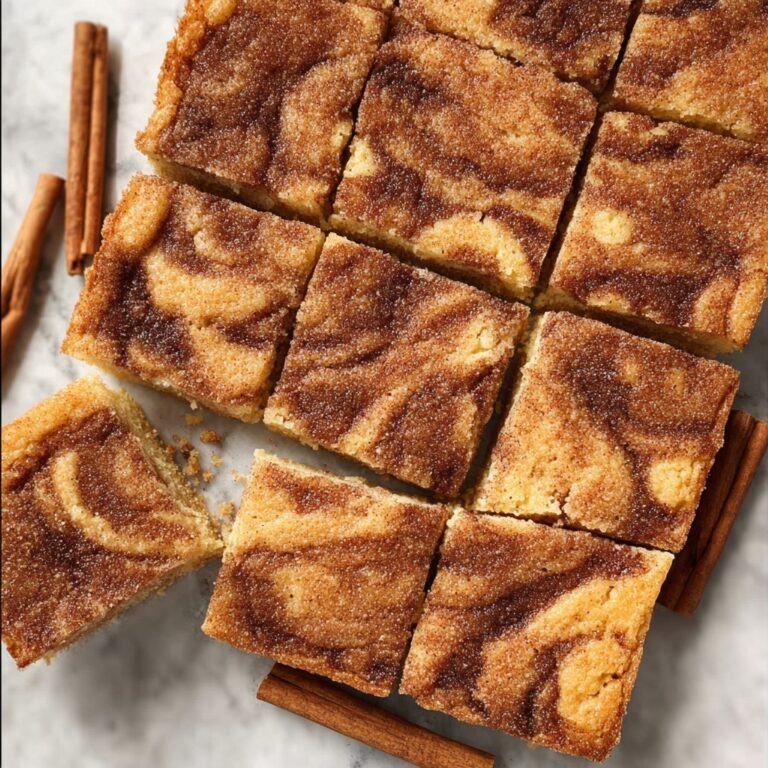
If you’re craving a dessert that effortlessly balances rich creaminess with bright, fruity freshness, then this Cherry Cheese Pastry Pie Recipe is your new best friend in the kitchen. Imagine a golden, flaky puff pastry crust hugging a luscious cream cheese filling, all topped with vibrant cherries that burst with flavor in every bite. It’s elegant yet rustic, simple to prepare but impressive enough to wow guests or elevate an everyday moment into a celebration. Whether you’re new to baking or looking for a quick, stunning dessert, this recipe blends familiar ingredients into something truly special.
Ingredients You’ll Need
Gathering these simple, accessible ingredients is the first step toward a sensational Cherry Cheese Pastry Pie Recipe. Each one plays its unique role—the buttery puff pastry creates that perfect crispness and structure, the cream cheese brings a smooth richness, and the cherries add a pop of sweetness and tartness that wakes up your taste buds.
- 1 sheet puff pastry: Provides a light, flaky foundation that bakes into a golden crust.
- 8 oz cream cheese, softened: Adds creamy texture and tangy flavor to the filling.
- 1/4 cup sugar: Sweetens the cheese mixture just enough to balance the tart cherries.
- 1 egg yolk: Enriches the filling and aids in binding the ingredients smoothly.
- 1 tsp vanilla extract: Gives a subtle warmth and depth to the creamy filling.
- 1 cup pitted cherries (fresh or jarred): The star fruit topping that bursts with juicy flavor; fresh cherries benefit from cornstarch to prevent sogginess.
- 1 tbsp cornstarch (if using fresh cherries): Keeps fresh cherries from making the pastry soggy by absorbing excess juice.
- 1 egg, beaten (for egg wash): Creates a shiny, golden crust on the pastry’s edges.
How to Make Cherry Cheese Pastry Pie Recipe
Step 1: Prepare Your Oven and Pastry
First, preheat your oven to 375°F (190°C) and line a baking sheet with parchment paper for easy cleanup. Unfold the puff pastry sheet onto your work surface and lightly score a 1-inch border around the edges—this helps keep the filling neatly contained and allows the crust to puff up beautifully along the rim.
Step 2: Whip Up the Cream Cheese Filling
In a mixing bowl, beat the softened cream cheese with sugar, egg yolk, and vanilla extract until completely smooth and creamy. This step is crucial because a well-blended filling creates a luscious texture that melts in your mouth with every bite.
Step 3: Assemble the Pie with Cherries
Spread the cream cheese mixture evenly within the scored border on your pastry sheet. If you’re working with fresh cherries, toss them in cornstarch first to keep the filling from getting watery. Then arrange the cherries on top of the cream cheese, gently pressing them into the mixture so they nestle beautifully.
Step 4: Crimp the Edges and Apply Egg Wash
Carefully fold and crimp the scored edges inward to create a charming rustic crust. Brush the entire border generously with the beaten egg wash—this will give your pie a gorgeous golden hue and a slight sheen once baked.
Step 5: Bake to Perfection
Place your pie on the baking sheet and bake for 25 to 30 minutes. You’re aiming for a golden, puffed crust with filling that’s set but still soft. Keep an eye on it towards the end; every oven bakes a little differently, but the golden color is your best indicator that it’s ready.
Step 6: Cool and Serve
After removing the pie from the oven, allow it to cool for a few minutes on a wire rack. This resting time helps the filling firm up just enough for neat slices without losing any creaminess or cherry juiciness.
How to Serve Cherry Cheese Pastry Pie Recipe
Garnishes
Sprinkle a light dusting of powdered sugar over the top for a pretty finishing touch that adds subtle sweetness. Fresh mint leaves or a few extra fresh cherries placed thoughtfully can elevate the look and add a refreshing flavor contrast.
Side Dishes
This Cherry Cheese Pastry Pie Recipe pairs wonderfully with a dollop of whipped cream or a scoop of vanilla ice cream for an indulgent twist. A cup of hot coffee or tea also complements the mild sweetness and rich textures perfectly.
Creative Ways to Present
For a charming presentation at brunch or a gathering, serve slices on rustic wooden boards or vintage plates. You can also cut the pie into smaller bite-sized pieces to serve as a delightful finger food that’s sure to disappear fast.
Make Ahead and Storage
Storing Leftovers
If you happen to have any leftovers, keep them in an airtight container in the refrigerator for up to three days. This helps preserve the cream cheese filling’s freshness and keeps the pastry from becoming too soft.
Freezing
While this pie is best enjoyed fresh, you can freeze unbaked assembled pies wrapped tightly in plastic wrap and foil for up to one month. Thaw overnight in the refrigerator before baking as directed. Avoid freezing after baking, as the texture of puff pastry can suffer.
Reheating
To reheat slices, warm them gently in a 350°F (175°C) oven for about 10 minutes. This helps retain the flaky crust crispness and warms the filling without drying it out. Avoid microwaving to prevent sogginess.
FAQs
Can I use frozen cherries for this recipe?
Yes, you can use frozen cherries, but be sure to thaw and drain them well to avoid extra liquid making the pastry soggy. Tossing them in cornstarch after thawing can help absorb moisture and keep your pie crisp.
Is it necessary to score the edges of puff pastry?
Scoring the edges isn’t absolutely mandatory but highly recommended because it creates a defined border that helps the filling stay put and the edges to puff up nicely for that classic rustic pie look.
Can I make this pie vegan or dairy-free?
This recipe uses cream cheese and egg, which are not vegan. For a vegan version, try substituting cream cheese with a dairy-free alternative and using a flax or chia egg in place of the egg yolk. Keep in mind that texture and flavor may vary.
How do I prevent the puff pastry from getting soggy?
To keep pastry crisp, make sure you toss fresh cherries with cornstarch to absorb excess juice. Also, baking on a parchment-lined sheet allows heat to circulate evenly and helps the crust stay flaky and golden.
Can this recipe be doubled for a larger pie?
Absolutely! Just use two sheets of puff pastry and a larger baking sheet or pan. Increase the cream cheese filling and cherries proportionally and follow the same steps, adjusting baking time slightly if needed.
Final Thoughts
This Cherry Cheese Pastry Pie Recipe is one of those delightful kitchen creations that feels both familiar and elevated at the same time. It’s the perfect dessert to whip up when you want something comforting yet impressive, combining buttery crust, creamy cheese, and juicy cherries in every forkful. I wholeheartedly encourage you to give it a try—you might just find it becoming your go-to for special occasions or treasured everyday treats.
Print
Cherry Cheese Pastry Pie Recipe
- Prep Time: 15 minutes
- Cook Time: 30 minutes
- Total Time: 45 minutes
- Yield: 6 servings
- Category: Dessert
- Method: Baking
- Cuisine: American
Description
This Cherry Cheese Pastry Pie is a delightful blend of creamy sweetened cream cheese and luscious cherries encased in a flaky puff pastry crust. Perfect for a quick dessert or an elegant brunch treat, it balances tart cherry flavor with smooth vanilla-scented filling and golden, crisp edges.
Ingredients
Pastry
- 1 sheet puff pastry
- 1 egg, beaten (for egg wash)
Filling
- 8 oz cream cheese, softened
- 1/4 cup sugar
- 1 egg yolk
- 1 tsp vanilla extract
- 1 cup pitted cherries (fresh or jarred)
- 1 tbsp cornstarch (use only if using fresh cherries)
Instructions
- Preheat and Prepare Baking Sheet: Preheat your oven to 375°F (190°C) and line a baking sheet with parchment paper to prevent sticking and ensure easy cleanup.
- Prepare Puff Pastry: Unfold the puff pastry sheet on the lined baking sheet and lightly score a 1-inch border along the edges without cutting through to help form the rustic pie edge.
- Make Cheese Filling: In a bowl, beat together softened cream cheese, sugar, egg yolk, and vanilla extract until the mixture is smooth and creamy, creating a rich filling base.
- Assemble the Pie: Spread the cream cheese mixture evenly within the scored border of the pastry. If using fresh cherries, toss them with cornstarch to prevent excess moisture; then arrange the cherries on top of the filling.
- Form Edges and Apply Egg Wash: Fold and crimp the edges of the puff pastry over to create a rustic border. Brush the pastry edges with the beaten egg wash to help them brown beautifully during baking.
- Bake the Pie: Place the assembled pie in the preheated oven and bake for 25 to 30 minutes until the pastry is golden brown and the filling is set and slightly puffed.
- Cool and Serve: Remove the pie from the oven and allow it to cool slightly to set the filling before slicing and serving warm or at room temperature.
Notes
- Use jarred cherries if fresh are not in season, just rinse and drain well.
- Cornstarch is used only with fresh cherries to avoid a watery filling.
- Ensure cream cheese is softened to make mixing easier and smoother texture.
- For a dairy-free variation, substitute cream cheese with a plant-based alternative.
- This pie is best served the same day but can be refrigerated and gently reheated.


