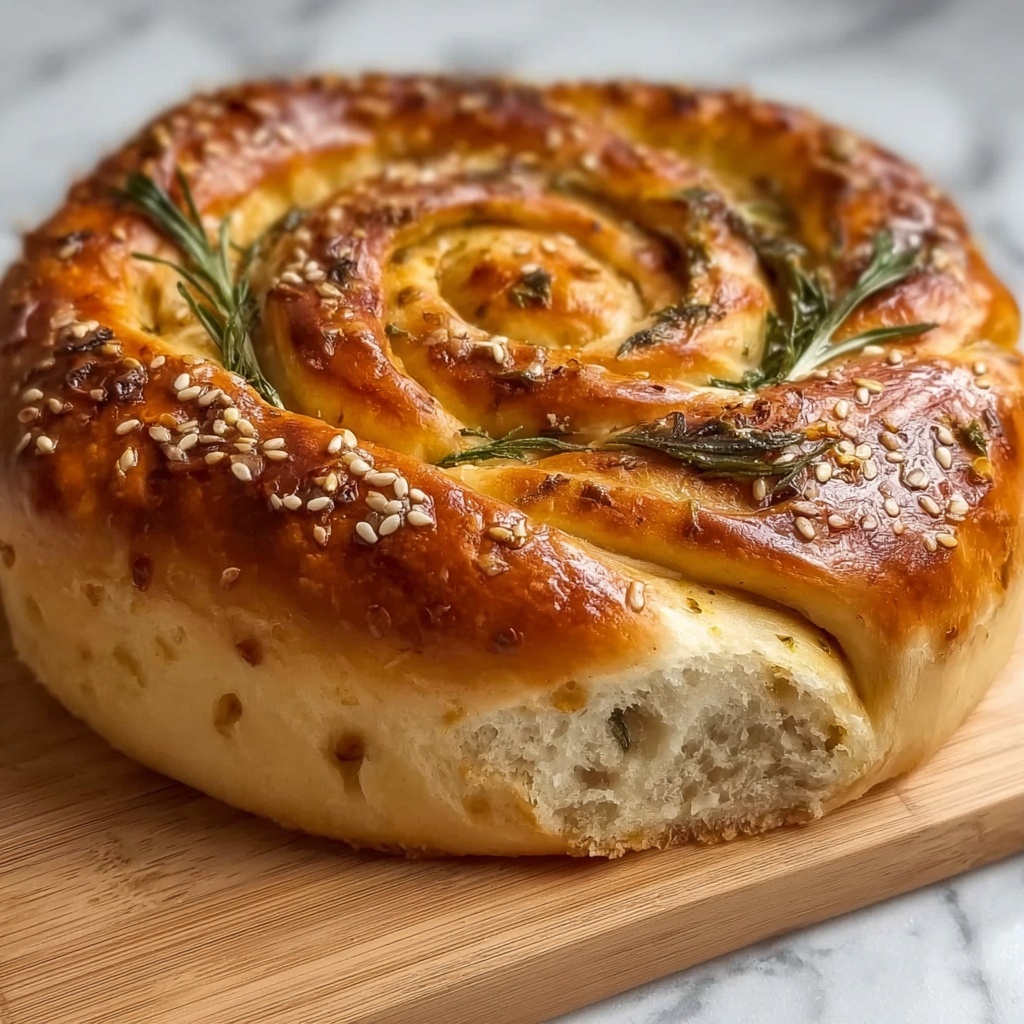
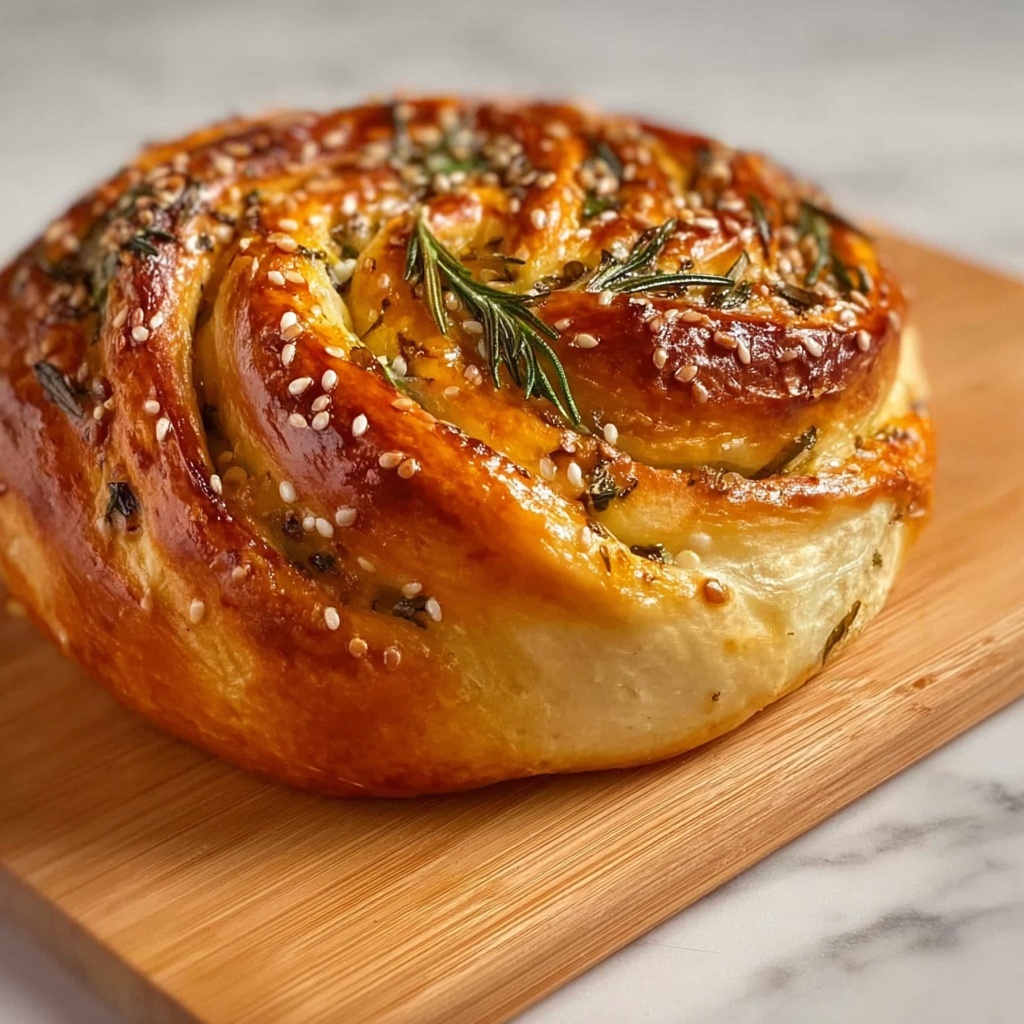
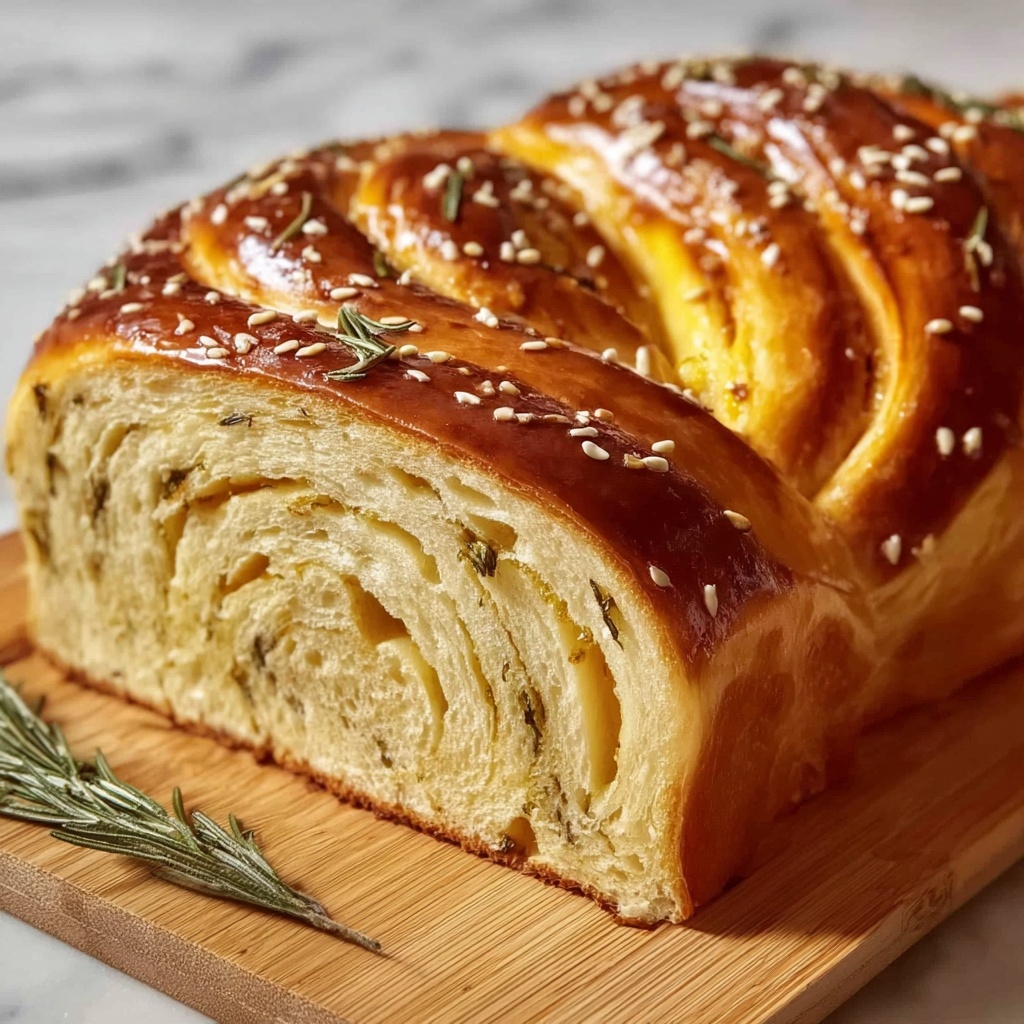
There is something incredibly satisfying about baking bread at home, especially when it requires minimal effort yet delivers maximum flavor. This Rustic No Knead Rosemary Garlic Bread Recipe is a perfect example of easy, rustic charm coming straight from your own oven. With fragrant rosemary, bold garlic, and that perfect crust and crumb, this bread feels like a warm hug on a plate. Whether you’re new to bread-making or just short on time, this recipe promises delightful results without the fuss of kneading or complicated steps.
Ingredients You’ll Need
Believe it or not, the magic of this Rustic No Knead Rosemary Garlic Bread Recipe lies in its simplicity. Each ingredient plays an essential role, whether it’s bringing flavor, texture, or that lovely golden hue to the crust.
- 3 cups all-purpose flour: The heart of the bread, providing structure and that soft, chewy texture we all adore.
- 3 cloves garlic, minced: Adds a fragrant punch that infuses the bread with savory goodness.
- 1 tablespoon finely chopped fresh rosemary: This herb lends a woodsy aroma and fresh, earthy notes that perfectly complement the garlic.
- 1 ¼ teaspoons kosher salt: Enhances all the flavors and strengthens the dough.
- ¾ teaspoon freshly ground black pepper: Offers just enough warmth and a subtle kick without overpowering.
- ½ teaspoon instant yeast: The gentle leavening agent that does the work quietly, creating that airy rise without a fuss.
- 1 ½ cups water, at room temperature: Hydrates the flour and activates the yeast, creating a delightfully sticky dough.
- 2 tablespoons cornmeal: Sprinkled in the skillet to prevent sticking and add a delightful crunch to the crust’s base.
How to Make Rustic No Knead Rosemary Garlic Bread Recipe
Step 1: Prepare the Dough
Start by dumping the flour, garlic, rosemary, salt, pepper, and yeast into a large bowl. It might look like a mix of random bits, but trust me, it’s the foundation of amazing bread. Pour in the room temperature water and stir with a wooden spoon or even your hand. You’re aiming for a wet, sticky dough that looks a little rough around the edges—perfection, not perfectionism.
Step 2: Let It Rise Overnight
Cover the bowl tightly with plastic wrap and let it rest at room temperature for 18 to 24 hours. This is where all the magic happens. The slow fermentation allows deep, complex flavors to develop while the dough becomes bubbly and full of life. It’s hands-off time, so go enjoy the anticipation.
Step 3: Shape and Proof the Dough
Lightly oil a 10-inch cast iron skillet or spray it with nonstick spray, then dust it with cornmeal—this prevents sticking and adds texture. On a floured surface, gently shape your dough into a round; no need to knead, just form it lovingly. Place it in the skillet, cover with a clean dishtowel, and let it prove until it doubles in size and feels relaxed when you lightly poke it, about two hours.
Step 4: Bake to Golden Perfection
Preheat your oven to 450 degrees Fahrenheit. Pop the skillet into the oven and let your bread bake for 30 to 40 minutes. You want that inviting golden crust that crackles when cut into, along with a beautifully airy crumb inside. When it’s done, remove from the oven and let it cool slightly before diving in.
How to Serve Rustic No Knead Rosemary Garlic Bread Recipe
Garnishes
This bread is fantastic on its own, but you can elevate it by brushing it with melted butter or a drizzle of olive oil right after baking. A sprinkle of flaky sea salt or extra fresh rosemary on top adds a lovely visual touch and a burst of flavor with every bite.
Side Dishes
Rustic No Knead Rosemary Garlic Bread pairs beautifully with soups like tomato basil or butternut squash, salads full of fresh greens and tangy vinaigrettes, or hearty stews. Its chewy interior and crisp crust are perfect for dunking and scooping.
Creative Ways to Present
For a fun twist, slice the bread and turn it into crostini topped with goat cheese and roasted cherry tomatoes or avocado smash with a sprinkle of chili flakes. You can also hollow out the center to create a flavor-packed bread bowl for dips or chili, making it a showstopper at your next gathering.
Make Ahead and Storage
Storing Leftovers
If you have leftovers, keep your Rustic No Knead Rosemary Garlic Bread Recipe fresh by storing it in a paper bag or wrapped loosely in a kitchen towel at room temperature. This helps maintain the crust’s crispness while preventing the bread from drying out.
Freezing
You can absolutely freeze this bread! Slice it first, then wrap the pieces tightly in plastic wrap and place them in a freezer-safe bag. This way, you can take out exactly how much you need, making your life easier and still delicious.
Reheating
To bring your bread back to life, reheat it in a 350-degree oven for 10-15 minutes wrapped loosely in foil, or toast individual slices in a toaster or skillet. This helps refresh the crust and warms the fragrant rosemary and garlic notes beautifully.
FAQs
Can I use dried rosemary instead of fresh?
Yes, you can substitute dried rosemary, but use about one-third of the amount called for since dried herbs are more concentrated. The flavor won’t be quite as bright but still delicious.
Do I need a cast iron skillet to bake this bread?
While a cast iron skillet creates a fantastic crust, you can also use an oven-safe Dutch oven or a heavy baking dish that can handle the high heat. Just be sure to prepare it with oil and cornmeal as described.
Why does this recipe not require kneading?
The high hydration and long fermentation time allow the gluten to develop naturally, giving you that chewy texture without all the effort of kneading. It’s a game-changer for easy home baking.
Can I add other herbs or ingredients?
Absolutely! This recipe is very adaptable. Feel free to add thyme, oregano, or even some grated Parmesan cheese for a twist. Just keep the water-to-flour ratio the same to maintain the dough’s texture.
What is the best flour to use for this bread?
All-purpose flour works wonderfully here, balancing taste, texture, and availability. If you want a slightly different crumb, bread flour is an option, but it’s not necessary.
Final Thoughts
This Rustic No Knead Rosemary Garlic Bread Recipe is a must-try for anyone who loves the warmth and aroma of homemade bread without complicated preparation. It’s a joy to watch the dough transform overnight and a delight to savor the fresh, fragrant slices at the table. I can’t wait for you to try it and share that same cozy feeling with your friends and family.
Print
Rustic No Knead Rosemary Garlic Bread Recipe
- Prep Time: 15 minutes
- Cook Time: 35 minutes
- Total Time: 19 hours 50 minutes
- Yield: 8 servings
- Category: Bread
- Method: Baking
- Cuisine: American
Description
This Rustic No Knead Rosemary Garlic Bread is an artisan-style loaf that requires minimal hands-on time but yields a flavorful, crusty bread infused with fragrant garlic and fresh rosemary. Perfect for serving alongside soups, salads, or as a savory snack, this simple recipe utilizes a slow fermentation process to develop depth of flavor and a chewy, tender crumb with a crisp golden crust.
Ingredients
Dry Ingredients
- 3 cups all-purpose flour
- 3 cloves garlic, minced
- 1 tablespoon finely chopped fresh rosemary (or more, to taste)
- 1 ¼ teaspoons kosher salt
- ¾ teaspoon freshly ground black pepper
- ½ teaspoon instant yeast
Wet Ingredients
- 1 ½ cups water, at room temperature
For Baking
- 2 tablespoons cornmeal
- Oil or nonstick spray for skillet
Instructions
- Prepare the Dough: In a large bowl, combine all-purpose flour, minced garlic, chopped rosemary, kosher salt, freshly ground black pepper, and instant yeast. Mix well to evenly distribute the ingredients.
- Add Water and Mix: Using a wooden spoon or your hand, gradually add the 1 ½ cups of room temperature water to the dry ingredients. Stir until a wet, sticky dough forms, about 30 seconds of mixing. The dough will be shaggy and sticky, which is expected.
- First Rise: Cover the bowl tightly with plastic wrap and let the dough stand at room temperature, undisturbed, for 18 to 24 hours. During this time, the dough will ferment and rise, becoming bubbly on the surface.
- Prepare the Skillet: Lightly oil a 10-inch cast iron skillet or spray it with a nonstick spray. Sprinkle the bottom with 2 tablespoons of cornmeal to prevent sticking and add a slight crunch to the crust.
- Shape the Dough: On a lightly floured surface, gently turn out the dough and shape it into a round loaf. Handle it carefully to preserve the air bubbles formed during fermentation.
- Second Proof: Place the shaped dough into the prepared skillet. Cover it with a clean dishtowel and let it stand at room temperature until it doubles in size and no longer springs back quickly when poked, approximately 2 hours.
- Preheat Oven: While the dough is proofing, preheat your oven to 450°F (232°C) to ensure it is hot enough for a good crust.
- Bake the Bread: Place the skillet with the dough into the preheated oven. Bake the bread for 30 to 40 minutes, or until the crust turns golden brown and the loaf sounds hollow when tapped on the bottom.
- Cool: Remove the bread from the skillet and place it on a wire rack to cool completely before slicing to prevent a gummy texture.
Notes
- Using a cast iron skillet helps develop a crisp, rustic crust but you can also use a heavy oven-safe pan with high sides.
- The long fermentation time (18-24 hours) develops flavor and improves texture. Do not rush this step.
- Room temperature water is key to activating the yeast without killing it.
- Adjust rosemary quantity to your preference; fresh rosemary gives a bright herbal note.
- Allow bread to cool fully before slicing to ensure the crumb sets properly.
- If you don’t have cornmeal, you can use flour to dust the skillet, but cornmeal adds texture and prevents sticking.


