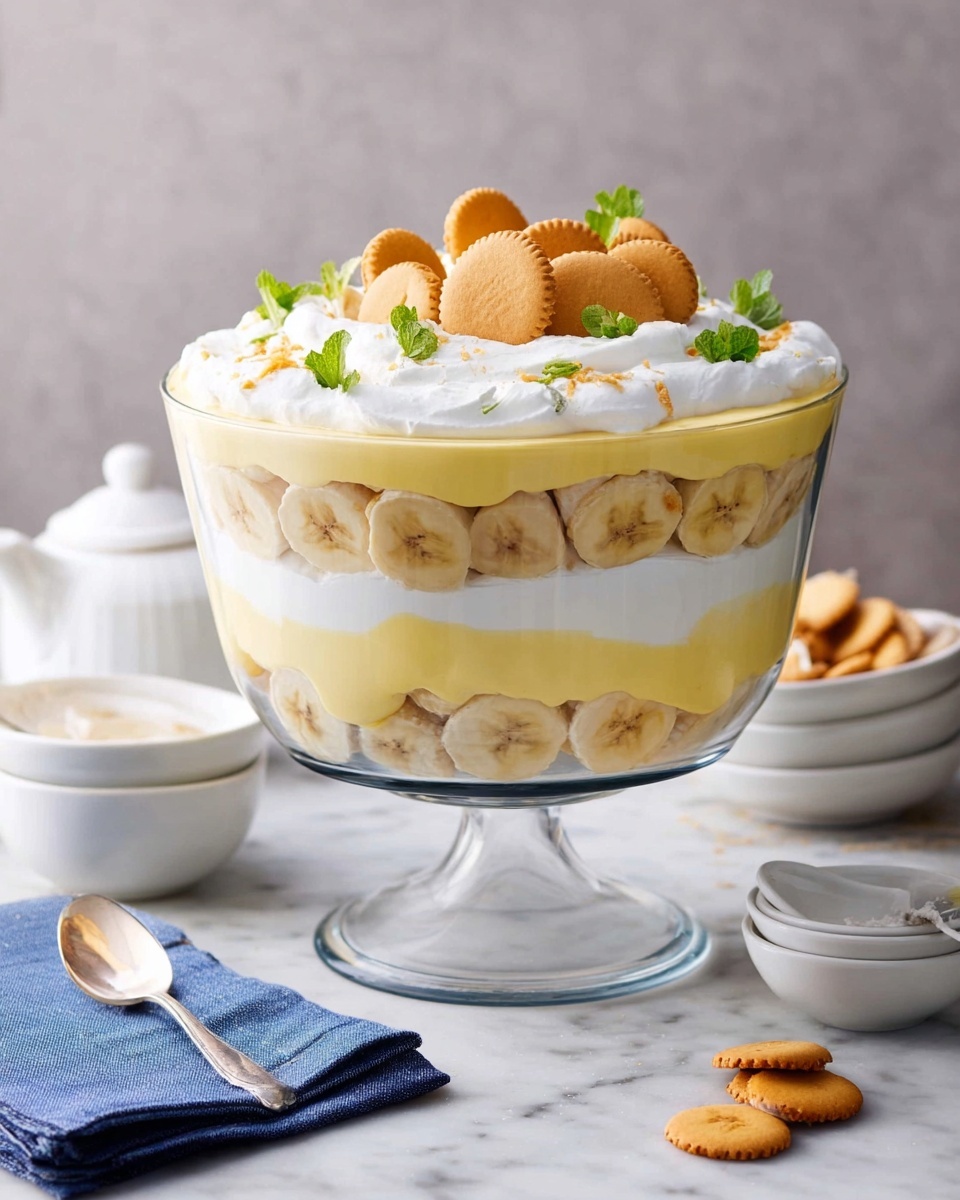
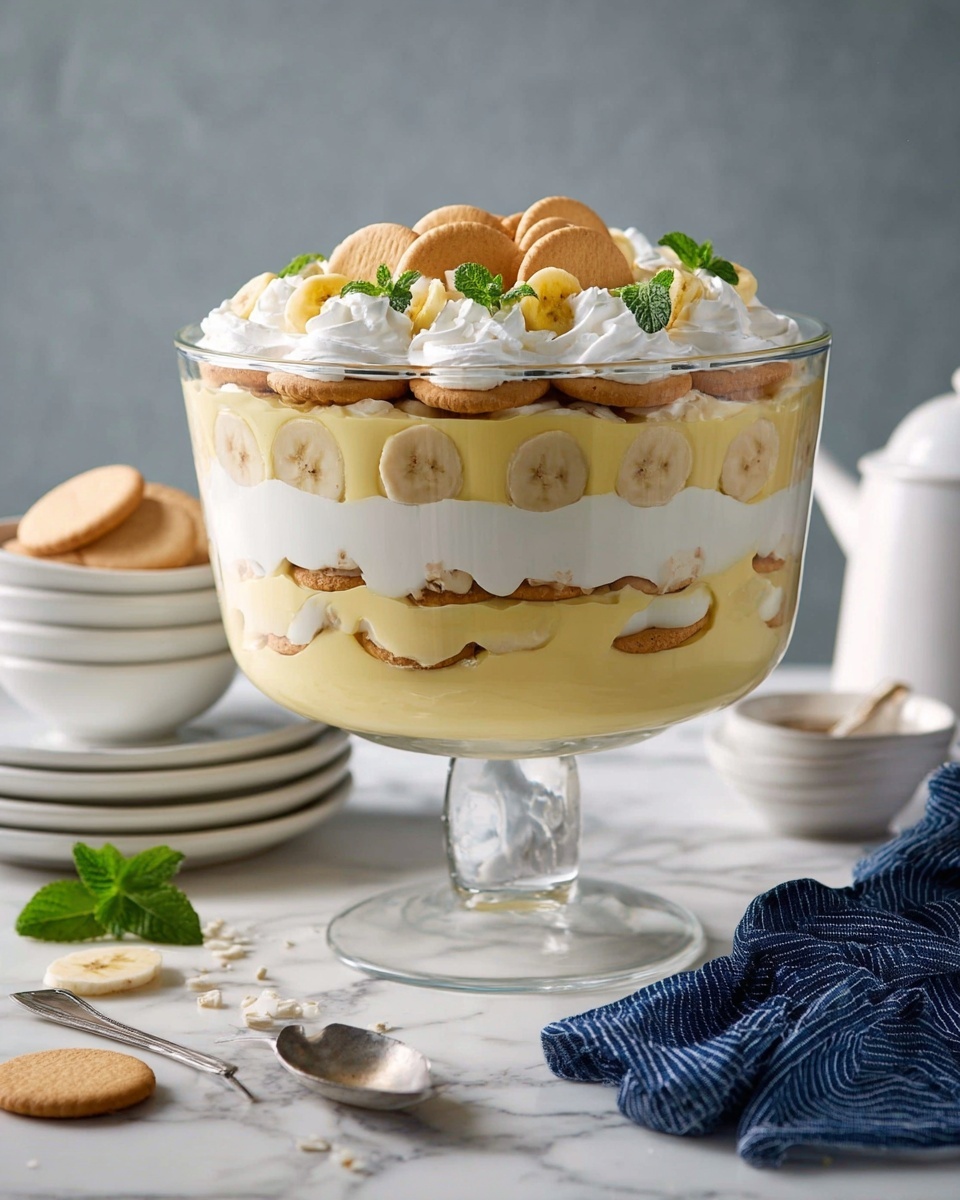
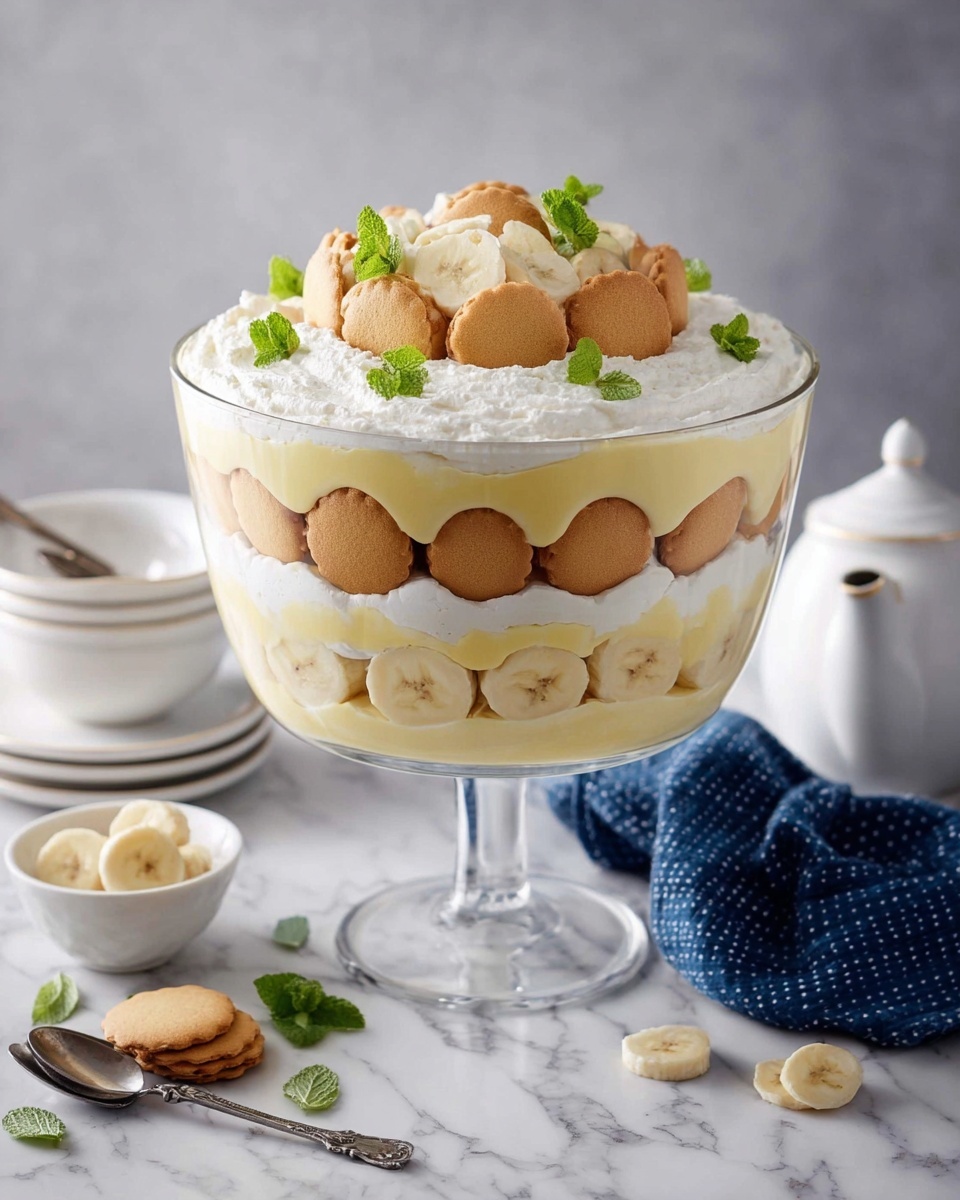
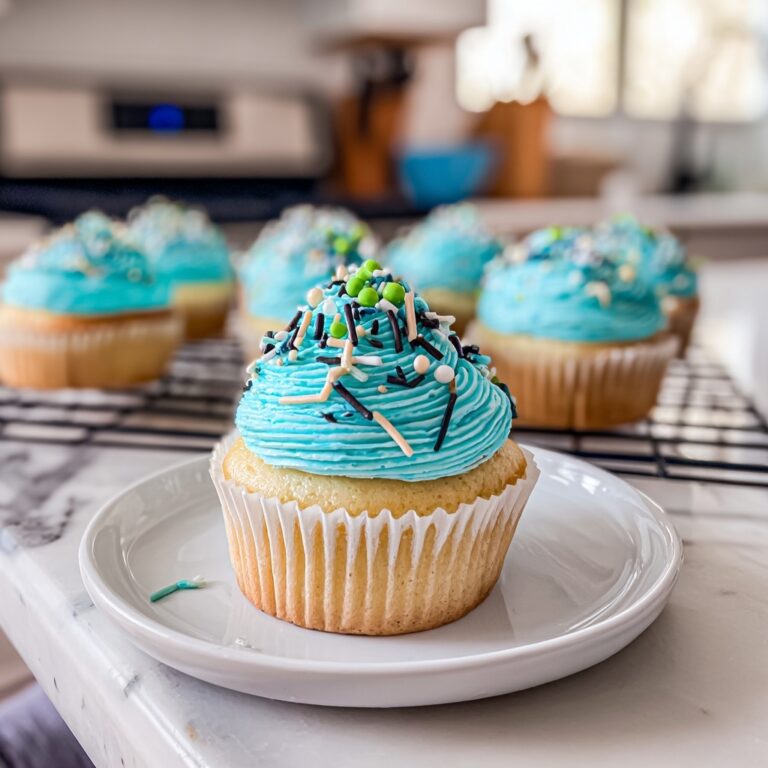
If you have a soft spot for nostalgic, comforting desserts that are as easy to make as they are delicious, this Classic No-Bake Banana Pudding Recipe is about to become your new go-to. Creamy layers of smooth vanilla pudding, fresh banana slices, and crunchy vanilla wafers come together in perfect harmony to create a dessert that feels like a warm hug from the South. The best part? No oven required, making it a wonderfully fuss-free treat that tastes like it took hours of love and care. Whether you’re serving it at a family gathering or just indulging on a quiet night in, this pudding is pure magic from the first spoonful to the very last.
Ingredients You’ll Need
The beauty of this Classic No-Bake Banana Pudding Recipe lies in its simplicity and the way each ingredient plays a starring role. From the richness of sweetened condensed milk to the delicate crunch of vanilla wafers, every component adds its own magic to the dessert’s final taste and texture.
- Sweetened condensed milk: Provides creamy sweetness and binds the pudding layers together perfectly.
- Cold water: Lightens the pudding mix, helping achieve a silky-smooth consistency.
- Instant vanilla pudding mix: The foundation of classic flavor and that signature custardy texture.
- Heavy whipping cream: Whipped to stiff peaks, it gives the pudding a luxurious, fluffy richness.
- Vanilla wafers: Add delightful crunch and nostalgic charm with every bite.
- Ripe bananas: The star fruit that offers natural sweetness and a fresh, fruity burst.
- Vanilla extract (optional): A splash enhances the vanilla flavor for an extra indulgent touch.
How to Make Classic No-Bake Banana Pudding Recipe
Step 1: Prepare the Pudding Base
Start by whisking the sweetened condensed milk and cold water together until it’s perfectly smooth—no lumps allowed here. Then, add the instant vanilla pudding mix and whisk again until it thickens a bit, which usually takes about 2 minutes. Pop this mixture into the fridge to chill for at least 5 minutes, giving it the time it needs to set and develop that signature creamy texture we all love.
Step 2: Whip the Cream
While the pudding chills, grab a clean bowl and whip that heavy cream until stiff peaks form—when you lift the whisk out, the peaks should stand tall without drooping. This step is the secret to making the pudding light and airy, so don’t rush it. Once done, gently fold the whipped cream into the chilled pudding mixture, being careful not to deflate all that lovely fluff.
Step 3: Layering the Magic
Grab your favorite 9×13-inch dish or a trifle bowl and start with a layer of vanilla wafers on the bottom. Add a generous layer of sliced bananas right on top—pro tip: tossing the banana slices in a little lemon juice will keep them looking fresh and prevent browning. Then, spread a thick layer of the luscious pudding mixture over the bananas. Repeat these layers—wafers, bananas, pudding—until all your ingredients are used up. Finish with a final layer of pudding for that polished look.
Step 4: Chill and Set
Cover your dessert tightly and refrigerate for at least 4 hours, or better yet, overnight. This step is crucial because it allows the flavors to meld beautifully and the wafers to soften slightly while still maintaining a lovely texture. The wait is totally worth it!
How to Serve Classic No-Bake Banana Pudding Recipe
Garnishes
A sprinkle of crushed vanilla wafers or a few elegant banana slices on top can elevate the presentation and add a bit of textural contrast right before serving. For a fun twist, you could even add a dollop of whipped cream or a dusting of cinnamon to complement the vanilla and banana flavors.
Side Dishes
This pudding is a versatile dessert that pairs wonderfully with many light sides. Fresh berries or a simple mixed green salad with a citrus vinaigrette can add balance, while a cup of rich coffee or a scoop of vanilla ice cream makes an indulgent pairing. It’s also fantastic on its own as the star of any sweet spread.
Creative Ways to Present
Why not turn this Classic No-Bake Banana Pudding Recipe into a show-stopping trifle? Layer individual servings in clear glasses or mason jars to showcase those dreamy layers. This presentation is perfect for parties or when you want to impress guests with a charming yet simple dessert.
Make Ahead and Storage
Storing Leftovers
Any leftovers should be kept in an airtight container in the fridge and are best enjoyed within two days. The pudding tastes freshest before the bananas start getting too soft, but the flavor remains delightful, especially when served chilled.
Freezing
Because of the fresh bananas and creamy texture, freezing is not recommended for this pudding. Frozen bananas tend to become mushy upon thawing, and the whipped cream can separate, affecting the overall quality and texture.
Reheating
This dessert is meant to be served cold, so reheating is not suggested. Just take it out of the fridge a few minutes before serving if you want to soften it slightly, allowing those flavors to shine even brighter.
FAQs
Can I use a different type of pudding mix?
For this Classic No-Bake Banana Pudding Recipe, instant vanilla pudding mix works best to achieve the right texture and flavor. While other flavors can be used creatively, vanilla is the traditional and most complementary choice for the bananas and wafers.
How do I prevent the bananas from browning?
Lightly tossing your banana slices in lemon juice or a bit of orange juice just before layering will keep them looking fresh and appetizing. This small trick slows down oxidation without altering the flavor.
Is there a way to make this pudding vegan or dairy-free?
This classic version relies on dairy ingredients, but you can experiment with coconut whipped cream and plant-based milk puddings. Just be mindful that it will change the taste and texture somewhat from the traditional experience.
How long does it take to set properly?
A minimum of 4 hours in the refrigerator is needed to let the layers meld and thicken, but overnight chilling really brings out the best flavors and texture for this Classic No-Bake Banana Pudding Recipe.
Can I make this recipe smaller or larger?
Absolutely! The layering is what makes this pudding so special, so just adjust the quantities of the ingredients proportionally to fit smaller or larger serving dishes without losing any of the magic.
Final Thoughts
This Classic No-Bake Banana Pudding Recipe is a timeless treasure that anyone can whip up with ease and enjoy with pure delight. It’s creamy, sweet, and refreshingly simple, bringing a little piece of Southern charm right to your table. Give it a try for your next gathering or simply to treat yourself—you’ll quickly see why this dessert is a beloved classic worth sharing again and again.
Print
Classic No-Bake Banana Pudding Recipe
- Prep Time: 20 minutes
- Cook Time: 0 minutes
- Total Time: 20 minutes plus at least 4 hours chilling time
- Yield: 10 servings
- Category: Dessert
- Method: No-Cook
- Cuisine: American
- Diet: Vegetarian
Description
Classic Southern-style Banana Pudding made with layers of creamy vanilla pudding, fresh bananas, and crispy vanilla wafers. This no-bake dessert combines the rich flavors of sweetened condensed milk and whipped cream for a smooth, luscious texture. Perfectly chilled for hours to meld the flavors, it’s a refreshing and nostalgic treat enjoyed by all.
Ingredients
Pudding Mixture
- 1 (14-ounce) can sweetened condensed milk
- 1 1/2 cups cold water
- 1 (3.4-ounce) package instant vanilla pudding mix
- 1/2 teaspoon vanilla extract (optional)
Whipped Cream
- 3 cups heavy whipping cream
Assembly
- 1 (12-ounce) box vanilla wafers
- 4–5 ripe bananas, sliced
Instructions
- Prepare the Pudding Mixture: In a large mixing bowl, whisk together the sweetened condensed milk and cold water until smooth. Add the instant vanilla pudding mix and continue whisking until well combined and the mixture thickens slightly, about 2 minutes. Cover and refrigerate for at least 5 minutes to chill and set.
- Whip the Cream: In a separate chilled bowl, whip the heavy cream until stiff peaks form. This will create a light and airy texture that complements the pudding.
- Combine Pudding and Whipped Cream: Gently fold the whipped cream into the chilled pudding mixture until fully incorporated and smooth, taking care not to deflate the whipped cream.
- Assemble the Banana Pudding: In a 9×13-inch dish or a trifle bowl, start by layering vanilla wafers evenly on the bottom. Add a layer of sliced bananas atop the wafers, then spread a layer of the pudding mixture over the bananas. Repeat these layers—wafers, bananas, pudding—until all ingredients are used, finishing with a top layer of pudding.
- Garnish and Chill: For extra texture and presentation, garnish the top with crushed vanilla wafers or additional banana slices if desired. Cover the dish and refrigerate for at least 4 hours or overnight to allow flavors to meld and the pudding to set for the best texture and flavor.
Notes
- For enhanced flavor, add a touch of vanilla or banana extract to the pudding mixture before chilling.
- To prevent banana slices from browning, lightly toss them in lemon juice before layering.
- This dessert is best enjoyed within 2 days for optimal freshness.


