
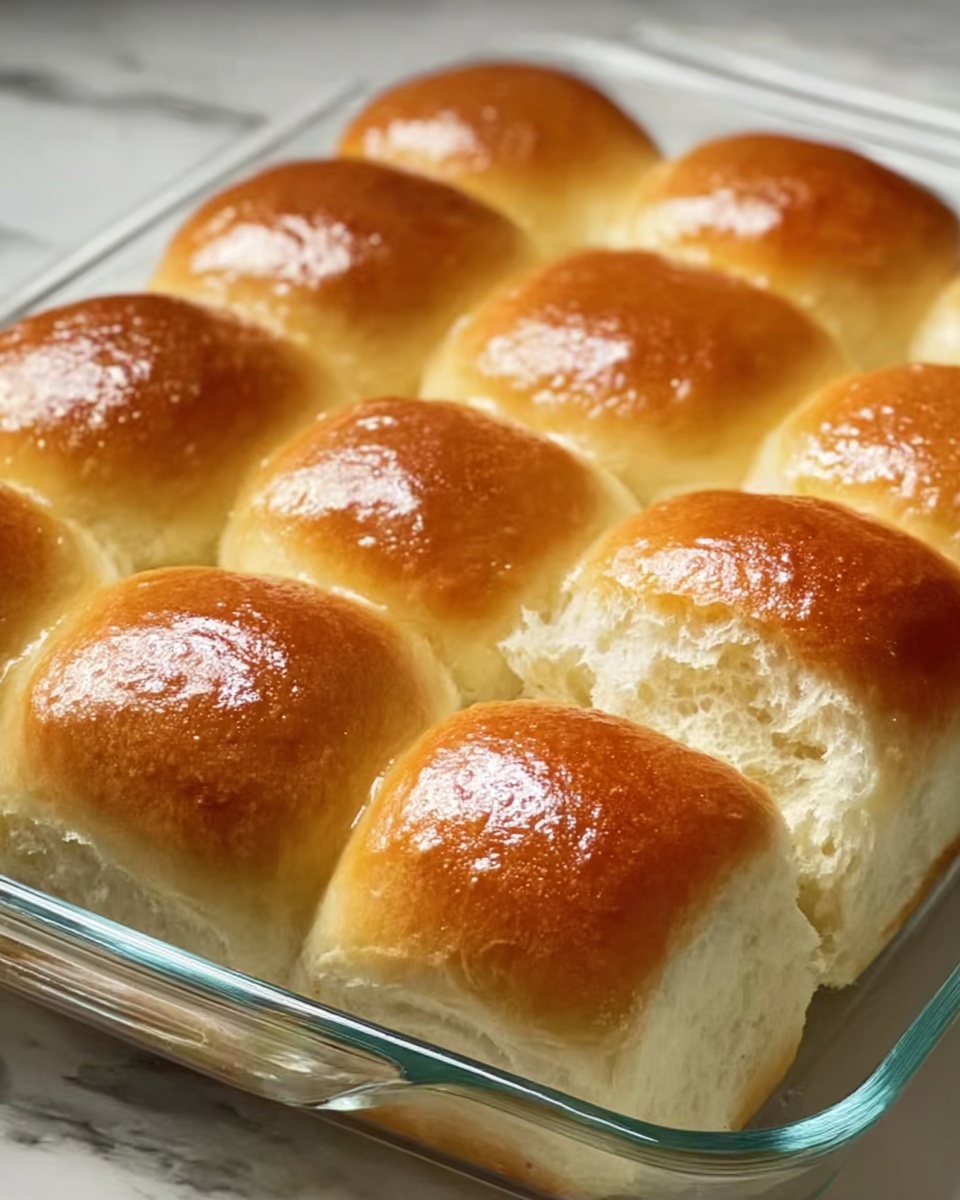
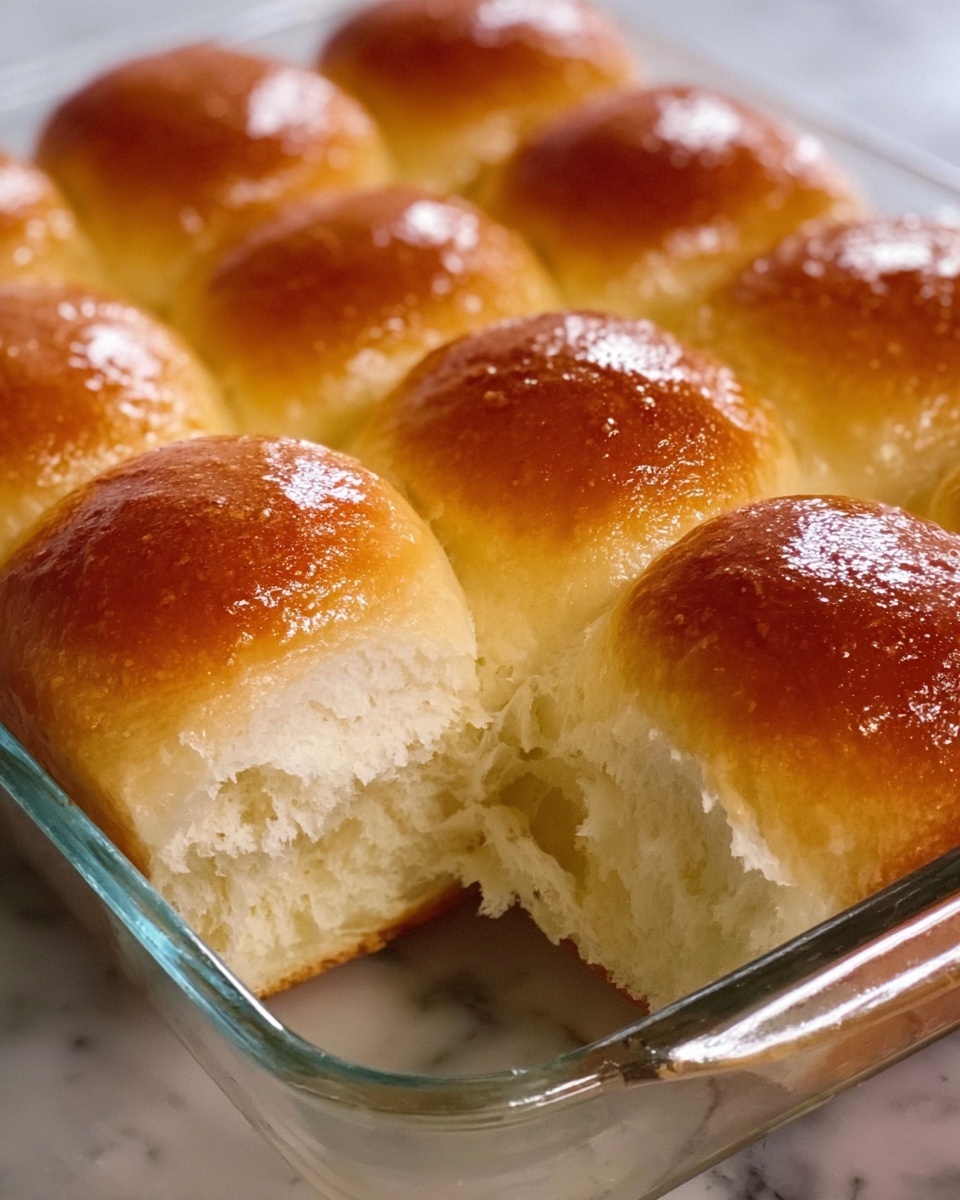
If you’ve ever dreamed of pulling warm, pillowy bread fresh from your oven, then this Soft & Fluffy Homemade Dinner Rolls Recipe is about to become your new favorite go-to. These rolls are the perfect mix of tender crumb and golden crust, making them irresistibly soft and chewy at the same time. With just common pantry ingredients and a bit of patience, you can create these delightful dinner rolls that elevate every meal, from weeknight dinners to holiday feasts. The aroma alone will have your whole house buzzing with happiness!
Ingredients You’ll Need
One of the things I love about this Soft & Fluffy Homemade Dinner Rolls Recipe is how simple the ingredients are, yet each one plays a crucial part in creating the perfect texture, flavor, and color. Let’s look at what you’ll need to bring these beautiful rolls to life.
- All-purpose flour (3 1/2 to 4 cups): The backbone of the dough, providing structure and chew.
- Active dry yeast (1 packet, 2 1/4 teaspoons): This magical ingredient makes the rolls rise nice and fluffy.
- Warm milk (1 cup, about 110°F/45°C): Feeds the yeast and enriches the dough for softness.
- Sugar (1/4 cup): Adds a subtle sweetness and helps feed the yeast for a beautiful rise.
- Unsalted butter (1/4 cup, melted): Adds richness and a tender crumb to the rolls.
- Large egg (1): Brings moisture, helps bind the dough, and contributes to a lovely golden color.
- Salt (1 teaspoon): Balances sweetness and enhances overall flavor.
- Melted butter for brushing (2 tablespoons): Gives the rolls a soft, shiny, and flavorful finish.
How to Make Soft & Fluffy Homemade Dinner Rolls Recipe
Step 1: Activate the Yeast
Begin by combining the warm milk, sugar, and yeast in a small bowl. Let this magical mixture sit for 5 to 10 minutes until it becomes foamy on top, signaling that your yeast is alive and ready to work its magic. This step is crucial for fluffy rolls that rise beautifully.
Step 2: Mix the Dough
In a large bowl, bring together 3 1/2 cups of flour, salt, the foamy yeast mixture, melted butter, and egg. Stir until a loose dough begins to form. If the dough feels too sticky or wet, sprinkle in additional flour a little at a time until you have a manageable, soft ball that’s not too dry.
Step 3: Knead Until Smooth
Turn your dough onto a floured surface and knead for 8 to 10 minutes until it feels smooth and elastic. If you prefer, a stand mixer fitted with a dough hook works great here—simply knead on medium speed for the same amount of time. This kneading process develops the gluten, ensuring your rolls have that perfect chewy texture inside.
Step 4: Let the Dough Rise
Place your dough ball in a greased bowl, cover it with a clean kitchen towel or plastic wrap, and find a warm spot to let it rise. After about an hour, the dough should double in size. This first rise is key for that soft yet airy crumb you want in each roll.
Step 5: Shape the Rolls
Once risen, punch the dough down gently to release any air bubbles. Divide it into 12 to 15 equal portions, shaping each one into a smooth ball. Arrange these balls closely in a greased 9×13-inch pan or spread out on a baking sheet if you prefer individual rolls—either way works beautifully.
Step 6: Second Rise
Cover the shaped rolls again and let them rise for another 30 to 45 minutes. They’ll puff up nicely, ready to bake into soft, fluffy delights that practically melt in your mouth.
Step 7: Bake to Golden Perfection
Preheat your oven to 375°F (190°C). Just before baking, brush the tops with melted butter to promote browning and add flavor. Bake for 15 to 18 minutes, watching for that irresistible golden brown color on top.
Step 8: Final Touch and Serve
As soon as the rolls come out of the oven, brush them with a little more melted butter. This step keeps the crust wonderfully soft and adds a beautiful sheen. Serve them warm and watch how everyone goes back for seconds—these rolls are that good!
How to Serve Soft & Fluffy Homemade Dinner Rolls Recipe
Garnishes
A simple brush of butter is the classic way to finish your rolls, but feel free to get creative! Sprinkle some freshly chopped herbs like rosemary or thyme right after baking, or a light dusting of flaky sea salt can add a delightful twist that wakes up every bite.
Side Dishes
These dinner rolls are incredibly versatile. Pair them with hearty soups, stews, or roasted meats. They’re equally perfect alongside a fresh salad for a lighter meal or as a canvas for slathering butter, honey, or jam at breakfast.
Creative Ways to Present
For a festive table, arrange the rolls in a circular pattern on a large platter, topped with a small dish of herb butter for dipping. Or, slice them horizontally and fill with savory ingredients like ham and cheese for mini sliders that wow guests and kids alike.
Make Ahead and Storage
Storing Leftovers
Once cooled, keep any leftover rolls in an airtight container at room temperature. They’ll stay soft and fresh for up to 2 days—perfect for second-day sandwiches or toast.
Freezing
If you’re making a big batch, these rolls freeze beautifully. Wrap them tightly in plastic wrap and then foil or place in a freezer bag. They can be stored for up to 3 months without losing that soft, fluffy charm.
Reheating
To enjoy your rolls fresh from the freezer, thaw overnight in the fridge and warm in the oven at 350°F (175°C) for 10 to 15 minutes, brushed again with melted butter. Microwave works in a pinch but won’t keep the crust as tender.
FAQs
Can I use whole wheat flour instead of all-purpose?
Yes, you can substitute whole wheat flour for all-purpose, but keep in mind the texture will be denser and slightly less fluffy. Try mixing half whole wheat and half all-purpose flour for a balanced flavor and softness.
What if my dough doesn’t rise?
If your dough doesn’t rise, your yeast might have been inactive. Make sure your milk is warm but not hot, and always check the expiration date on your yeast. Starting with fresh, active yeast is key to success.
Can I make these rolls dairy-free?
Absolutely! Swap the milk for a plant-based milk like almond or oat milk, and use a dairy-free butter alternative. The rolls will still come out soft and delicious.
Why do I need to brush the rolls with butter after baking?
Brushing with butter right out of the oven helps keep the crust soft while adding a delicious buttery flavor. It also gives the rolls a beautiful shine that makes them look irresistible.
Can I double the recipe?
Yes, doubling this Soft & Fluffy Homemade Dinner Rolls Recipe is straightforward. Just be sure to use a larger bowl for mixing and give the dough a bit more time to rise. Baking times stay roughly the same.
Final Thoughts
I genuinely hope you give this Soft & Fluffy Homemade Dinner Rolls Recipe a try because it has such a special way of turning any meal into something extraordinary. There’s something truly comforting about homemade bread, and these rolls deliver that in every bite. They’re rewarding to make, easy to share, and impossible not to love. So warm up your oven and get ready for a delicious adventure!
Print
Soft & Fluffy Homemade Dinner Rolls Recipe
- Prep Time: 20 minutes
- Cook Time: 15-18 minutes
- Total Time: 1 hour 55 minutes
- Yield: 12-15 rolls
- Category: Bread
- Method: Baking
- Cuisine: American
Description
These soft and fluffy Dinner Rolls are perfect for any meal, with a tender crumb and golden crust. Made from a simple yeast dough enriched with butter and milk, they are ideal for serving alongside soups, salads, or holiday dinners.
Ingredients
Dry Ingredients
- 3 1/2 to 4 cups all-purpose flour
- 1 packet (2 1/4 teaspoons) active dry yeast
- 1/4 cup sugar
- 1 teaspoon salt
Wet Ingredients
- 1 cup warm milk (about 110°F/45°C)
- 1/4 cup unsalted butter, melted
- 1 large egg
- 2 tablespoons melted butter (for brushing)
Instructions
- Activate Yeast: In a small bowl, combine the warm milk, sugar, and active dry yeast. Let the mixture sit for 5-10 minutes until it becomes foamy, indicating the yeast is active.
- Mix Dough: In a large mixing bowl, combine 3 1/2 cups of all-purpose flour, salt, the foamy yeast mixture, melted butter, and the egg. Stir until a dough forms. Add more flour if necessary until the dough is workable and not overly sticky.
- Knead Dough: Transfer the dough to a floured surface and knead it for 8-10 minutes until smooth and elastic. Alternatively, use a stand mixer fitted with a dough hook to knead the dough to the same consistency.
- First Rise: Place the kneaded dough in a greased bowl, cover it with a clean cloth or plastic wrap, and let it rise in a warm place for about 1 hour, or until it has doubled in size.
- Shape Rolls: Punch down the risen dough gently to release air. Divide it into 12 to 15 equal portions. Shape each portion into a smooth ball and place them close together in a greased 9×13-inch baking dish or spaced on a greased baking sheet.
- Second Rise: Cover the shaped rolls and let them rise again in a warm spot for 30-45 minutes until they are puffed and nearly doubled.
- Preheat Oven and Prepare: While the rolls are undergoing their second rise, preheat the oven to 375°F (190°C). Just before baking, brush the tops of the rolls with 2 tablespoons of melted butter for a golden crust.
- Bake: Bake the rolls in the preheated oven for 15-18 minutes until the tops are golden brown and the rolls sound hollow when tapped.
- Final Butter Brush: Remove the rolls from the oven and immediately brush them again with melted butter to keep them soft and add a rich flavor.
- Serve Warm: Serve the dinner rolls warm alongside your favorite main dishes or soups for a comforting addition to your meal.
Notes
- If you prefer a slightly sweeter roll, increase the sugar by a tablespoon or two.
- Ensure the milk is not too hot when activating yeast, as high temperatures can kill the yeast.
- Kneading by hand should take about 8-10 minutes; if using a stand mixer, knead for about 5-7 minutes.
- For softer rolls, cover them with a damp kitchen towel during rising stages to prevent drying out.
- These rolls can be frozen after shaping and second rise; bake them straight from frozen, adding a few extra minutes to baking time.


