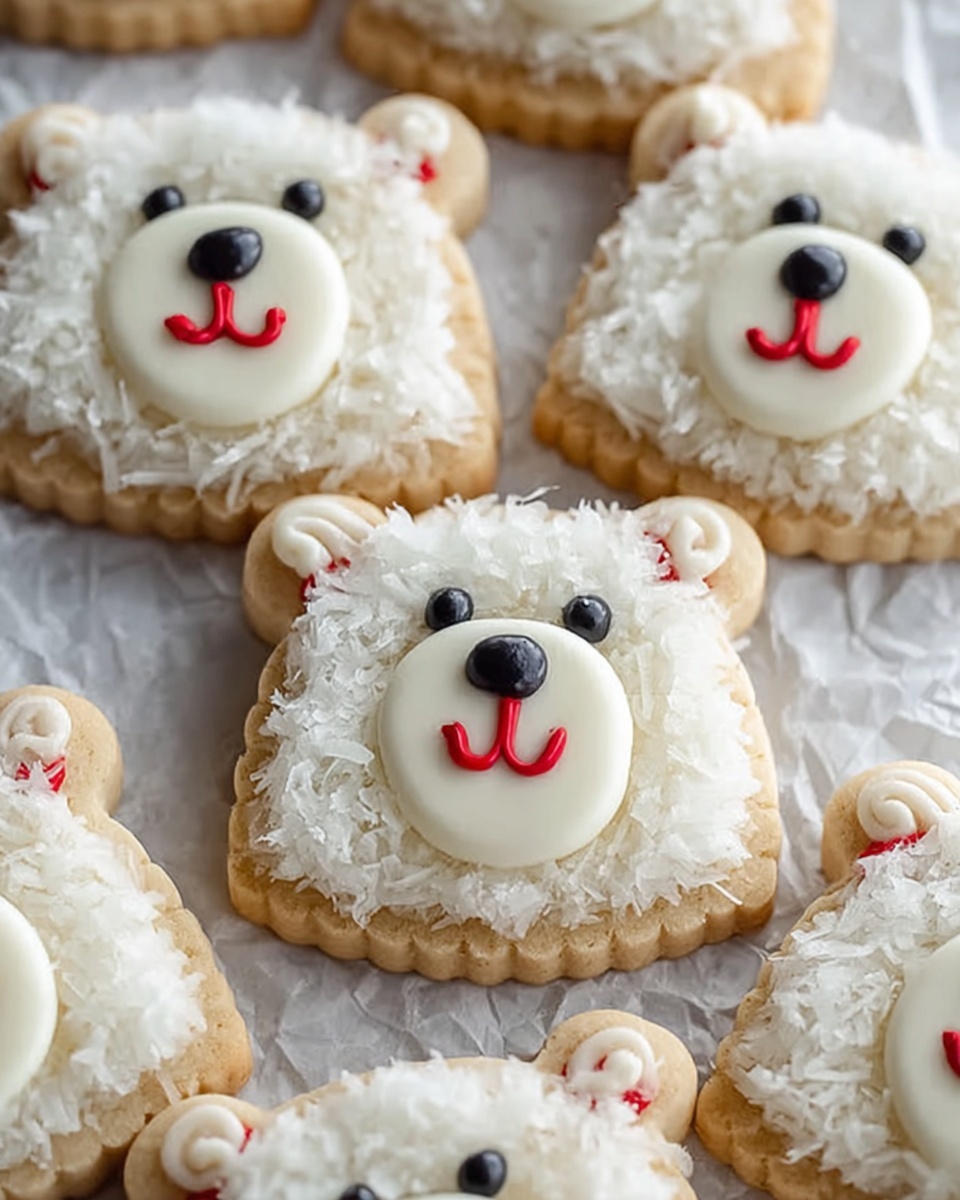
If you are looking for a delightfully charming treat that combines adorable presentation with delicious flavor, the Polar Bear Cookies Recipe is your new best friend in the kitchen. These sweet cookies are soft, buttery, and perfectly frosted to capture the playful essence of a fluffy polar bear’s face. Whether you’re baking for a cozy winter gathering or simply want to brighten someone’s day with a smile-inducing snack, this recipe delivers on taste and festive fun with every bite.

Ingredients You’ll Need
The beauty of the Polar Bear Cookies Recipe lies in its simple yet essential ingredients, each one carefully chosen to create a tender cookie with a creamy, luscious frosting. From the cream cheese that keeps the cookies soft to the subtle almond extract that adds a hint of depth, every element plays a key role in making these cookies simply irresistible.
- Unsalted butter (3/4 cup): Provides richness and a tender crumb to the cookies.
- Cream cheese (1/2 cup): Adds moisture and a slight tanginess for an irresistible softness.
- Granulated sugar (1 cup): Sweetens the dough, ensuring perfect balance without overpowering.
- Large egg (1): Binds ingredients together and contributes to the cookies’ structure.
- Vanilla extract (1 teaspoon): Enhances all the flavors with warm, comforting notes.
- Almond extract (1/2 teaspoon, optional): Gives a subtle nutty aroma that complements the vanilla beautifully.
- All-purpose flour (3 cups): The foundation of the cookie’s texture, providing structure.
- Cornstarch (2 teaspoons): Ensures a tender, melt-in-your-mouth softness.
- Baking powder (1/2 teaspoon): Helps cookies rise just enough for fluffiness without puffiness.
- Salt (1/2 teaspoon): Balances sweetness and enhances flavor.
- Unsalted butter for frosting (1/2 cup): Creates the creamy base of the buttercream frosting.
- Powdered sugar (2 cups): Sweetens and smooths the frosting perfectly.
- Vanilla extract for frosting (1 teaspoon): Adds a fragrant lift to the frosting.
- Heavy cream or milk (2 tablespoons): Makes the buttercream light and spreadable.
- Pinch of salt for frosting: Balances sweetness and heightens flavor.
- White sanding sugar or granulated sugar: For that signature sparkling finish on the frosted cookies.
- Large chocolate chips: Perfect for crafting the polar bear’s cute little nose.
- Black round sprinkles: Ideal for making expressive, twinkling eyes.
- Red or pink round sprinkles: Use these to create charming inner ears, adding a pop of color.
How to Make Polar Bear Cookies Recipe
Step 1: Prepare the Cookie Dough
Begin by creaming together the butter, cream cheese, and granulated sugar until your mixture is light and wonderfully fluffy. This is the magic foundation for tender cookies. Then, add in the egg along with vanilla extract and almond extract, mixing until everything is perfectly combined. In another bowl, whisk your dry ingredients: flour, cornstarch, baking powder, and salt. Gradually fold these dry ingredients into your wet mixture, taking care not to overmix. Once your dough comes together, divide it into discs, wrap in plastic wrap, and pop it into the fridge for at least two hours to chill and become easier to work with.
Step 2: Roll and Cut the Cookies
Preheat your oven to 350°F (175°C), and line your baking sheets with parchment paper. On a well-floured surface, roll out your dough to about one-third inch thick. Use a 2 1/2-inch round cookie cutter to create the bear faces, then cut smaller circles (about 3/4-inch) for the ears. Trim a flat edge on each ear circle so they sit snugly on the large circle faces. Gently press the ears onto the tops of each bear face cookie. Chill these adorable creations back in the fridge for 15 minutes — this keeps their shape intact while baking.
Step 3: Bake the Cookies
Sliding the baking sheets into the oven, bake the cookies for 10 to 13 minutes until their edges are just set and not browned. This timing ensures they stay soft and tender inside. After baking, let them cool on the baking sheets for 15 minutes before transferring to wire racks to cool completely. Cooling is a must before moving on to the frosting stage.
Step 4: Prepare the Buttercream Frosting
For the frosting, beat butter until creamy and soft. Gradually add powdered sugar while mixing on low speed to avoid a sugary cloud in your kitchen. Once combined, add vanilla extract, the heavy cream or milk, and a pinch of salt, then beat on medium-high until your frosting turns fluffy and smooth — perfect for decorating those polar bears.
Step 5: Decorate the Cookies
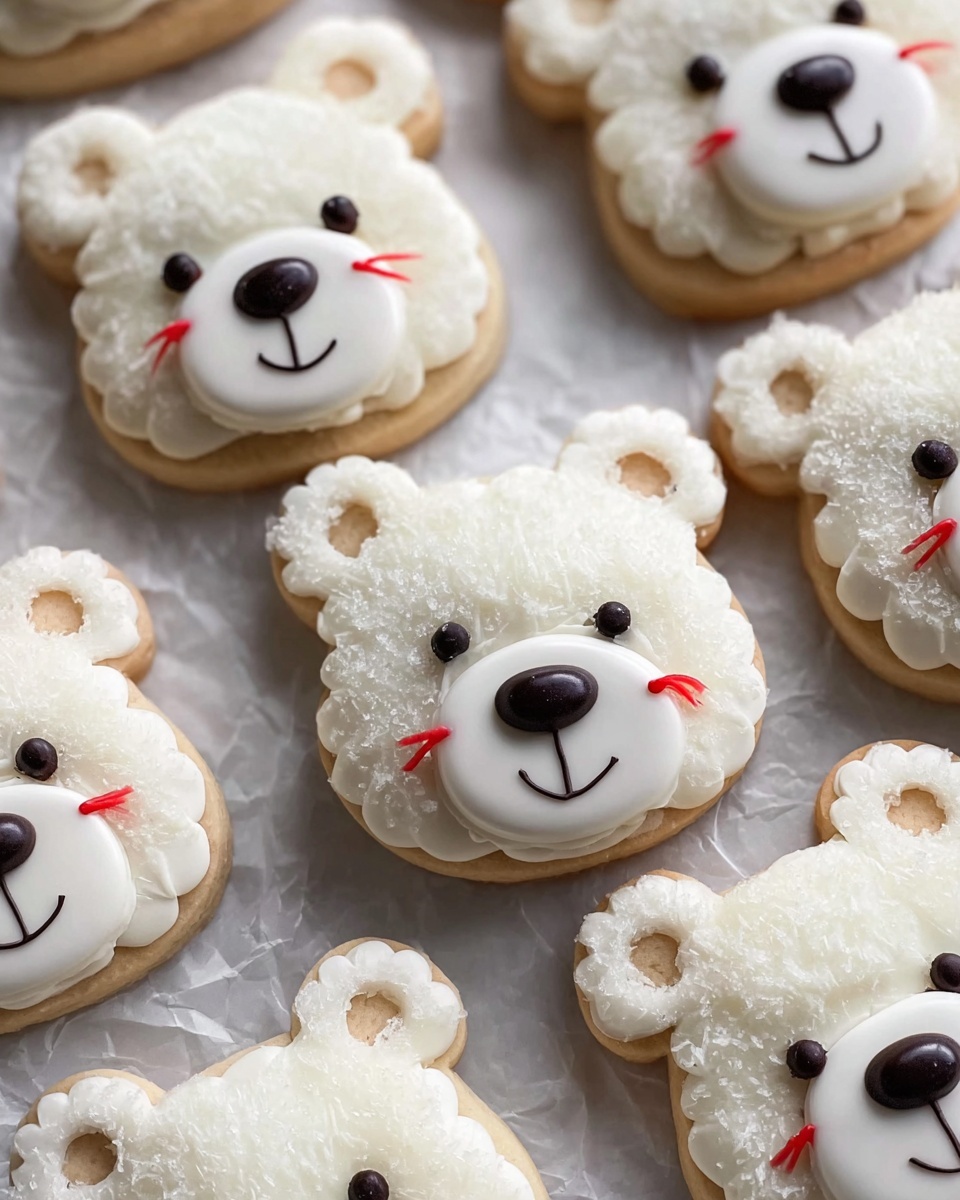
Spread a thin, even layer of buttercream on each cooled cookie surface. Then, while the frosting is still tacky, gently dip the frosted side into white sanding sugar for that snowy, sparkling coat. Next, pipe an oval of frosting at the cookie’s bottom to create the muzzle, topping it with a large chocolate chip nose. Position black sprinkles above as the eyes, and add red or pink sprinkles inside the ears for an extra pop of personality. Each polar bear face will surely bring a joyful grin!
How to Serve Polar Bear Cookies Recipe
Garnishes
These cookies are already stars, but adding a dusting of edible glitter or a drizzle of white chocolate can turn them into show-stopping treats. Fresh mint leaves or a few cranberries on the plate can add a festive flair when serving to guests. Serving with a little bowl of honey or raspberry jam on the side lets everyone customize their bite.
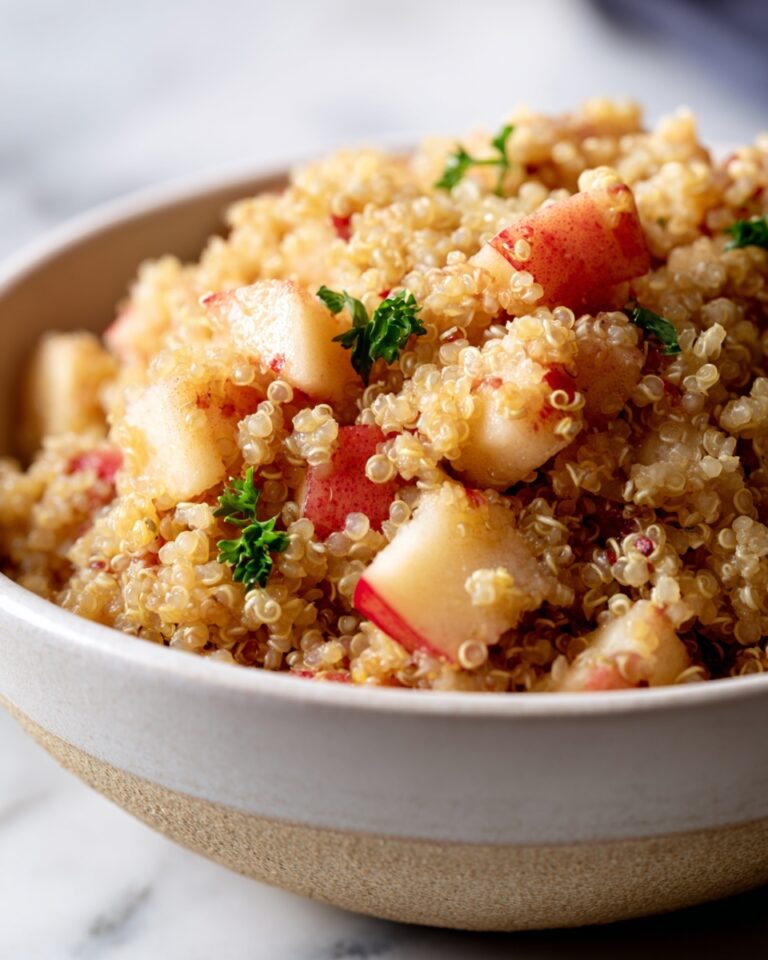
Side Dishes
Polar Bear Cookies pair wonderfully with warm drinks like hot cocoa, chai tea, or a frothy cappuccino. The fluffy softness of the cookies complements smooth, creamy beverages, making your snack time feel luxuriously cozy. For a gathering, set up a cookie and drink station to encourage everyone to relax and enjoy.
Creative Ways to Present
Presentation can make all the difference! Arrange your Polar Bear Cookies on a platter lined with evergreen branches or sprinkle around mini marshmallows for a winter wonderland vibe. Use a tiered cake stand to display them at parties, or package a handful in clear cellophane bags tied with red ribbon as delightful gifts that anyone would treasure.
Make Ahead and Storage
Storing Leftovers
You can keep any leftover Polar Bear Cookies in an airtight container at room temperature for up to five days. Their tender texture holds up beautifully, so they remain soft and tasty without any fuss. Just make sure they are completely cool before storing to avoid condensation.
Freezing
If you want to make these cookies ahead of a special occasion, feel free to freeze the unbaked dough discs wrapped tightly in plastic wrap for up to one month. When ready to bake, thaw them overnight in the fridge before rolling out. You can also freeze fully decorated cookies between layers of parchment paper for up to two weeks, letting them thaw at room temperature to preserve the frosting perfectly.
Reheating
To enjoy these cookies freshly baked, gently warm them in the microwave for 10 to 15 seconds. This quick heat-up will revive their softness and bring out the fragrant vanilla and almond notes, making it feel like they just came out of the oven every single time.
FAQs
Can I skip the almond extract in this Polar Bear Cookies Recipe?
Absolutely! The almond extract is optional and adds a subtle nutty note, but the cookies are just as delicious without it. Vanilla alone provides plenty of lovely flavor.
What if I don’t have white sanding sugar?
No worries! You can use regular granulated sugar for the sparkling effect or even substitute with finely shredded coconut for a snowy touch that’s a bit different but equally tasty.
How do I keep the ears attached securely during baking?
Press the small ear circles gently into the larger cookie dough rounds and chill the assembled cookies for at least 15 minutes before baking. This helps everything stick together and prevents shifting while in the oven.
Can I make these cookies gluten-free?
Yes, by swapping the all-purpose flour for a high-quality gluten-free flour blend with xanthan gum, you can enjoy these cookies with everyone. Just keep in mind that texture may vary slightly but will still be delicious.
How long will the decorated cookies last?
Once decorated, Polar Bear Cookies can be stored in an airtight container for up to five days at room temperature. For longer storage, freezing is best to maintain freshness and decoration.
Final Thoughts
If you want to bake something that feels like a warm, delightful hug, the Polar Bear Cookies Recipe is exactly what you need. They’re fun, charming, and more irresistible than you’d expect from a homemade treat. Share them with loved ones or enjoy a quiet moment with a cup of tea – either way, these cookies are sure to become a cherished favorite. So, grab your ingredients and get ready to make some smiles one sweet bear face at a time!
Print
Polar Bear Cookies Recipe
- Prep Time: 20 minutes
- Cook Time: 13 minutes
- Total Time: 1 hour 20 minutes (including chilling time)
- Yield: 30 cookies
- Category: Dessert
- Method: Baking
- Cuisine: American
Description
Delightfully charming Polar Bear Cookies featuring soft, creamy butter and cream cheese dough cut into adorable bear faces, baked to perfection, and decorated with smooth buttercream frosting, sanding sugar, and playful sprinkle details. Perfect for winter celebrations or any time you want a fun, tasty treat.
Ingredients
Cookie Dough
- 3/4 cup (170g) unsalted butter, room temperature
- 1/2 cup (113g) cream cheese, room temperature
- 1 cup (200g) granulated sugar
- 1 large egg, room temperature
- 1 teaspoon vanilla extract
- 1/2 teaspoon almond extract (optional)
- 3 cups (375g) all-purpose flour
- 2 teaspoons cornstarch
- 1/2 teaspoon baking powder
- 1/2 teaspoon salt
Buttercream Frosting
- 1/2 cup (113g) unsalted butter, room temperature
- 2 cups (250g) powdered sugar
- 1 teaspoon vanilla extract
- 2 tablespoons heavy cream or milk
- Pinch of salt
Decoration
- White sanding sugar or granulated sugar
- Large chocolate chips (for noses)
- Black round sprinkles (for eyes)
- Red or pink round sprinkles (for inner ears)
Instructions
- Prepare the Cookie Dough: Cream together the unsalted butter, cream cheese, and granulated sugar until the mixture is light and fluffy, creating a smooth base for the dough.
- Add Flavorings and Egg: Incorporate the egg, vanilla extract, and optional almond extract into the creamed mixture, mixing until just combined for enhanced flavor and structure.
- Mix Dry Ingredients: In a separate bowl, whisk together all-purpose flour, cornstarch, baking powder, and salt, ensuring an even distribution of leavening and texture components.
- Combine Wet and Dry Ingredients: Gradually add the dry ingredients to the wet mixture and blend until a uniform dough forms, careful not to overmix to maintain tenderness.
- Chill the Dough: Divide the dough into portions, flatten into discs, wrap tightly in plastic wrap, and refrigerate for at least 2 hours or freeze for 30 minutes to firm up for easier handling.
- Preheat and Prepare Baking Sheets: Set your oven to 350°F (175°C) and line baking sheets with parchment paper to prevent sticking and ensure even baking.
- Roll Out Dough: On a floured surface, roll the chilled dough to about 1/3 inch thickness, providing the ideal thickness for soft but sturdy cookies.
- Cut Bear Faces: Use a 2 1/2-inch round cookie cutter to create the main bear faces from the rolled dough.
- Cut and Shape Ears: Use a 3/4-inch round cutter to cut out smaller circles for ears, trimming a straight edge if needed to attach securely.
- Attach Ears to Faces: Gently press the small ear circles onto the top edge of each larger bear face cookie, ensuring they adhere after chilling.
- Chill Cookies Before Baking: Place the shaped cookies back in the refrigerator for 15 minutes to help maintain their shape during baking.
- Bake: Bake cookies for 10-13 minutes until edges are set but not browned, retaining a soft texture.
- Cool Cookies: Let cookies cool on the baking sheet for 15 minutes to firm up, then transfer to a wire rack to cool completely for decorating.
- Make Buttercream Frosting: Beat the butter until creamy, then gradually add powdered sugar and mix on low until combined smoothly.
- Add Remaining Frosting Ingredients: Incorporate vanilla extract, heavy cream or milk, and a pinch of salt, then beat on medium-high speed until the frosting is light and fluffy.
- Frost Cookies: Spread a thin layer of buttercream frosting over each cooled cookie using a spatula or knife.
- Add Sugar Coating: Dip the frosted side of each cookie into white sanding sugar or granulated sugar to give a smooth, snowy finish.
- Pipe Muzzle: Use a piping bag or small spatula to add an oval dollop of frosting near the bottom center of each bear face to form the muzzle.
- Place Nose: Press a large chocolate chip onto the frosting muzzle to serve as the bear’s nose.
- Add Eyes and Inner Ears: Position black round sprinkles above the muzzle for eyes, and stick red or pink sprinkles inside the ears for a cute inner ear detail.
Notes
- For best texture, ensure butter and cream cheese are at room temperature before creaming.
- Chilling the dough is crucial to prevent spreading during baking and maintaining the bear shape.
- Use parchment paper or silicone baking mats to avoid sticking and facilitate easy cleanup.
- Almond extract is optional but adds a lovely depth of flavor complementing the vanilla.
- Decorating can be customized with different sprinkles or colored sugars for a festive touch.
- Store cookies in an airtight container at room temperature for up to 5 days or freeze for longer storage.


