
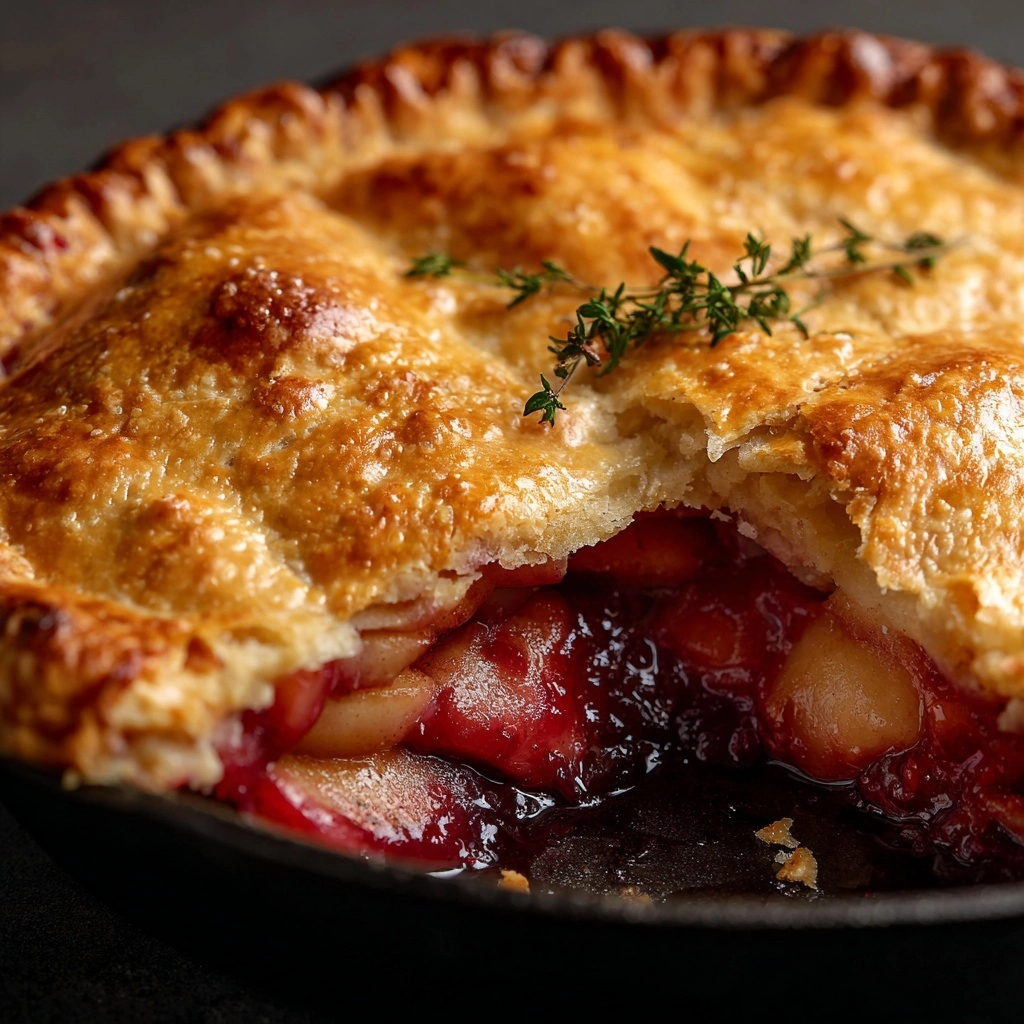
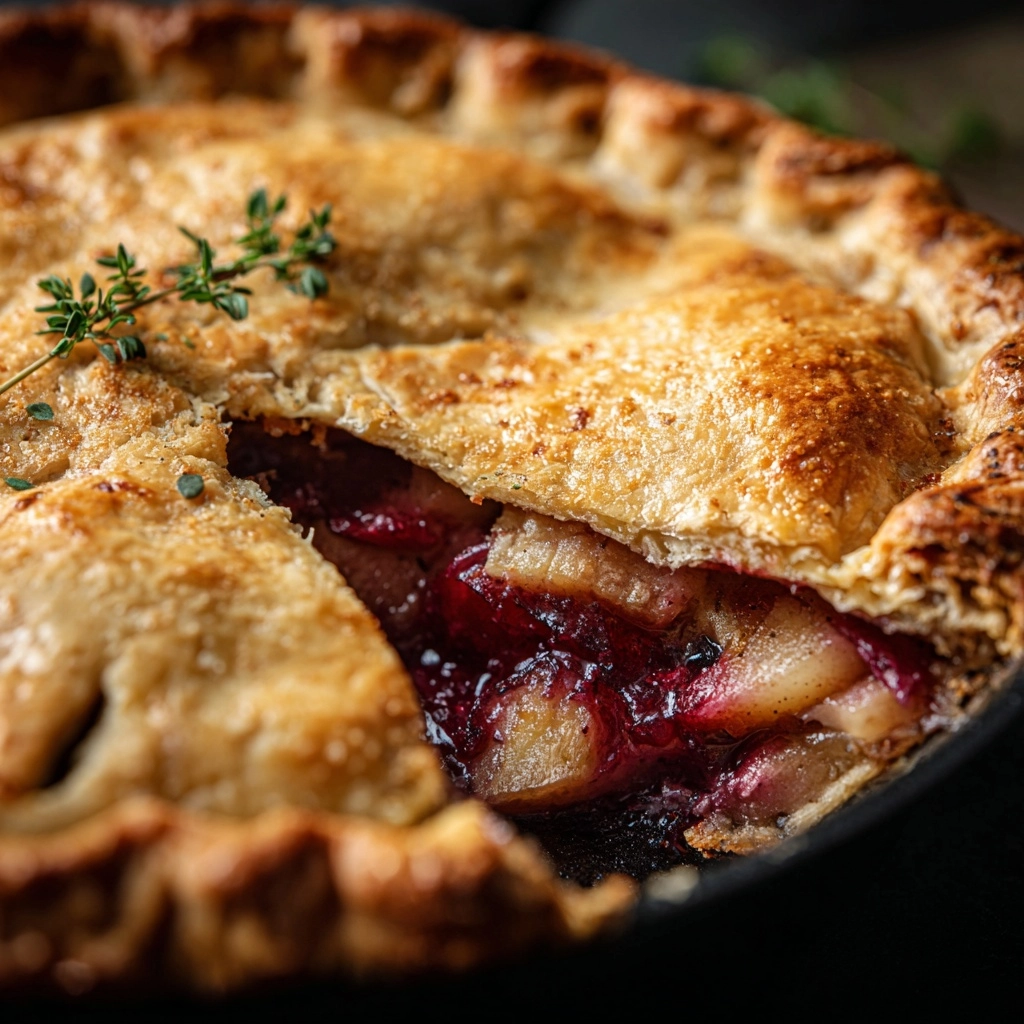
Hillbilly Pie is the ultimate comfort food for anyone who craves a cozy, satisfying meal that’s as nostalgic as it is delicious. This all-in-one dish layers seasoned ground beef, sweet corn, and creamy mushroom soup beneath a golden pie crust, then blankets it all in gooey cheddar cheese. Whether you’re feeding a hungry crowd or looking for a weeknight dinner with serious staying power, Hillbilly Pie is sure to become a family favorite that disappears fast.
Ingredients You’ll Need
The magic of Hillbilly Pie is in its simplicity—each ingredient is carefully chosen to deliver robust flavor, creamy texture, and eye-catching color. Don’t skip a thing! Every component helps build that classic, crave-worthy taste.
- Ground beef (1 pound): The hearty, savory base that brings richness and satisfying protein to every bite.
- Onion, chopped (1 medium): Adds subtle sweetness and depth, perfectly balancing the savory flavors.
- Cream of mushroom soup (1 can, 10.5 ounces): Creates luscious creaminess and ties the filling together beautifully.
- Whole kernel corn (1 can, 15 ounces, drained): Offers pops of sweetness and color—don’t forget to drain it well!
- Shredded cheddar cheese (2 cups): The melty, gooey topping everyone loves—sharp or mild, pick your favorite.
- Refrigerated pie crusts (1 package, 2 crusts): Makes assembly a breeze and bakes up perfectly golden every time.
- Salt (1 teaspoon): Essential for enhancing all the flavors in the filling.
- Black pepper (1/2 teaspoon): Adds just the right touch of warmth and spice.
- Garlic powder (1/2 teaspoon): Infuses subtle garlicky goodness throughout the pie.
- Paprika (1/2 teaspoon, optional): For a dash of color and gentle smoky kick—highly recommended for finishing!
How to Make Hillbilly Pie
Step 1: Prepare the Oven and Pan
Start by preheating your oven to 375°F (190°C). This ensures a perfectly crisp, golden crust. While the oven warms up, get out a 9-inch pie dish—it’s the ideal size for Hillbilly Pie and will help keep those delicious layers neat and tidy.
Step 2: Cook the Beef and Onions
In a large skillet over medium heat, add your ground beef and chopped onion. Cook them together, stirring occasionally, until the beef is browned and the onion is tender. This step fills your kitchen with mouthwatering aromas and sets the stage for the savory, hearty filling.
Step 3: Mix in the Creamy Filling
Once your beef is browned, drain off any excess fat for a lighter finish. Stir in the cream of mushroom soup, drained corn, salt, pepper, and garlic powder. Mix until everything is evenly combined—the filling should be creamy and flecked with golden corn kernels.
Step 4: Assemble the Pie
Roll out one pie crust and gently press it into your pie dish, smoothing it up the sides. Spoon the beef mixture evenly into the crust, making sure every bite will have that classic Hillbilly Pie flavor. Sprinkle 1 1/2 cups of shredded cheddar cheese over the filling, reserving the rest for later.
Step 5: Top and Bake
Unroll the second pie crust and lay it over the top. Pinch and crimp the edges to seal in all that goodness. Don’t forget to cut a few small slits in the top crust—this lets steam escape and keeps the pie from getting soggy. Slide the pie into your preheated oven and bake for 35 to 40 minutes, or until the crust is golden brown and irresistible.
Step 6: Rest, Garnish, and Serve
When the pie comes out of the oven, let it rest for about 10 minutes—this makes slicing easier and keeps the filling from running. Sprinkle the remaining cheese and a dusting of paprika over the top for extra flavor and a pop of color. Now you’re ready to dig in!
How to Serve Hillbilly Pie
Garnishes
A generous sprinkle of the reserved cheddar cheese and a light dusting of paprika really make Hillbilly Pie pop. For a fresh twist, try adding a handful of sliced green onions or a dollop of sour cream right before serving. These little extras add color, flavor, and just the right finishing touch.
Side Dishes
While Hillbilly Pie is plenty hearty on its own, it pairs beautifully with a crisp green salad or some roasted vegetables. Buttery mashed potatoes or a tangy coleslaw also make classic sides that round out the meal and keep everyone coming back for seconds.
Creative Ways to Present
If you’re feeling playful, bake Hillbilly Pie in individual ramekins for adorable personal pies. Or, cut it into small squares for a fun party appetizer platter—just add toothpicks and watch them disappear! Leftover slices also make an excellent lunchbox treat the next day.
Make Ahead and Storage
Storing Leftovers
Leftover Hillbilly Pie keeps beautifully in the fridge. Simply cover the pie plate tightly with foil or transfer slices to an airtight container. It’ll stay fresh and tasty for up to three days—making it a perfect make-ahead meal.
Freezing
Want to save your Hillbilly Pie for a rainy day? Let it cool completely, then wrap it tightly in plastic wrap and foil. You can freeze the whole pie or individual slices for up to two months. When you’re ready, just thaw in the fridge overnight.
Reheating
To reheat, place slices of Hillbilly Pie on a baking sheet and warm in a 350°F oven for about 10-15 minutes, or until heated through. For a quick lunch, you can also microwave individual portions for 1-2 minutes. The crust stays flakier if you use the oven method!
FAQs
Can I use a homemade pie crust instead of refrigerated?
Absolutely! If you have a favorite homemade pie crust recipe, it will work perfectly in Hillbilly Pie. Just make sure to roll it out thin enough to fit your pie dish and bake up crisp.
Is there a way to make Hillbilly Pie spicier?
You bet—swap in pepper jack cheese for the cheddar or stir in a can of Rotel tomatoes with green chilies for a kick. A pinch of cayenne pepper or diced jalapeños can also add heat to the filling.
Can I make Hillbilly Pie ahead of time?
You can assemble the pie up to a day in advance, cover tightly, and refrigerate before baking. When you’re ready, just pop it in the oven and add a few extra minutes to the baking time if it’s cold from the fridge.
What’s the best way to serve leftovers?
Leftover Hillbilly Pie is delicious reheated for lunch or dinner. For something different, try serving it alongside scrambled eggs for a hearty breakfast or brunch.
Can I substitute other vegetables for the corn?
Definitely! Feel free to swap in canned peas, green beans, or even a frozen veggie mix. Just make sure they’re thawed and well-drained so the filling isn’t watery.
Final Thoughts
If you’re searching for a cozy, crowd-pleasing recipe, Hillbilly Pie is pure comfort with every forkful. It’s easy to make, endlessly adaptable, and guaranteed to have everyone asking for seconds. Don’t wait—gather your ingredients and treat yourself to a slice of old-fashioned goodness tonight!
Print
Hillbilly Pie Recipe
- Prep Time: 15 minutes
- Cook Time: 40 minutes
- Total Time: 55 minutes
- Yield: 6 servings
- Category: Main Course
- Method: Baking
- Cuisine: American
- Diet: Non-Vegetarian
Description
Hillbilly Pie is a comforting Southern-style casserole pie featuring a savory mixture of ground beef, creamy mushroom soup, corn, and cheddar cheese encased in a flaky pie crust. This hearty dish combines elements of a classic meat pie and a cheesy casserole, perfect for family dinners or casual gatherings.
Ingredients
Meat and Vegetables
- 1 pound ground beef
- 1 medium onion, chopped
- 1 can whole kernel corn (15 ounces), drained
Soup and Seasonings
- 1 can cream of mushroom soup (10.5 ounces)
- 1 teaspoon salt
- 1/2 teaspoon black pepper
- 1/2 teaspoon garlic powder
- 1/2 teaspoon paprika (optional)
Dairy and Crust
- 2 cups shredded cheddar cheese (divided: 1 1/2 cups plus 1/2 cup for topping)
- 1 package refrigerated pie crusts (2 crusts)
Instructions
- Preheat Oven: Preheat your oven to 375°F (190°C) to ensure it’s ready to bake the pie evenly and achieve a golden crust.
- Cook Beef and Onion: In a large skillet over medium heat, cook the ground beef and chopped onion together until the beef is fully browned and the onions are soft and translucent, then drain excess fat to keep the pie from becoming greasy.
- Mix Filling: Stir the cream of mushroom soup, drained corn, salt, black pepper, and garlic powder into the cooked beef and onions until well combined for a flavorful filling.
- Prepare Pie Crust: Roll out one pie crust and fit it into a 9-inch pie dish, pressing it gently to cover the bottom and sides evenly.
- Assemble Pie: Spoon the beef mixture into the pie crust and spread it evenly. Sprinkle 1 1/2 cups of shredded cheddar cheese evenly over the filling to add richness and meltiness.
- Add Top Crust: Place the second pie crust over the filling. Seal and crimp the edges tightly to prevent leaking. Cut several small slits in the top crust to allow steam to escape while baking.
- Bake: Bake the pie in the preheated oven for 35 to 40 minutes, or until the crust is golden brown and cooked through.
- Rest and Garnish: Remove the pie from the oven and let it rest for 10 minutes to set. Before serving, sprinkle the remaining 1/2 cup shredded cheddar cheese and paprika on top if desired for extra flavor and color.
Notes
- For a spicier twist, substitute pepper jack cheese for cheddar cheese.
- Add a can of Rotel tomatoes with green chilies to the filling for additional flavor and heat.
- Leftover pie reheats well and makes a satisfying lunch.
Nutrition
- Serving Size: 1 slice
- Calories: 480
- Sugar: 4 g
- Sodium: 820 mg
- Fat: 29 g
- Saturated Fat: 13 g
- Unsaturated Fat: 14 g
- Trans Fat: 1 g
- Carbohydrates: 32 g
- Fiber: 2 g
- Protein: 24 g
- Cholesterol: 85 mg

